
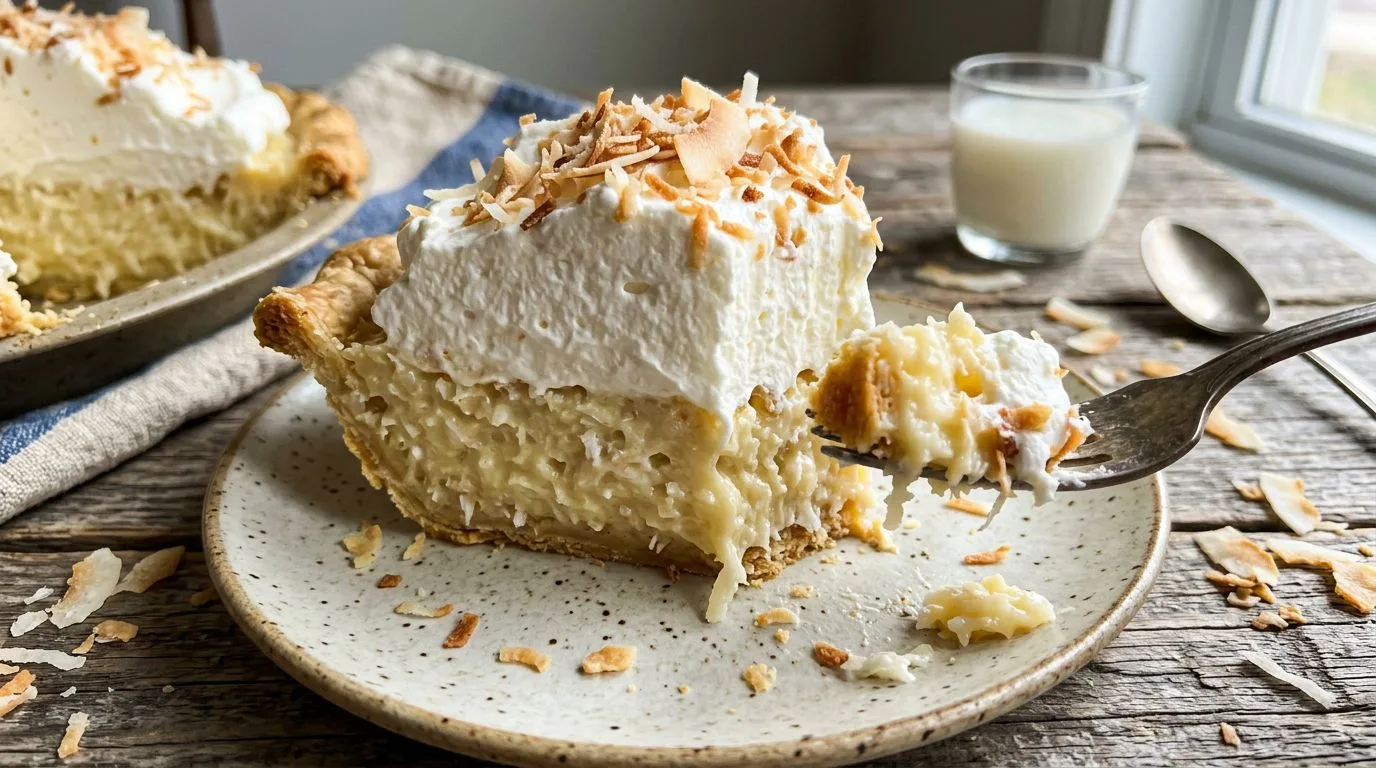
There’s something wonderfully nostalgic about an old-fashioned coconut cream pie. This classic American dessert features a flaky, buttery crust filled with silky coconut custard, topped with billowy whipped cream and a generous sprinkle of toasted coconut. I love how this pie balances rich creaminess with the tropical sweetness of coconut, creating a dessert that feels both comforting and elegant. Whether you’re serving it at a holiday gathering or bringing it to a potluck, this coconut cream pie never fails to impress.
What makes this recipe truly special is the combination of whole milk and coconut milk in the custard filling. The coconut milk adds authentic coconut flavor and creates an incredibly smooth, luxurious texture that sets this pie apart from versions made with artificial extracts alone. I find that using real coconut milk makes all the difference in achieving that deep, satisfying coconut taste that reminds me of the pies served in classic American diners and bakeries.
This homemade coconut cream pie does require some patience—the custard needs time to chill and set properly—but the hands-on work is straightforward and rewarding. The result is a show-stopping dessert with layers of flavor and texture that’s absolutely worth the effort.
Why You’ll Love This Old-Fashioned Coconut Cream Pie
This coconut cream pie checks all the boxes for a memorable dessert. The custard filling is incredibly smooth and creamy, with genuine coconut flavor that comes from both coconut milk and sweetened shredded coconut stirred right into the filling. I love how the toasted coconut on top adds a subtle nutty flavor and pleasant crunch that contrasts beautifully with the soft custard and whipped cream.
The recipe is also quite forgiving for home bakers. While making custard might seem intimidating, the technique is straightforward: you’ll whisk together your dry ingredients, gradually add the liquids, and cook while stirring until thickened. The tempering step—where you slowly add hot custard to the egg yolks—prevents scrambling and ensures a silky-smooth filling every time.
I recommend this pie for anyone who appreciates classic American desserts. It’s perfect for Thanksgiving, Christmas, Easter, or any special occasion when you want to serve something impressive yet comfortingly familiar. The combination of textures—flaky crust, creamy filling, fluffy whipped cream, and crunchy toasted coconut—makes every bite interesting and satisfying.
Ingredients and Substitutions
This coconut cream pie recipe calls for simple, accessible ingredients that work together to create something truly special. Let me walk you through what you’ll need and some helpful substitutions.
For the Crust
You’ll need one fully baked 9-inch pie crust. I typically use a homemade butter pie crust, but a store-bought crust works perfectly well if you’re short on time. Just make sure it’s fully baked and cooled before adding the filling. A graham cracker crust can also work if you prefer a sweeter, more casual presentation.
For the Coconut Custard Filling
The filling combines 1 cup whole milk and 1 can (13.5 oz) unsweetened coconut milk. I find that this combination provides the best balance of creaminess and coconut flavor. If you can’t find canned coconut milk, you could use all whole milk and increase the shredded coconut, though the coconut flavor won’t be quite as pronounced.
You’ll need 3/4 cup granulated sugar for sweetness and 1/4 cup cornstarch as the thickening agent. Cornstarch creates a smooth, sliceable custard that holds its shape when you cut the pie. Don’t substitute flour here—it won’t give you the same silky texture.
The 4 large egg yolks add richness and help thicken the custard. Make sure to save those egg whites for another recipe, or use them to make meringue if you prefer a meringue-topped coconut cream pie instead of whipped cream.
1/4 teaspoon salt balances the sweetness, while 2 tablespoons unsalted butter adds richness and gives the custard a luxurious mouthfeel. The 1 teaspoon vanilla extract enhances all the other flavors, and 1 cup sweetened shredded coconut stirred into the filling provides texture and concentrated coconut taste throughout.
For the Topping
The topping is simple but essential: 1 cup heavy whipping cream whipped with 2 tablespoons powdered sugar creates a light, sweet cloud that balances the rich custard. The 1/3 cup toasted coconut adds visual appeal and a wonderful nutty flavor. I like to toast coconut in a dry skillet over medium heat, stirring frequently, until it’s golden brown and fragrant.
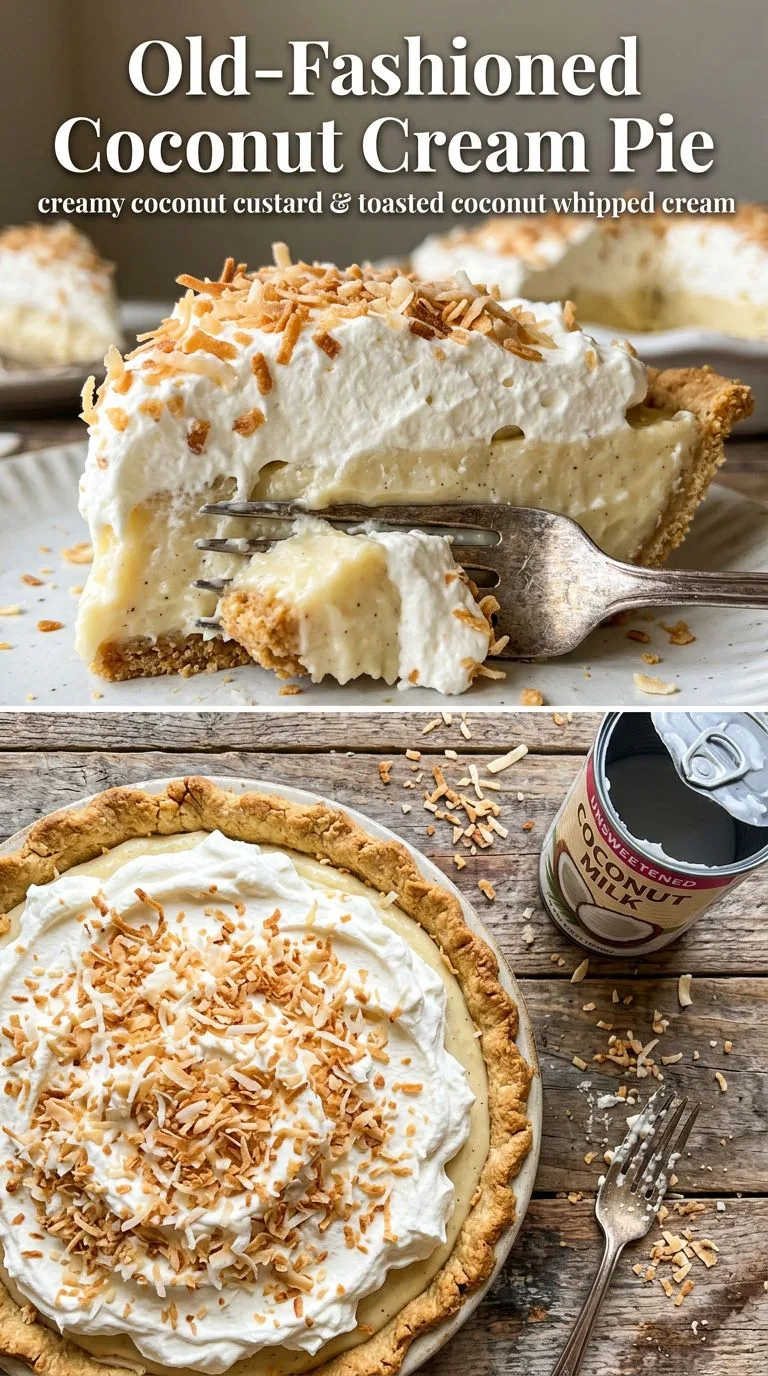
How to Make Old-Fashioned Coconut Cream Pie
Making this coconut cream pie involves three main steps: preparing the custard filling, chilling the pie, and adding the whipped cream topping. I’ll walk you through each step so you can achieve perfect results.
Step 1: Prepare Your Pie Crust
Start with a fully baked 9-inch pie crust that has cooled completely. If you’re making your own crust, blind-bake it with pie weights to prevent puffing and ensure it’s completely cooked through. A golden-brown, crisp crust provides the perfect foundation for the creamy filling.
Step 2: Make the Coconut Custard
In a medium saucepan, whisk together the sugar, cornstarch, and salt until well combined. This step is important—mixing the dry ingredients first prevents lumps from forming when you add the liquids. Gradually whisk in the whole milk and coconut milk, making sure everything is smooth and well incorporated.
Place the saucepan over medium heat and cook, whisking constantly, until the mixture thickens and begins to bubble gently. I recommend using a whisk rather than a spoon because it helps prevent lumps and ensures even cooking. The mixture will seem thin at first, but it will suddenly thicken as it approaches the boiling point. This usually takes about 8-10 minutes.
Step 3: Temper the Egg Yolks
While the custard is cooking, beat the egg yolks in a separate bowl. Once your custard is thick and bubbling, you’ll need to temper the egg yolks to prevent them from scrambling. Remove the saucepan from the heat and slowly whisk about 1 cup of the hot filling into the beaten egg yolks, adding it in a thin stream while whisking constantly.
This gradual process raises the temperature of the egg yolks slowly so they won’t curdle. Once you’ve added about a cup of hot custard to the yolks, pour the entire egg mixture back into the saucepan with the remaining custard, whisking constantly as you pour.
Step 4: Finish the Custard
Return the saucepan to medium heat and bring the custard to a gentle boil, whisking constantly. Let it cook for 1 minute while continuing to whisk. This final cooking step ensures the egg yolks are fully cooked and the custard reaches its maximum thickness.
Remove the pan from the heat and stir in the butter, vanilla extract, and sweetened shredded coconut. The butter adds richness and gives the custard a beautiful sheen, while the shredded coconut provides texture and intensifies the coconut flavor throughout the filling.
Step 5: Fill and Chill the Pie
Pour the hot custard into your cooled pie crust, spreading it evenly. To prevent a skin from forming on top of the custard, press a piece of plastic wrap or food wrap directly onto the surface of the filling. This creates a seal that keeps the custard smooth and prevents it from drying out.
Let the pie cool at room temperature for about 30 minutes, then transfer it to the refrigerator. The pie needs to chill for at least 4 hours, though overnight is even better. This chilling time allows the custard to set completely so the pie will slice cleanly.
Step 6: Add the Whipped Cream Topping
Just before serving, make the whipped cream topping. In a large bowl, beat the heavy whipping cream and powdered sugar together until firm peaks form. I like to use a hand mixer or stand mixer for this, though you can whisk by hand if you have the arm strength and patience.
Spread the whipped cream over the chilled pie, creating swirls and peaks for an attractive presentation. Sprinkle the toasted coconut over the top, and your old-fashioned coconut cream pie is ready to serve.
Expert Tips for Best Results
I’ve learned a few tricks over the years that help ensure this coconut cream pie turns out perfectly every time. Here are my top recommendations:
- Whisk constantly while cooking the custard. This is the most important step for achieving smooth, lump-free custard. Don’t walk away from the stove, and keep that whisk moving.
- Use full-fat coconut milk. Light coconut milk won’t provide the same rich flavor and creamy texture. Make sure to shake the can well before opening to incorporate any separated coconut cream.
- Don’t skip the tempering step. Adding hot custard to the egg yolks gradually prevents scrambling and ensures a silky-smooth filling.
- Press wrap directly on the custard surface. This prevents a skin from forming, which can create an unpleasant texture in your finished pie.
- Chill the pie thoroughly. Four hours is the minimum, but overnight chilling produces the best texture and makes slicing much easier.
- Toast your coconut. Taking a few minutes to toast the coconut for the topping adds incredible flavor and makes your pie look more professional.
- Add whipped cream just before serving. Whipped cream can weep and deflate if it sits too long, so I recommend topping the pie within an hour or two of serving.
Serving Suggestions
This old-fashioned coconut cream pie is a stunning dessert that needs little accompaniment, but I have a few favorite ways to serve it. The pie is rich and creamy, so I like to keep portions moderate—a standard 9-inch pie serves 8 people comfortably.
For a classic presentation, simply slice the pie and serve it on dessert plates. The layers of flaky crust, creamy custard, and fluffy whipped cream look beautiful when you cut clean slices. I recommend using a sharp knife dipped in hot water and wiped clean between cuts for the neatest slices.
If you want to dress up the presentation, consider adding a drizzle of chocolate sauce or caramel sauce on the plate before placing the pie slice. The contrast of chocolate with coconut is particularly delicious. Fresh berries—especially raspberries or strawberries—also make a lovely accompaniment, adding a tart counterpoint to the sweet, creamy pie.
This pie is perfect for holiday dinners, particularly Thanksgiving and Christmas, when you want an impressive dessert that’s not too heavy. It’s also wonderful for Easter celebrations or summer potlucks. I find that coconut cream pie appeals to a wide range of tastes and ages, making it a crowd-pleasing choice for any gathering.
For beverages, I recommend serving this pie with hot coffee or tea. The slight bitterness of coffee balances the sweetness beautifully. If you’re serving it at a summer gathering, cold milk or iced coffee also pairs nicely.
Variations and Substitutions
While this classic recipe is delicious as written, there are several variations you might enjoy trying:
Chocolate Coconut Cream Pie
Add 1/2 cup of chopped dark chocolate or chocolate chips to the hot custard along with the butter and vanilla. Stir until melted and smooth. This creates a chocolate-coconut combination that’s absolutely irresistible.
Toasted Coconut Cream Pie
Toast all of the shredded coconut before adding it to the custard. This intensifies the coconut flavor and adds a subtle nutty quality throughout the filling. You can also use toasted coconut flakes instead of shredded coconut for a different texture.
Meringue-Topped Version
Instead of whipped cream, top the pie with a classic meringue made from the 4 egg whites left over from the custard. Beat the whites with 1/2 cup sugar until stiff peaks form, spread over the hot filling, and bake at 350°F until the meringue is golden brown.
Dairy-Free Coconut Cream Pie
Replace the whole milk with additional coconut milk, use dairy-free butter, and top with coconut whipped cream instead of dairy whipped cream. This creates a completely dairy-free version that’s still rich and delicious.
Banana Coconut Cream Pie
Layer sliced bananas in the bottom of the pie crust before adding the coconut custard. The combination of banana and coconut is tropical and delicious, similar to a classic Southern custard pie but with more complex flavors.
Storage, Freezing, and Reheating
Proper storage is important for maintaining the quality and safety of this coconut cream pie, since it contains dairy and eggs.
Refrigerator Storage
Store the pie covered in the refrigerator for up to 3 days. I recommend covering it loosely with plastic wrap or placing it in a pie keeper to protect the whipped cream topping. The custard will remain safe to eat for 3-4 days, but the whipped cream may begin to weep after a day or two. If you know you’ll have leftovers, consider adding whipped cream only to the slices you’re serving immediately.
Freezing Instructions
You can freeze coconut cream pie, though the texture of the whipped cream topping won’t be quite the same after thawing. I recommend freezing the pie without the whipped cream topping. Wrap the custard-filled pie tightly in plastic wrap, then in aluminum foil, and freeze for up to 2 months.
To serve, thaw the pie overnight in the refrigerator, then add fresh whipped cream and toasted coconut just before serving. This method preserves the quality of the custard while ensuring the topping is fresh and fluffy.
Make-Ahead Tips
This pie is actually an excellent make-ahead dessert. You can prepare the entire pie (including the whipped cream topping) up to 24 hours in advance. Keep it refrigerated until serving time. For best results, I like to make the custard-filled pie the day before and add the whipped cream topping the morning of serving.
You can also bake the pie crust up to 2 days in advance and store it at room temperature, covered. This breaks up the work and makes the final assembly quicker.
Frequently Asked Questions
Can I use cream of coconut instead of coconut milk?
Cream of coconut is much sweeter and thicker than coconut milk, so I don’t recommend substituting it directly. If you want to use cream of coconut, reduce the sugar in the recipe by about 1/4 cup and thin the cream of coconut with some regular milk to achieve a pourable consistency.
Why is my custard lumpy?
Lumps usually form when the dry ingredients aren’t mixed well before adding the liquids, or when the custard isn’t whisked constantly during cooking. If you do end up with lumps, you can strain the custard through a fine-mesh sieve before pouring it into the pie crust.
Can I make this pie without eggs?
Eggs are essential for the custard’s texture and richness in this recipe. While there are eggless custard recipes using only cornstarch, they produce a different texture that’s more like pudding than traditional custard. For best results, I recommend following the recipe as written.
How do I know when the custard is thick enough?
The custard is ready when it coats the back of a spoon and holds a line when you run your finger through it. It should be thick enough to mound slightly when you lift the whisk, similar to the consistency of pudding. Remember that it will thicken further as it cools.
Can I use a store-bought pie crust?
Absolutely! A store-bought pie crust works perfectly well for this recipe. Just make sure to fully bake it according to the package directions before adding the filling. Both refrigerated pie crusts and frozen pie shells work well.
What’s the difference between coconut cream pie and coconut custard pie?
The terms are often used interchangeably, but technically, coconut cream pie has a cooked custard filling (like this recipe), while coconut custard pie might refer to a pie where the custard is baked in the crust. This recipe is a true coconut cream pie with a stovetop custard filling.
How can I prevent the crust from getting soggy?
Make sure your pie crust is fully baked and completely cooled before adding the filling. You can also brush the inside of the cooled crust with a thin layer of melted white chocolate, which creates a moisture barrier. Let the chocolate set before adding the custard.
Can I use coconut extract instead of coconut milk?
You could use coconut extract for flavor, but you’d miss out on the creamy texture and authentic taste that coconut milk provides. If you must substitute, use all whole milk and add 1-2 teaspoons of coconut extract along with the vanilla, but I find the results aren’t quite as good as using real coconut milk.
This old-fashioned coconut cream pie is a timeless dessert that brings together simple ingredients in a way that feels both nostalgic and special. The combination of creamy coconut custard, flaky crust, and fluffy whipped cream creates a dessert that’s worthy of any celebration. Whether you’re continuing a family tradition or starting a new one, this pie is sure to become a favorite. Much like a classic Southern pecan pie, it’s the kind of dessert that makes people ask for seconds and request the recipe.
Old-Fashioned Coconut Cream Pie
This classic coconut cream pie features a flaky crust filled with rich coconut custard made from coconut milk and sweetened shredded coconut, topped with homemade whipped cream and toasted coconut. It’s a show-stopping dessert perfect for holidays and special occasions.
- Prep Time: 30 minutes
- Cook Time: 15 minutes
- Chilling Time: 4 hours
- Total Time: 4 hours 45 minutes
- Servings: 8 slices
- Difficulty: Medium
- Cuisine: American
- Course: Dessert
Ingredients
Crust:
- 1 fully baked 9-inch pie crust
Filling:
- 1 cup whole milk
- 1 can (13.5 oz) unsweetened coconut milk
- 3/4 cup granulated sugar
- 1/4 cup cornstarch
- 4 large egg yolks
- 1/4 teaspoon salt
- 2 tablespoons unsalted butter
- 1 teaspoon vanilla extract
- 1 cup sweetened shredded coconut
Topping:
- 1 cup heavy whipping cream
- 2 tablespoons powdered sugar
- 1/3 cup toasted coconut
Instructions
- Fully bake the 9-inch pie crust according to your recipe or package directions. Let it cool completely while you prepare the filling.
- In a medium saucepan, whisk together the granulated sugar, cornstarch, and salt until well combined.
- Gradually whisk in the whole milk and coconut milk, stirring until smooth and no lumps remain.
- Place the saucepan over medium heat and cook, whisking constantly, until the mixture thickens and begins to bubble gently, about 8-10 minutes.
- In a separate bowl, beat the egg yolks. Once the custard is thick and bubbling, slowly whisk about 1 cup of the hot filling into the egg yolks, adding it in a thin stream while whisking constantly.
- Pour the tempered egg yolk mixture back into the saucepan with the remaining custard, whisking constantly.
- Return the saucepan to medium heat and bring to a gentle boil, whisking constantly. Cook for 1 minute, then remove from the heat.
- Stir in the butter, vanilla extract, and sweetened shredded coconut until the butter is melted and everything is well combined.
- Pour the hot custard into the cooled pie crust, spreading it evenly.
- Press a piece of plastic wrap or food wrap directly onto the surface of the filling to prevent a skin from forming.
- Let the pie cool at room temperature for about 30 minutes, then refrigerate for at least 4 hours or overnight until completely set.
- Just before serving, beat the heavy whipping cream and powdered sugar together in a large bowl until firm peaks form.
- Remove the plastic wrap from the chilled pie. Spread the whipped cream over the top of the pie, creating swirls and peaks.
- Sprinkle the toasted coconut over the whipped cream. Slice and serve immediately.
Recipe Notes
- To toast coconut, spread it in a dry skillet over medium heat and stir frequently until golden brown and fragrant, about 3-5 minutes. Watch carefully as it can burn quickly.
- Make sure to shake the can of coconut milk well before opening to incorporate any separated coconut cream.
- The custard must be whisked constantly while cooking to prevent lumps and ensure even thickening.
- For cleanest slices, dip your knife in hot water and wipe it clean between cuts.
- The pie can be made up to 24 hours in advance. For best results, add the whipped cream topping within a few hours of serving.
- Store leftover pie covered in the refrigerator for up to 3 days.
Estimated Nutrition Per Serving
(Based on 8 servings; values are approximate)
- Calories: 425
- Carbohydrates: 42g
- Protein: 5g
- Fat: 27g
- Saturated Fat: 18g
- Fiber: 2g
- Sugar: 26g
- Sodium: 185mg
Nutrition information is estimated and will vary based on specific ingredients used.
