
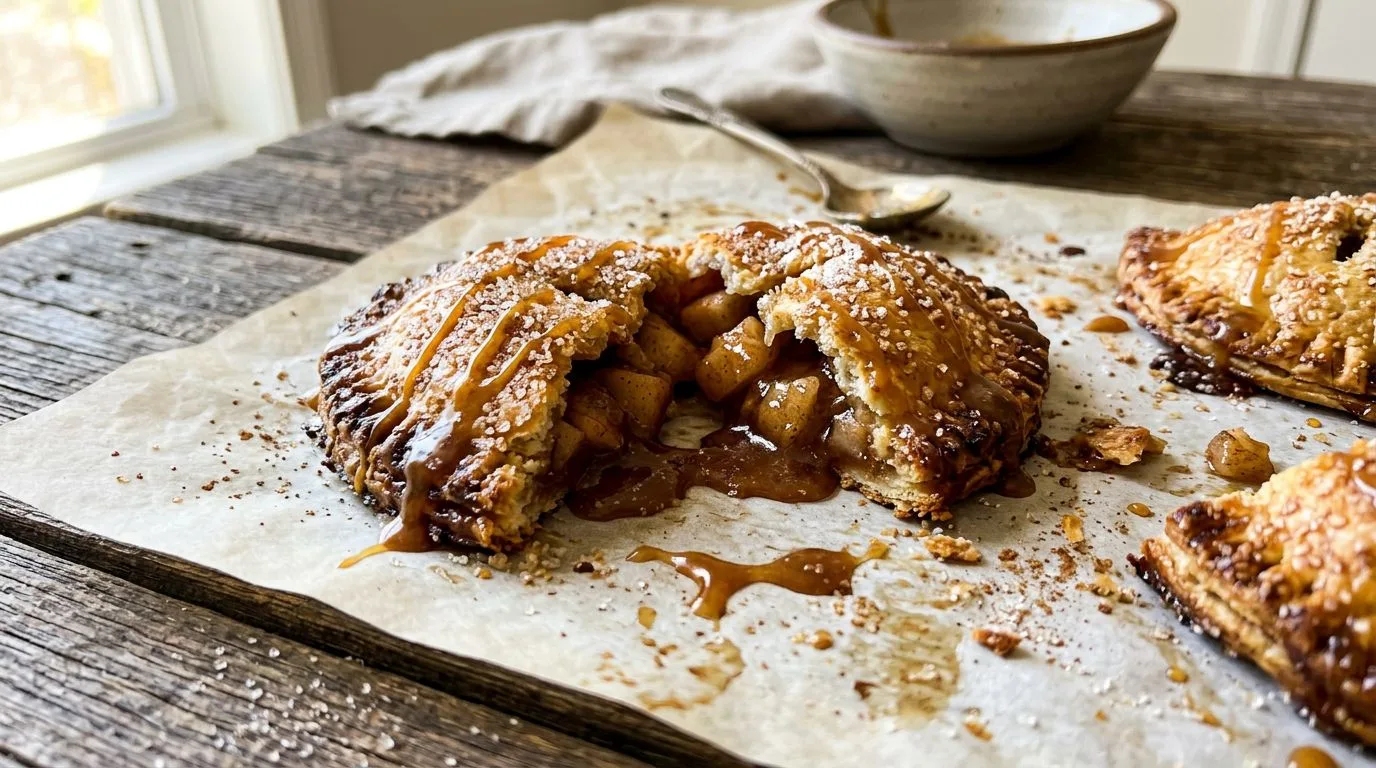
There’s something irresistible about handheld desserts, and these caramel apple hand pies are no exception. I love how they combine the classic flavors of cinnamon-spiced apples with rich caramel sauce, all wrapped up in flaky, golden pastry. These individual treats are perfect for fall gatherings, lunchboxes, or anytime you want a portable dessert that doesn’t require plates or forks.
What makes these hand pies special is the balance of textures and flavors. The tender, cinnamon-kissed apples pair beautifully with the sweet caramel, while the buttery pastry provides that satisfying crunch. I find that using refrigerated pie crusts makes this recipe accessible for busy weeknights, yet the results look and taste impressively homemade. Whether you’re serving them warm from the oven or packing them for a picnic, these caramel apple hand pies deliver comfort in every bite.
Why You’ll Love This Recipe
These caramel apple hand pies check all the boxes for a crowd-pleasing dessert. First, they’re incredibly portable—no need for plates, forks, or fancy serving dishes. I recommend these for potlucks, bake sales, or packed lunches because they travel beautifully and stay fresh for hours.
The recipe is also wonderfully approachable. By starting with refrigerated pie crusts, you eliminate the most time-consuming step of traditional pie-making while still achieving that flaky, buttery texture everyone loves. The filling comes together in one skillet in less than ten minutes, and the assembly process is straightforward enough for bakers of all skill levels.
I love how customizable these hand pies are, too. You can adjust the sweetness, add extra spices, or even experiment with different apple varieties to suit your taste. The combination of fresh apples and caramel creates a flavor profile that’s both nostalgic and sophisticated—perfect for fall but honestly delicious year-round.
Finally, these hand pies offer portion control without sacrificing satisfaction. Each one is a complete dessert experience, making them ideal for parties where guests want just a taste of something sweet without committing to a full slice of pie.
Ingredients and Substitutions
Let me walk you through what you’ll need to make these delicious caramel apple hand pies and offer some helpful substitutions if you need to adapt the recipe.
Refrigerated pie crusts form the foundation of these hand pies. I use two 9-inch crusts, which yield about eight hand pies. If you prefer homemade pastry, you can absolutely substitute your favorite pie dough recipe—just make sure you have enough for about sixteen 3½-inch rounds.
Apples are the star of the filling. I recommend using firm, slightly tart varieties like Granny Smith, Honeycrisp, or Braeburn. These hold their shape during cooking and provide a nice contrast to the sweet caramel. Avoid overly soft apples like Red Delicious, which can turn mushy. You’ll need two medium apples, peeled and finely diced into small, uniform pieces for even cooking.
Unsalted butter adds richness to the filling. If you only have salted butter, reduce the added salt in the recipe slightly to compensate.
Light brown sugar contributes both sweetness and a subtle molasses flavor that complements the apples beautifully. You can substitute granulated sugar if needed, though you’ll lose some of that caramel-like depth.
Ground cinnamon is essential for that classic apple pie flavor. I find that one teaspoon provides the perfect warmth without overwhelming the other flavors. Feel free to add a pinch of nutmeg or allspice if you enjoy more complex spice profiles.
Lemon juice brightens the filling and prevents the apples from browning. Fresh lemon juice works best, but bottled will do in a pinch.
All-purpose flour thickens the filling so it doesn’t leak out during baking. Just one tablespoon does the trick—cornstarch can substitute in equal amounts if you prefer.
Thick caramel sauce is what makes these hand pies truly special. I recommend using a high-quality store-bought caramel or homemade caramel sauce. Make sure it’s thick rather than thin and pourable—you want it to stay put inside the pastry. Dulce de leche also works wonderfully as a substitute.
Egg wash gives the hand pies their beautiful golden finish. One egg beaten with a tablespoon of water creates the perfect glaze. Milk or cream can substitute if you’re out of eggs.
Coarse sugar adds a delightful crunch and sparkle to the tops. Turbinado or sanding sugar works perfectly, but regular granulated sugar is fine if that’s what you have on hand.

How to Make Caramel Apple Hand Pies
Making these hand pies involves three main steps: preparing the filling, assembling the pastries, and baking them to golden perfection. Let me guide you through each stage.
Preparing the Apple Filling
Start by melting the butter in a skillet over medium heat. Once it’s bubbling, add your finely diced apples along with the brown sugar, cinnamon, lemon juice, and salt. Cook this mixture for 5 to 7 minutes, stirring occasionally, until the apples have softened slightly but still retain some texture. You don’t want them completely mushy—they’ll continue cooking in the oven.
Next, sprinkle the flour over the apple mixture and stir it in thoroughly. Cook for just one minute to eliminate any raw flour taste. This step is crucial for creating a filling that holds together rather than being too liquidy.
Remove the skillet from the heat and stir in the caramel sauce until everything is well combined. Now comes the important part: let this filling cool completely before assembling your hand pies. I usually transfer it to a bowl and refrigerate it for about 30 minutes. If the filling is warm when you assemble the pies, it can melt the pastry and make sealing difficult.
Assembling the Hand Pies
While your filling cools, preheat your oven to 400°F (200°C) and line a baking sheet with parchment paper. This prevents sticking and makes cleanup easier.
Unroll your refrigerated pie crusts on a lightly floured surface. Using a 3½-inch round cutter (a biscuit cutter or drinking glass works perfectly), cut out as many rounds as possible from each crust. You should get about eight rounds per crust, for a total of sixteen. Gather the scraps, gently press them together, reroll, and cut additional rounds until you’ve used all the dough.
Arrange eight rounds on your prepared baking sheet, spacing them about 2 inches apart. These will be your bottoms. Spoon about 1½ tablespoons of the cooled filling into the center of each round, being careful to leave a clear border of about ½ inch around the edges. I find that a small cookie scoop works perfectly for portioning the filling. Resist the temptation to overfill—too much filling will cause leaks during baking.
Lightly brush the exposed borders with water. This acts as glue to help seal the hand pies. Place the remaining eight rounds on top of the filled bottoms, then use a fork to crimp the edges firmly all the way around. Press down with enough pressure to create a good seal—this prevents the filling from escaping.
Use a sharp knife to cut two or three small slits in the top of each hand pie. These steam vents are essential for allowing moisture to escape during baking.
Chilling and Baking
Refrigerate the assembled hand pies for 15 minutes. This short chill helps the pastry firm up, which results in flakier layers and helps the pies hold their shape during baking.
After chilling, brush the tops generously with the egg wash, making sure to cover the entire surface. Sprinkle with coarse sugar for that bakery-style finish.
Bake for 20 to 25 minutes, until the hand pies are deeply golden brown. The pastry should look crisp and the edges should be nicely browned. Let them cool on the baking sheet for at least 10 minutes before serving—the filling will be extremely hot right out of the oven.
Expert Tips for Best Results
I’ve learned a few tricks over the years that make a real difference in how these hand pies turn out.
Keep everything cold. Cold pastry bakes up flakier, so don’t skip the refrigeration step before baking. If your kitchen is warm and the dough becomes soft while you’re working, pop it back in the fridge for a few minutes.
Dice the apples small and uniform. Pieces about ¼-inch work best. Larger chunks won’t cook through properly, and uneven sizes lead to inconsistent texture.
Cool the filling completely. This cannot be emphasized enough. Warm filling makes the pastry soggy and difficult to seal. I often make the filling the night before and refrigerate it overnight.
Don’t overfill. It’s tempting to pack in as much filling as possible, but restraint pays off. Too much filling causes leaks and messy hand pies. About 1½ tablespoons per pie is the sweet spot.
Seal thoroughly. Press the fork tines firmly when crimping to create a tight seal. Go around the edges twice if needed. Any gaps will allow filling to escape.
Cut adequate vents. Those small slits in the top aren’t just decorative—they release steam and prevent the hand pies from bursting open.
Watch the baking time. Ovens vary, so start checking at 20 minutes. You want a deep golden color, not pale. Underbaked hand pies can be doughy in the center.
Let them cool before eating. I know it’s hard to wait, but the filling is molten hot right out of the oven. Ten minutes of cooling makes them safe to eat and allows the filling to set slightly.
Serving Suggestions
These caramel apple hand pies are delicious on their own, but I love dressing them up for special occasions. Serve them warm with a scoop of vanilla ice cream for a classic à la mode experience. The contrast of cold, creamy ice cream against the warm, flaky pastry is absolutely heavenly.
A drizzle of extra caramel sauce over the top adds visual appeal and intensifies that caramel flavor. For an elegant presentation, dust them lightly with powdered sugar just before serving.
I find these hand pies pair beautifully with hot beverages. Serve them alongside coffee for breakfast, with hot apple cider for an autumn afternoon treat, or with spiced tea for a cozy evening dessert.
For parties, arrange them on a platter with small bowls of whipped cream, caramel sauce, and chopped pecans so guests can customize their own. They’re also wonderful packed in lunchboxes or wrapped individually for bake sales—they hold up well at room temperature for several hours.
If you’re looking for more apple dessert inspiration, you might enjoy this classic apple pie or these apple pie bars with streusel topping for different takes on the same beloved flavors.
Variations and Substitutions
One of the things I love about this recipe is how adaptable it is. Here are some variations to try:
Spice it up: Add ¼ teaspoon of nutmeg, ginger, or cardamom to the filling for more complex flavor. A pinch of cloves works nicely too, though use a light hand—it’s potent.
Add texture: Stir in ¼ cup of finely chopped pecans or walnuts to the cooled filling for a bit of crunch.
Change the fruit: Try pears instead of apples, or use a combination of both. Peaches work beautifully in summer, though you may need to add an extra teaspoon of flour to account for their higher moisture content.
Make them dairy-free: Use vegan butter in the filling and brush the tops with plant-based milk instead of egg wash. Many refrigerated pie crusts are already dairy-free, but check the label.
Try different caramels: Salted caramel adds a sophisticated sweet-salty contrast. Butterscotch sauce creates a different but equally delicious flavor profile.
Make them gluten-free: Use your favorite gluten-free pie crust and substitute the all-purpose flour in the filling with cornstarch or a gluten-free flour blend.
Add cheese: For a sweet-savory twist, add a small cube of sharp cheddar cheese to the filling before sealing. It sounds unusual but creates an amazing flavor combination.
Storage, Freezing, and Reheating
Proper storage keeps these hand pies fresh and delicious for days.
Room Temperature Storage
Cooled hand pies can sit at room temperature for up to 4 hours, making them perfect for parties or picnics. After that, I recommend refrigerating them to maintain food safety.
Refrigerator Storage
Store cooled hand pies in an airtight container in the refrigerator for up to 4 days. Place parchment paper between layers to prevent sticking. The pastry will soften slightly in the fridge, but reheating restores much of the crispness.
Freezing Instructions
These hand pies freeze beautifully, either before or after baking. To freeze unbaked hand pies, assemble them completely but don’t brush with egg wash. Place them on a baking sheet and freeze until solid, then transfer to a freezer bag. They’ll keep for up to 3 months. When ready to bake, brush with egg wash, sprinkle with sugar, and bake from frozen, adding 5 to 7 minutes to the baking time.
To freeze baked hand pies, let them cool completely, then wrap individually in plastic wrap and place in a freezer bag. Freeze for up to 2 months.
Reheating
For the best texture, reheat hand pies in the oven. Place them on a baking sheet and warm at 350°F for 8 to 10 minutes if refrigerated, or 12 to 15 minutes if frozen. This restores the pastry’s crispness. You can also microwave them for 20 to 30 seconds, though the pastry won’t be as crisp.
Frequently Asked Questions
Can I use homemade pie crust instead of refrigerated?
Absolutely! You’ll need enough dough for about sixteen 3½-inch rounds. Your favorite pie crust recipe should work perfectly—just make sure it’s well-chilled before rolling and cutting.
Why is my filling leaking out?
The most common causes are overfilling, not sealing the edges properly, or skipping the steam vents. Make sure to leave adequate borders, crimp firmly with a fork, and cut those small slits in the top.
Can I make these ahead of time?
Yes! You can prepare the filling up to 2 days in advance and refrigerate it. You can also assemble the hand pies completely and refrigerate them for up to 24 hours before baking, or freeze them as described above.
What size cutter should I use?
A 3½-inch round cutter works perfectly. If you don’t have one, a drinking glass or wide-mouth jar of similar diameter works just as well.
Can I make these larger or smaller?
Certainly! For larger hand pies, cut 4-inch rounds and use about 2 tablespoons of filling. For mini versions, cut 2½-inch rounds and use about 1 tablespoon of filling. Adjust baking time accordingly—smaller pies bake faster.
Do I have to peel the apples?
I recommend peeling for the best texture, but if you prefer to leave the peels on for extra fiber and nutrition, dice the apples very finely so the peels aren’t noticeable.
My hand pies are browning too quickly. What should I do?
If the tops are getting too dark before the pastry is fully cooked, tent them loosely with aluminum foil for the last 5 to 10 minutes of baking.
Can I use apple pie filling from a can?
While homemade filling tastes best, you can use canned apple pie filling in a pinch. Drain it well and chop the apple pieces smaller, then stir in the caramel sauce.
Caramel Apple Hand Pies
These caramel apple hand pies feature cinnamon-spiced apples and rich caramel tucked into flaky pastry pockets, baked until beautifully golden. Perfect for fall gatherings or anytime you crave a portable, handheld dessert.
- Prep Time: 30 minutes
- Chilling Time: 15 minutes
- Cook Time: 25 minutes
- Total Time: 1 hour 10 minutes
- Servings: 8 hand pies
- Difficulty: Easy
- Cuisine: American
- Course: Dessert
Ingredients
For the Pastry:
- 2 refrigerated 9-inch pie crusts
For the Filling:
- 2 medium apples, peeled and finely diced
- 2 tablespoons unsalted butter
- 1/4 cup packed light brown sugar
- 1 teaspoon ground cinnamon
- 1 tablespoon lemon juice
- 1 tablespoon all-purpose flour
- 1/3 cup thick caramel sauce
- 1/8 teaspoon salt
For the Finish:
- 1 egg, beaten with 1 tablespoon water
- 1 tablespoon coarse sugar
Instructions
- Melt the butter in a skillet over medium heat. Add the diced apples, brown sugar, cinnamon, lemon juice, and salt. Cook for 5 to 7 minutes, stirring occasionally, until the apples are slightly softened but still hold their shape.
- Sprinkle the flour over the apple mixture and stir well. Cook for 1 minute to eliminate the raw flour taste.
- Remove the skillet from the heat and stir in the caramel sauce until thoroughly combined. Transfer the filling to a bowl and let it cool completely, about 30 minutes. You can refrigerate it to speed up the process.
- Preheat your oven to 400°F (200°C). Line a baking sheet with parchment paper.
- Roll out the pie crusts on a lightly floured surface. Using a 3½-inch round cutter, cut out approximately sixteen rounds total, rerolling scraps as needed.
- Place eight rounds on the prepared baking sheet. Spoon about 1½ tablespoons of the cooled filling into the center of each round, leaving a clear ½-inch border around the edges.
- Lightly brush the borders with water. Place the remaining eight rounds on top of the filled bottoms. Use a fork to crimp the edges firmly all the way around, creating a tight seal.
- Cut two or three small slits in the top of each hand pie to allow steam to escape during baking.
- Refrigerate the assembled hand pies for 15 minutes to firm up the pastry.
- Brush the tops of the chilled hand pies generously with the egg wash. Sprinkle with coarse sugar.
- Bake for 20 to 25 minutes, until the hand pies are deeply golden brown and the pastry is crisp.
- Let the hand pies cool on the baking sheet for at least 10 minutes before serving. The filling will be very hot immediately after baking.
Recipe Notes
- Make sure the filling is completely cool before assembling the hand pies to prevent soggy pastry and difficult sealing.
- Don’t overfill the hand pies—1½ tablespoons per pie is ideal. Too much filling causes leaks.
- Firm apple varieties like Granny Smith, Honeycrisp, or Braeburn work best. Avoid soft apples that turn mushy when cooked.
- Use thick caramel sauce rather than thin, pourable caramel for best results.
- The hand pies can be assembled and refrigerated for up to 24 hours before baking, or frozen for up to 3 months.
- Reheat leftover hand pies in a 350°F oven for 8 to 10 minutes to restore crispness.
Estimated Nutrition (Per Hand Pie)
Values are approximate and will vary based on specific ingredients used.
- Calories: 285
- Carbohydrates: 38g
- Protein: 3g
- Fat: 14g
- Saturated Fat: 6g
- Fiber: 2g
- Sugar: 18g
- Sodium: 220mg
