
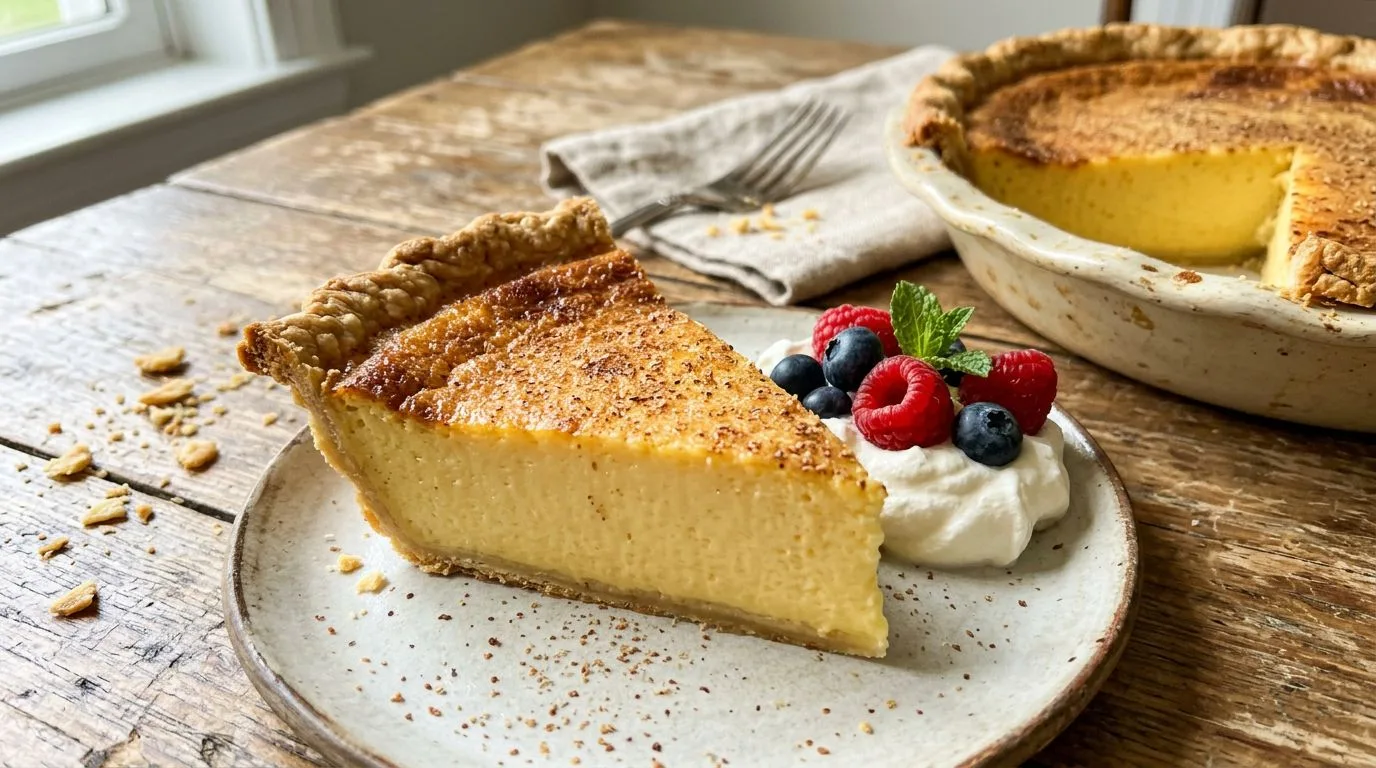
There’s something wonderfully nostalgic about a classic southern buttermilk pie. This old-fashioned dessert has graced Southern tables for generations, offering a simple yet elegant way to end a meal. With its smooth, golden custard filling and subtle tang from buttermilk, this pie delivers comfort in every bite. I love how this recipe transforms basic pantry ingredients into something truly special—perfect for Thanksgiving, Christmas, or any time you’re craving a taste of Southern tradition.
What makes buttermilk pie so beloved is its simplicity. Unlike fussy desserts that require special equipment or hard-to-find ingredients, this pie comes together with items you likely already have in your kitchen. The filling bakes into a beautiful golden custard with a delicate vanilla flavor and just a hint of lemon brightness. I find that the slight tang from the buttermilk balances the sweetness perfectly, creating a dessert that’s rich without being overly heavy.
Whether you’re new to Southern baking or a seasoned pie maker, this buttermilk custard pie is remarkably forgiving and always impressive. The result is a creamy, silky filling nestled in a flaky crust—a true celebration of Southern comfort food at its finest.
Why You’ll Love This Southern Buttermilk Pie
This traditional buttermilk pie checks all the boxes for an ideal dessert. First, it’s incredibly easy to make—even beginner bakers can achieve beautiful results. The ingredient list is short and straightforward, with no exotic items or complicated techniques required. I recommend this pie to anyone looking for a reliable dessert that won’t keep you in the kitchen all day.
The texture is what really sets buttermilk pie apart. When baked properly, the filling achieves a perfect custard consistency—creamy and smooth with just a slight jiggle in the center when you remove it from the oven. As it cools and chills, it sets beautifully for clean, elegant slices. The flavor is subtly sweet with vanilla notes and that characteristic buttermilk tang that keeps it from being cloying.
This pie is also wonderfully versatile for different occasions. It’s fancy enough for Thanksgiving dinner alongside classic sweet potato pie and pumpkin pie, yet simple enough for a weeknight family dessert. I love that it can be made a day ahead, which takes pressure off holiday meal preparation. Plus, it’s a conversation starter—many people have never tried buttermilk pie before and are delighted by this Southern classic.
Ingredients and Substitutions
Let me walk you through what you’ll need for this homemade buttermilk pie and offer some helpful substitutions if needed.
Pie Crust: You’ll need one unbaked 9-inch pie crust. I recommend using a homemade flaky pie crust if you have the time, as it provides the best flavor and texture. However, a store-bought refrigerated pie crust works perfectly well and saves time. Just make sure it’s fitted properly into your pie plate with crimped edges to hold the custard filling.
Granulated Sugar: The 1 1/2 cups of sugar creates the classic sweetness expected in this dessert. You can reduce it slightly to 1 1/4 cups if you prefer a less sweet pie, but I wouldn’t go lower than that or the flavor balance will be off.
Eggs: Three large eggs provide structure and richness to the custard. They’re essential for the proper texture, so I don’t recommend substitutions here. Make sure your eggs are at room temperature for better incorporation.
Unsalted Butter: The half cup of melted butter adds richness and helps create that silky texture. It must be cooled before adding to prevent cooking the eggs. If you only have salted butter, you can use it but reduce the added salt to just a pinch.
All-Purpose Flour: Just three tablespoons of flour help stabilize the custard and prevent it from being too loose. This small amount doesn’t make the pie taste floury—it simply provides structure.
Full-Fat Buttermilk: This is the star ingredient that gives the pie its name and characteristic tang. I strongly recommend using full-fat buttermilk rather than low-fat versions for the best flavor and texture. If you don’t have buttermilk, you can make a substitute by adding one tablespoon of lemon juice or white vinegar to one cup of whole milk and letting it sit for 5 minutes.
Lemon Juice: One tablespoon of fresh lemon juice brightens the flavor and enhances the buttermilk’s tang. Bottled lemon juice works in a pinch.
Vanilla Extract: Pure vanilla extract provides warmth and depth. I always use pure extract rather than imitation for the best flavor.
Salt and Nutmeg: A quarter teaspoon of salt balances the sweetness, while a pinch of ground nutmeg adds subtle warmth and complexity. The nutmeg is optional but traditional.
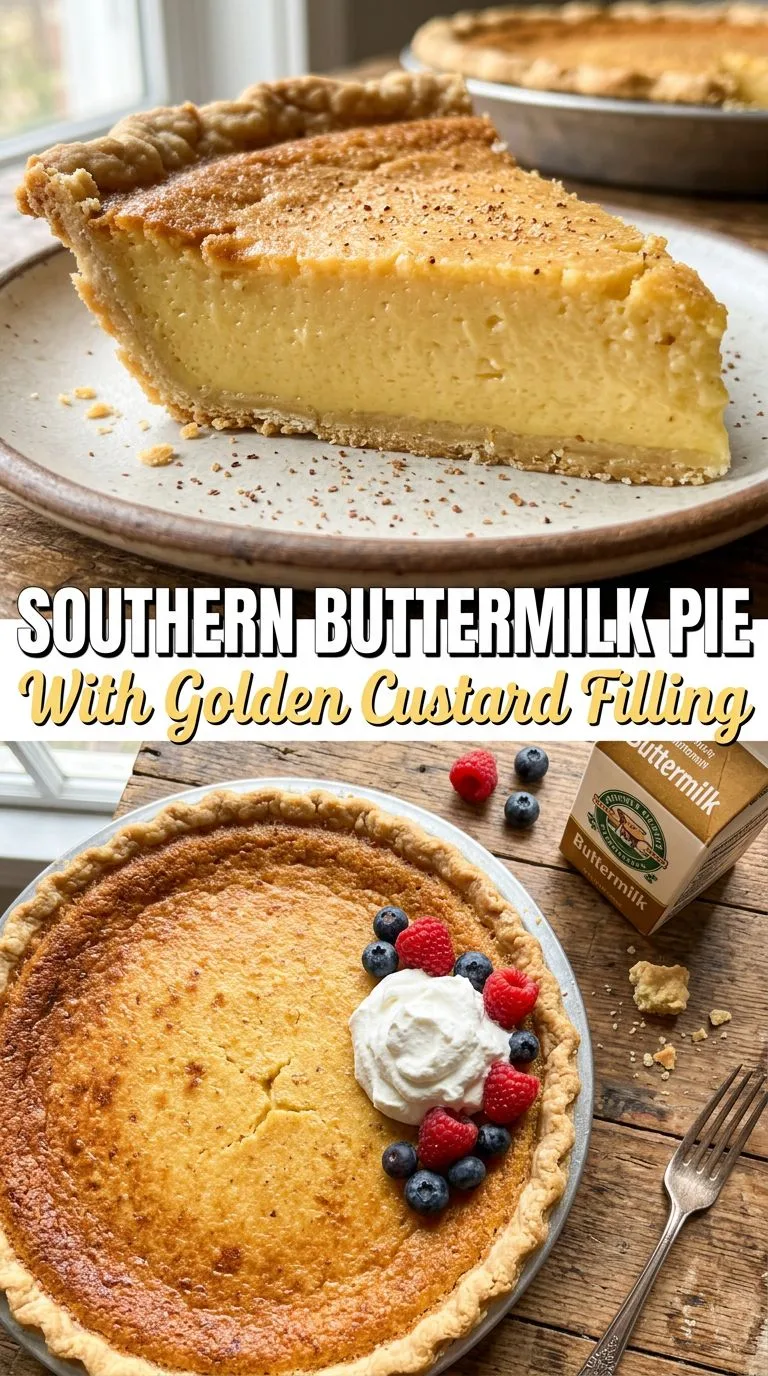
How to Make Southern Buttermilk Pie
Making this classic buttermilk pie is straightforward, but following the steps carefully ensures perfect results every time.
Step 1: Prepare Your Oven and Crust
Start by preheating your oven to 350°F (175°C). While it heats, fit your unbaked pie crust into a 9-inch pie plate. Take time to crimp the edges decoratively—this not only looks beautiful but also helps contain the liquid filling. I like to place the prepared crust in the refrigerator while I make the filling to keep it cold.
Step 2: Cream the Butter and Sugar
In a large mixing bowl, beat the softened butter and granulated sugar together until the mixture is light and creamy. This should take about 2-3 minutes with an electric mixer on medium speed. This step incorporates air and helps create a smooth filling.
Step 3: Add the Eggs
Add the eggs one at a time, beating well after each addition. This gradual incorporation prevents the mixture from curdling and ensures a smooth, homogeneous filling. Make sure each egg is fully mixed in before adding the next.
Step 4: Mix in Dry Ingredients
Add the flour and salt to the mixture, stirring until just combined. Don’t overmix at this stage—you just want the flour evenly distributed throughout.
Step 5: Add Liquid Ingredients
Whisk in the buttermilk, vanilla extract, lemon juice, and ground nutmeg until the filling is completely smooth. The mixture will be fairly liquid, which is exactly what you want. Make sure there are no lumps of flour remaining.
Step 6: Fill and Bake
Carefully pour the filling into your prepared pie crust. The crust should be quite full, but leave a tiny bit of room at the top to prevent overflow. Place the pie on a baking sheet (to catch any drips) and transfer to your preheated oven.
Step 7: Bake Until Golden
Bake for 45 to 55 minutes. You’re looking for a golden-brown top and a filling that still has a slight jiggle in the center when you gently shake the pan. The edges should be set, but the very center should wobble just a bit—it will continue to set as it cools. If the crust edges are browning too quickly, cover them with aluminum foil or a pie shield.
Step 8: Cool Completely
Remove the pie from the oven and place it on a wire rack. Let it cool at room temperature for about one hour. This initial cooling allows the filling to begin setting. After the hour, transfer the pie to the refrigerator and chill for at least 2 hours before slicing. I find that chilling overnight produces the cleanest slices.
Expert Tips for Best Results
After making many buttermilk pies, I’ve learned a few tricks that make a real difference in the final result.
Don’t Overbake: The single most important tip is to avoid overbaking. The pie is done when the center still jiggles slightly. If you bake until the entire pie is completely firm, it will be overcooked and may crack or become grainy. Trust the jiggle—the residual heat and chilling will finish the setting process.
Use Room Temperature Ingredients: Bringing your eggs and buttermilk to room temperature before mixing helps them incorporate more smoothly and creates a more uniform texture. I like to set them out about 30 minutes before I start baking.
Cool the Melted Butter: Make sure your melted butter has cooled to lukewarm before adding it to the mixture. Hot butter can cook the eggs and create an unpleasant texture. I usually melt it first and let it sit while I prepare other ingredients.
Strain the Filling: For an ultra-smooth filling, pour the mixture through a fine-mesh strainer before adding it to the crust. This removes any small lumps and ensures a silky texture.
Protect the Crust: Keep an eye on your crust edges during baking. If they’re browning too quickly, create a foil shield by cutting a circle in the center of a piece of foil and placing it over the pie, leaving the center exposed.
Be Patient with Chilling: I know it’s tempting to cut into the pie as soon as it’s cool, but proper chilling is essential for clean slices. The filling needs that refrigerator time to fully set. Overnight chilling produces the best results.
Serving Suggestions
This old fashioned buttermilk pie is delicious on its own, but there are several ways to dress it up for serving.
My favorite way to serve buttermilk pie is simply chilled with a dollop of freshly whipped cream. The light, airy cream complements the dense custard beautifully. You can sweeten the whipped cream lightly with a tablespoon of sugar and a splash of vanilla extract.
For a more indulgent presentation, I love adding fresh berries. Sliced strawberries, blueberries, or a mix of summer berries add color, freshness, and a slight tartness that balances the sweet custard. Macerate the berries with a little sugar and lemon juice for extra flavor.
A dusting of powdered sugar over the top makes the pie look elegant and bakery-worthy. You can also add a sprinkle of freshly grated nutmeg for visual appeal and extra spice notes.
For holidays, consider serving it alongside other classic Southern pies for a dessert buffet. The pale golden color of buttermilk pie provides a beautiful contrast to the deep orange of sweet potato pie or the rich brown of pecan pie.
I recommend serving slices at cool room temperature rather than straight from the refrigerator. Let the pie sit out for about 15-20 minutes before serving—this allows the flavors to bloom and the texture to soften slightly.
Variations and Substitutions
While the classic version is wonderful, there are several ways to customize this traditional buttermilk pie.
Lemon Buttermilk Pie: Increase the lemon juice to 3 tablespoons and add 1 tablespoon of lemon zest to the filling for a brighter, more citrus-forward version. This variation is particularly refreshing in spring and summer.
Chocolate Buttermilk Pie: Add 1/4 cup of cocoa powder to the flour before mixing. This creates a chocolate version that’s still tangy and interesting rather than overly sweet.
Coconut Buttermilk Pie: Stir in 1/2 cup of sweetened shredded coconut to the filling before baking. The coconut adds texture and tropical flavor while maintaining the classic buttermilk base.
Brown Butter Version: Instead of just melting the butter, brown it in a saucepan until it develops nutty, caramel notes. Cool completely before using. This adds incredible depth of flavor.
Bourbon Buttermilk Pie: Replace the vanilla extract with 2 tablespoons of bourbon for an adult version with warm, oaky notes. This is particularly popular during the holidays.
Gluten-Free Option: Use a gluten-free pie crust and substitute the all-purpose flour with a gluten-free flour blend or cornstarch. The texture will be slightly different but still delicious.
Storage, Freezing, and Reheating
Proper storage keeps your buttermilk custard pie fresh and delicious for several days.
Refrigerator Storage: Store the pie covered in the refrigerator for up to 4 days. I like to cover it loosely with plastic wrap or aluminum foil, or use a pie keeper if you have one. The pie actually improves after a day as the flavors meld together. Always keep it refrigerated due to the eggs and dairy—this is not a pie that can sit at room temperature for extended periods.
Freezing Instructions: Buttermilk pie can be frozen, though the texture may be slightly softer after thawing. To freeze, let the pie cool and chill completely first. Wrap it tightly in plastic wrap, then in aluminum foil, and freeze for up to 2 months. Thaw overnight in the refrigerator before serving. I find that freezing works better for the filling than for the crust, which can become slightly soggy.
Freezing Individual Slices: For easier portion control, slice the pie and freeze individual pieces. Wrap each slice in plastic wrap and place in a freezer-safe container. This allows you to thaw just what you need.
Serving After Storage: For the best flavor and texture, remove the pie from the refrigerator about 15-20 minutes before serving. This takes the chill off slightly and allows the custard to soften to its ideal creamy consistency. The pie is meant to be served cool, not cold.
Do Not Reheat: Unlike some pies, buttermilk pie should not be reheated. It’s designed to be served chilled or at cool room temperature. Heating it will break down the custard texture and make it watery.
Frequently Asked Questions
Why is my buttermilk pie runny?
If your pie is runny, it likely wasn’t baked long enough or wasn’t given adequate chilling time. The filling needs to reach the proper temperature during baking to set the eggs, and then needs several hours in the refrigerator to fully firm up. Make sure you bake until the edges are set and only the very center jiggles, then chill for at least 2 hours, preferably longer.
Can I make buttermilk pie without buttermilk?
Yes, you can create a buttermilk substitute by adding 1 tablespoon of lemon juice or white vinegar to 1 cup of whole milk. Let it sit for 5 minutes before using. While this works in a pinch, I recommend using real buttermilk when possible for the best authentic flavor and texture.
Why did my buttermilk pie crack?
Cracking usually occurs from overbaking or too high an oven temperature. The pie should be removed from the oven when the center still jiggles slightly. Also, avoid opening the oven door frequently during baking, as temperature fluctuations can cause cracking. Letting the pie cool gradually rather than moving it to a cold environment also helps prevent cracks.
How do I know when buttermilk pie is done?
The pie is done when the edges are set and puffed slightly, the top is golden brown, and the center still has a slight jiggle when you gently shake the pan. It should wobble like gelatin, not slosh like liquid. The internal temperature should reach about 170-175°F if you want to use a thermometer.
Can I use a store-bought crust?
Absolutely! A store-bought refrigerated pie crust works perfectly well for this recipe. It saves time and still produces a delicious pie. Just make sure to crimp the edges well to contain the liquid filling.
What does buttermilk pie taste like?
Buttermilk pie has a smooth, creamy custard texture with a sweet vanilla flavor and a subtle tang from the buttermilk. It’s similar to chess pie but with a lighter, more delicate flavor profile. The lemon juice adds brightness, and the nutmeg provides warmth. It’s sweet but not cloying, with a pleasant complexity.
Can I make this pie ahead of time?
Yes! This is actually an ideal make-ahead dessert. The pie needs to chill for at least 2 hours anyway, so making it the day before is perfect. It will keep well in the refrigerator for up to 4 days, making it excellent for holiday meal planning.
Why is there flour in buttermilk pie?
The small amount of flour helps stabilize the custard filling and prevents it from being too loose or weeping. It doesn’t make the pie taste floury—it simply provides structure so the filling sets properly while maintaining a creamy texture.
Southern Buttermilk Pie with Golden Custard Filling
This traditional Southern buttermilk pie features a smooth, golden custard filling with delicate vanilla flavor and a subtle tang from buttermilk. Baked in a flaky homemade pie crust, this old-fashioned dessert is simple, comforting, and perfect for Thanksgiving or any special occasion.
- Prep Time: 15 minutes
- Cook Time: 50 minutes
- Chilling Time: 2 hours
- Total Time: 3 hours 5 minutes
- Servings: 8 slices
- Difficulty: Easy
- Cuisine: Southern American
- Course: Dessert
Ingredients
- 1 unbaked 9-inch pie crust
- 1 1/2 cups granulated sugar
- 3 large eggs
- 1/2 cup unsalted butter, melted and cooled
- 3 tablespoons all-purpose flour
- 1 cup full-fat buttermilk
- 1 tablespoon lemon juice
- 1 teaspoon vanilla extract
- 1/4 teaspoon salt
- Pinch of ground nutmeg
Instructions
- Preheat the oven to 350°F (175°C). Fit the unbaked pie crust into a 9-inch pie plate, crimping the edges decoratively. Set aside.
- In a large mixing bowl, beat the softened butter and granulated sugar together until light and creamy, about 2-3 minutes.
- Add the eggs one at a time, mixing well after each addition until fully incorporated.
- Mix in the flour and salt until just combined.
- Whisk in the buttermilk, vanilla extract, lemon juice, and ground nutmeg until the mixture is completely smooth with no lumps.
- Pour the filling into the prepared pie crust. Place the pie plate on a baking sheet to catch any drips.
- Bake for 45 to 55 minutes, until the top is golden brown and the edges are set. The center should still have a slight jiggle. If the crust edges brown too quickly, cover them with aluminum foil.
- Remove from the oven and cool on a wire rack for 1 hour at room temperature.
- Transfer the pie to the refrigerator and chill for at least 2 hours (preferably overnight) before slicing and serving.
Recipe Notes
- The pie is done when the center still jiggles slightly—it will continue to set as it cools and chills.
- For the cleanest slices, chill the pie overnight before cutting.
- Make sure the melted butter has cooled to lukewarm before adding to prevent cooking the eggs.
- Use full-fat buttermilk for the best flavor and texture.
- Store covered in the refrigerator for up to 4 days.
- Serve at cool room temperature for the best flavor—remove from refrigerator 15-20 minutes before serving.
- If you don’t have buttermilk, substitute with 1 cup whole milk plus 1 tablespoon lemon juice or vinegar; let sit 5 minutes before using.
Estimated Nutrition (Per Slice)
- Calories: 385
- Carbohydrates: 48g
- Protein: 5g
- Fat: 19g
- Saturated Fat: 11g
- Fiber: 1g
- Sugar: 38g
- Sodium: 245mg
Nutrition information is estimated and will vary based on specific ingredients used.
