
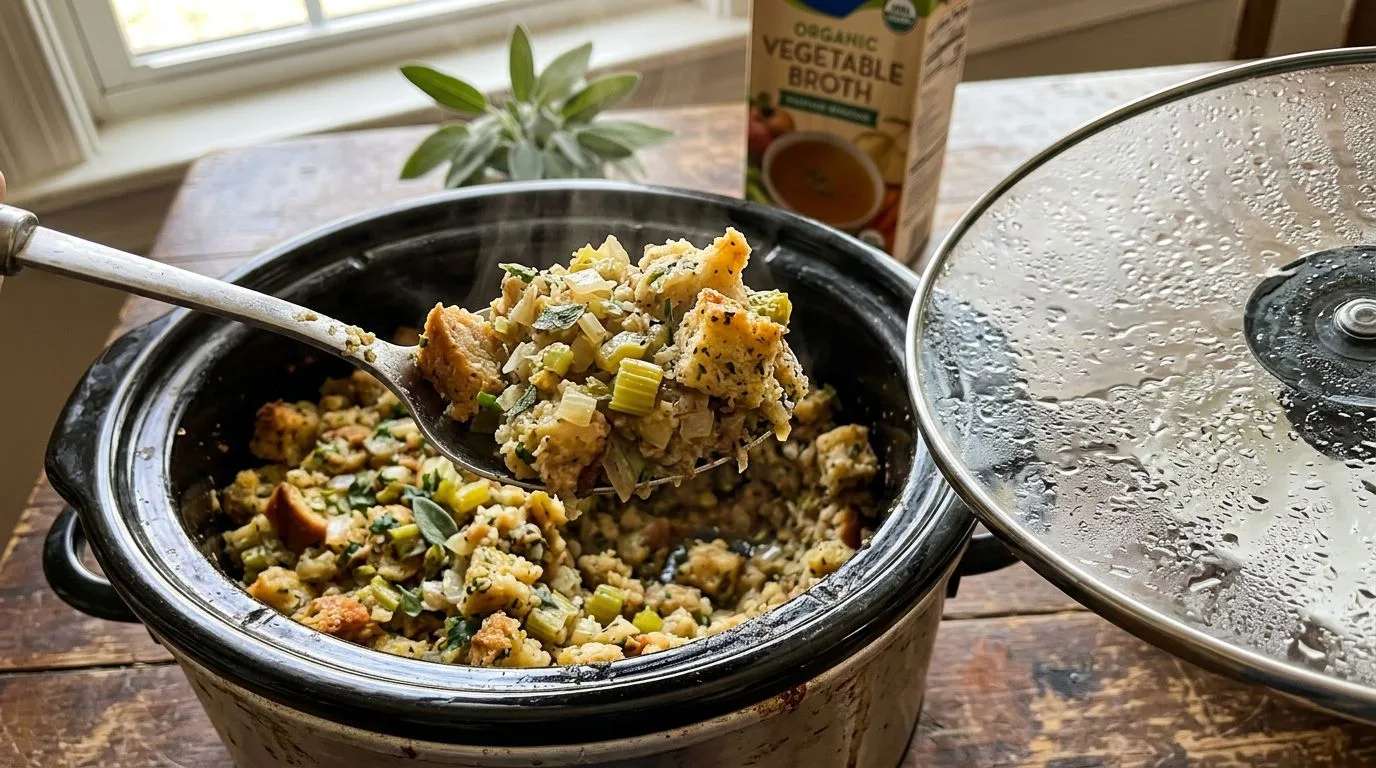
When Thanksgiving rolls around, oven space becomes more precious than gold. Between the turkey, casseroles, and pies, there’s barely room to breathe—let alone cook another dish. That’s exactly why I love making crockpot stuffing. This classic side dish features all the traditional flavors you crave—savory herbs, tender vegetables, and perfectly seasoned bread cubes—but it cooks entirely in your slow cooker, freeing up valuable oven real estate for everything else on your holiday menu.
This crockpot stuffing recipe delivers the same delicious results as traditional oven-baked versions, with tender, flavorful bread cubes infused with butter, aromatic vegetables, and a blend of classic herbs. The slow cooker creates a wonderfully moist interior while allowing the top to develop just the right texture. Whether you’re hosting a crowd or simply looking for a more convenient way to prepare this beloved side dish, this recipe will become your new go-to method.
I find that using a slow cooker for stuffing not only saves oven space but also allows me to prepare it ahead and keep it warm until serving time. It’s a game-changer for holiday meal planning, reducing stress and giving you more time to focus on other dishes—or simply enjoy time with your guests.
Why You’ll Love This Crockpot Stuffing Recipe
This slow cooker stuffing checks all the boxes for a perfect holiday side dish. First and foremost, it completely frees up your oven during the busiest cooking day of the year. Instead of juggling multiple dishes and constantly checking temperatures, you can simply set your crockpot and let it work its magic while you focus on other preparations.
The flavor is absolutely traditional and comforting. With a classic combination of celery, onions, butter, and aromatic herbs like sage, thyme, and poultry seasoning, this stuffing tastes just like the version grandma used to make. The slow, gentle cooking process allows all those flavors to meld together beautifully, creating a deeply savory and satisfying dish.
I also appreciate how forgiving this recipe is. Unlike oven-baked stuffing, which can dry out if left too long, crockpot stuffing stays moist and tender throughout the cooking process. The covered environment traps steam, ensuring every bite is perfectly seasoned and never dry. Plus, you can keep it on the warm setting for hours without worrying about it overcooking.
Another major advantage is the make-ahead potential. You can prepare all the components the night before, refrigerate them, and simply assemble and start cooking in the morning. This advance preparation makes holiday cooking so much more manageable and less stressful.
Ingredients and Substitutions
The beauty of this crockpot stuffing lies in its simple, classic ingredients. Here’s what you’ll need and how you can customize it to suit your preferences:
Day-old bread forms the foundation of this stuffing. I recommend using a sturdy white bread, French bread, or sourdough. The bread needs to be slightly stale so it can absorb the liquid without becoming mushy. If your bread is fresh, simply cube it and let it sit out overnight, or dry it in a 300°F oven for about 15 minutes. You can also use a combination of white and whole wheat bread for added texture and nutrition.
Butter provides rich flavor and helps sauté the vegetables. While I prefer using real butter for the best taste, you can substitute with margarine or a plant-based butter alternative if needed. For a lighter version, you could reduce the butter to 3/4 cup, though the flavor will be less rich.
Celery and onion are the classic aromatic vegetables in traditional stuffing. I like to dice them into small, uniform pieces so they cook evenly and distribute throughout the dish. If you’re not a fan of celery, you can increase the onion or add diced carrots instead.
Chicken broth adds moisture and savory depth. I recommend using a good-quality broth for the best flavor. You can substitute vegetable broth to make this recipe vegetarian-friendly, or use turkey broth if you have it available. For a richer flavor, consider using half broth and half white wine.
Eggs help bind the stuffing together and add richness. They’re whisked with the broth before being added to the bread mixture. If you need an egg-free version, you can omit them, though the stuffing will be slightly less cohesive.
Herbs and seasonings are what give this stuffing its classic flavor profile. Poultry seasoning is a blend that typically includes sage, thyme, marjoram, and rosemary—perfect for this dish. I also add extra dried sage and thyme for a more pronounced herb flavor. Fresh herbs can be substituted using a 3:1 ratio (three times as much fresh as dried). The fresh parsley adds a bright, fresh note that balances the dried herbs beautifully.
How to Make Crockpot Stuffing
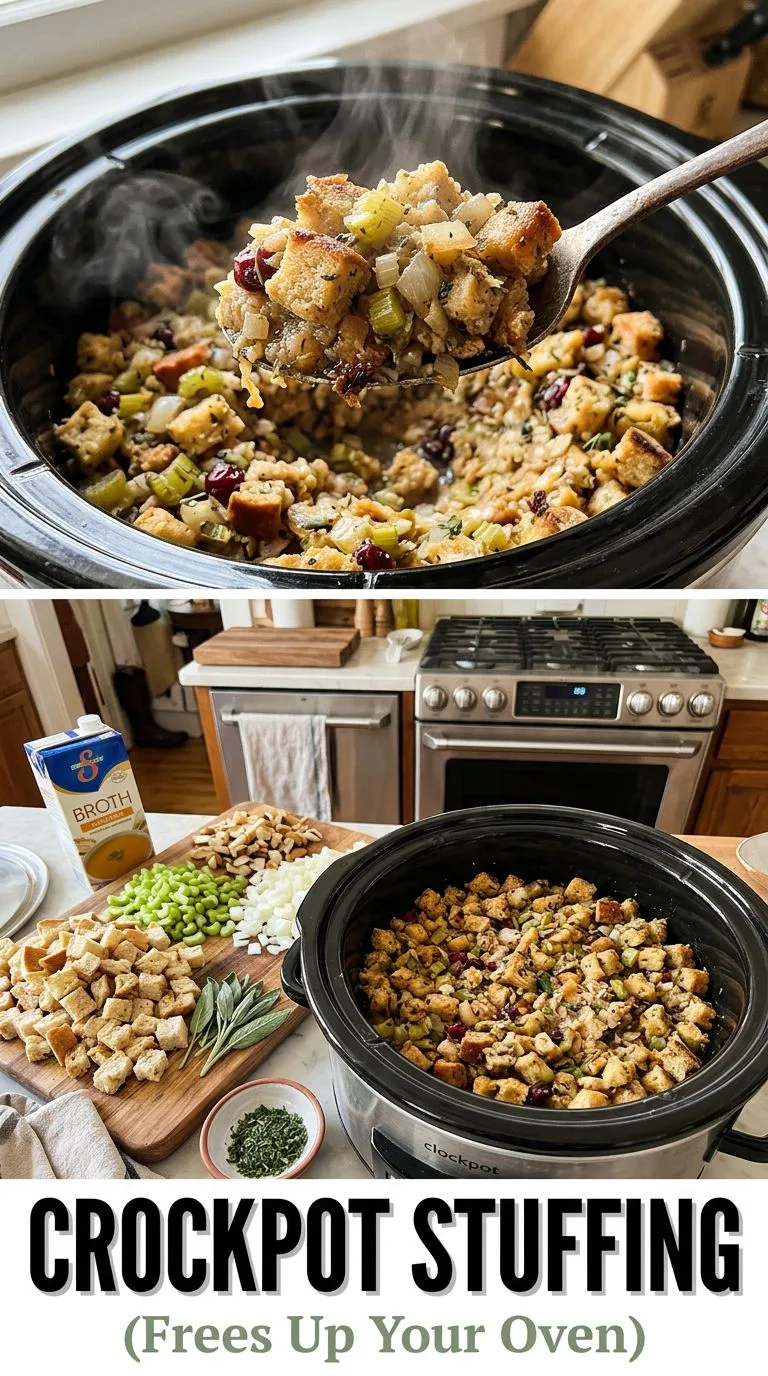
Making this slow cooker stuffing is straightforward and doesn’t require any special techniques. Here’s how I prepare it step by step:
Prepare the bread: Start by cutting your day-old bread into cubes, roughly 3/4 to 1 inch in size. Spread them out on a baking sheet or in a large bowl and allow them to dry completely. This step is crucial because dry bread absorbs the liquid mixture without becoming soggy. If you’re short on time, you can dry fresh bread cubes in a 300°F oven for about 15 minutes, stirring occasionally.
Sauté the vegetables: Melt the butter in a large skillet over medium heat. Add the diced onion and celery, cooking until they’re softened and fragrant, about 8-10 minutes. I like to cook them until the onions are translucent and just beginning to turn golden at the edges. This develops their flavor and ensures they’ll be tender in the finished dish. Stir in the poultry seasoning, sage, thyme, salt, and pepper during the last minute of cooking to bloom the spices and release their aromatic oils.
Combine the mixture: Transfer your dried bread cubes to a very large mixing bowl. Add the sautéed vegetable mixture and the chopped fresh parsley, tossing everything together to distribute the vegetables and herbs evenly throughout the bread. In a separate bowl, whisk together the eggs and chicken broth until well combined. Gradually pour this liquid mixture over the bread, tossing gently as you go. I recommend adding the liquid in stages, tossing between additions, to ensure even distribution. The bread should be moistened throughout but not soaking wet or mushy.
Transfer to the slow cooker: Generously grease your slow cooker insert with butter or cooking spray. This prevents sticking and makes cleanup much easier. Transfer the stuffing mixture to the prepared slow cooker, spreading it out evenly. Don’t pack it down too tightly—you want some air pockets for texture.
Cook low and slow: Cover the slow cooker with its lid and cook on LOW for 3-4 hours. The stuffing is done when the center reaches 165°F on an instant-read thermometer and the mixture is heated through. I find that 3.5 hours is usually perfect for my 6-quart slow cooker, but cooking times can vary depending on your specific model and how full it is.
Keep warm and serve: Once the stuffing is fully cooked, you can switch the slow cooker to the WARM setting and keep it there for up to 2 hours before serving. This is incredibly convenient when you’re coordinating multiple dishes for a big meal.
Expert Tips for Best Results
After making crockpot stuffing many times, I’ve learned a few tricks that ensure perfect results every time:
Don’t skip drying the bread. This is the most important step for achieving the right texture. Wet or fresh bread will turn to mush when you add the liquid. If you’re in a hurry, spreading cubed bread on baking sheets and leaving it out overnight works perfectly. The bread should feel dry to the touch and slightly firm.
Adjust liquid based on your bread. Different types of bread absorb liquid differently. Denser breads like sourdough may need slightly more broth, while lighter white breads may need less. The mixture should look moist but not wet or soupy. I recommend starting with 2.5 cups of broth, then adding more if needed until the bread is evenly moistened but not saturated.
Grease your slow cooker well. I can’t stress this enough—a well-greased slow cooker makes serving and cleanup so much easier. I like to use butter for extra flavor, but cooking spray works too. Pay special attention to the corners and edges where stuffing tends to stick.
Don’t overfill your slow cooker. The stuffing should fill your slow cooker about two-thirds to three-quarters full. If it’s too full, it won’t cook evenly. If you have extra mixture, you can bake it separately in a greased baking dish.
Check for doneness with a thermometer. The center of the stuffing should reach 165°F to ensure the eggs are fully cooked and the dish is safe to eat. This is especially important since slow cookers can vary in temperature.
For a crispy top, finish under the broiler. If you prefer some crispy, golden bits on top (like traditional oven-baked stuffing), you can transfer portions to a baking dish and broil for 3-5 minutes just before serving. This gives you the best of both worlds—moist interior from the slow cooker and crispy top from the broiler.
Serving Suggestions
Crockpot stuffing is incredibly versatile and pairs beautifully with a wide variety of main dishes and sides. Of course, it’s a natural companion to roasted turkey or classic sausage stuffing at Thanksgiving, but I find it works equally well with roasted chicken, pork loin, or even beef roast throughout the year.
For a complete Thanksgiving spread, I love serving this alongside creamy mashed potatoes, green bean casserole, cranberry sauce, and rich turkey gravy. The stuffing is excellent at soaking up gravy, making every bite even more flavorful. Don’t forget to offer gravy on the side so guests can add as much as they like.
This stuffing also makes a wonderful base for leftover turkey sandwiches the next day. I like to layer sliced turkey, stuffing, and cranberry sauce between two slices of bread for the ultimate post-Thanksgiving sandwich.
For a Southern-style meal, pair this with Southern cornbread dressing, collard greens, and honey-glazed ham. The combination of different stuffing styles gives guests wonderful variety.
I also recommend serving this stuffing family-style in a large serving bowl or directly from the slow cooker if you’re keeping it warm. Garnish with fresh parsley for a pop of color and freshness.
Variations and Substitutions
While this classic recipe is delicious as written, there are countless ways to customize it to suit your tastes or dietary needs:
Add sausage: For a heartier stuffing, brown 1 pound of Italian sausage (mild or spicy) and add it to the bread mixture. This adds protein and rich, savory flavor. Reduce the butter slightly if using sausage to account for the fat it releases.
Include dried fruit: Dried cranberries, chopped dried apricots, or raisins add a sweet-tart contrast that many people love. I recommend adding about 1/2 to 1 cup of dried fruit to the bread mixture.
Add nuts: Toasted pecans, walnuts, or chestnuts provide wonderful texture and nutty flavor. Add about 1 cup of chopped, toasted nuts for the best results.
Try different herbs: While the classic herb blend is traditional, you can experiment with fresh rosemary, oregano, or even a bit of fennel seed for different flavor profiles.
Make it vegetarian: Simply use vegetable broth instead of chicken broth. The rest of the recipe remains the same.
Go gluten-free: Use your favorite gluten-free bread, making sure to dry it thoroughly. The texture will be slightly different but still delicious.
Add vegetables: Diced mushrooms, chopped apples, or diced bell peppers can be sautéed with the celery and onions for additional flavor and nutrition.
Make it dairy-free: Substitute the butter with a plant-based alternative or use olive oil for sautéing the vegetables.
Storage, Freezing, and Reheating
One of the great advantages of this crockpot stuffing is how well it stores and reheats, making it perfect for meal prep or enjoying leftovers.
Refrigerating: Allow the stuffing to cool completely, then transfer it to an airtight container. It will keep in the refrigerator for up to 4 days. I like to portion it into individual servings for easy reheating during the week.
Freezing: This stuffing freezes beautifully for up to 3 months. Let it cool completely, then transfer to freezer-safe containers or heavy-duty freezer bags. I recommend freezing in portion sizes that make sense for your household—either individual servings or family-sized portions. Label with the date and contents.
Reheating from refrigerated: For best results, reheat stuffing in the oven. Place it in a greased baking dish, cover with foil, and bake at 350°F for about 20-25 minutes until heated through. You can add a splash of chicken broth if it seems dry. Alternatively, microwave individual portions for 1-2 minutes, stirring halfway through.
Reheating from frozen: Thaw the stuffing overnight in the refrigerator, then reheat as directed above. If you’re short on time, you can reheat from frozen—just add an extra 10-15 minutes to the oven time and keep it covered to prevent drying out.
Keeping warm for serving: One of the best features of making stuffing in a slow cooker is that you can keep it on the WARM setting for up to 2 hours before serving. This is incredibly convenient when timing multiple dishes for a holiday meal.
Frequently Asked Questions
Can I make this stuffing the night before?
Yes! You can prepare all the components the night before. Sauté the vegetables, cube and dry the bread, and even mix everything together. Store the assembled mixture in the refrigerator overnight, then transfer to your greased slow cooker in the morning and cook as directed. You may need to add an extra 30 minutes to the cooking time if starting with cold ingredients.
Why is my stuffing mushy?
Mushy stuffing usually results from using bread that wasn’t dry enough or adding too much liquid. Make sure your bread cubes are completely dry before starting, and add the broth mixture gradually, stopping when the bread is moistened but not soaking wet.
Can I cook this on HIGH instead of LOW?
Yes, you can cook this stuffing on HIGH for 1.5 to 2 hours instead of LOW for 3-4 hours. However, I prefer the LOW setting because it allows the flavors to develop more fully and reduces the risk of the edges drying out or burning.
How do I get a crispy top like oven-baked stuffing?
The slow cooker creates a moist environment, so the top won’t get crispy like traditional oven-baked stuffing. If you want that crispy texture, transfer portions to a baking dish and broil for 3-5 minutes just before serving, or remove the slow cooker lid during the last 30 minutes of cooking.
What size slow cooker do I need?
This recipe works best in a 6-quart slow cooker. You can use a 5-quart if needed, but don’t go smaller or the stuffing won’t cook evenly. If you only have a 4-quart slow cooker, I recommend halving the recipe.
Can I add raw sausage directly to the slow cooker?
I don’t recommend adding raw sausage directly to the stuffing mixture. It’s better to brown it first in a skillet, both for food safety and to develop better flavor. Plus, browning allows you to drain excess fat before adding it to the stuffing.
Is this recipe safe with raw eggs?
Yes, as long as the stuffing reaches an internal temperature of 165°F, the eggs will be fully cooked and safe to eat. Always check the temperature with an instant-read thermometer inserted into the center of the stuffing.
Can I make this without eggs?
Yes, you can omit the eggs if needed. The stuffing will be slightly less cohesive but still delicious. You might want to reduce the broth slightly (by about 1/4 cup) to compensate for the missing eggs.
Crockpot Stuffing (Frees Up Your Oven)
Classic stuffing made with bread cubes, celery, onions, herbs, and savory broth, conveniently cooked in a slow cooker. This traditional side dish frees up valuable oven space while delivering all the comforting flavors you love.
- Prep Time: 20 minutes
- Cook Time: 3-4 hours
- Total Time: 3 hours 20 minutes – 4 hours 20 minutes
- Servings: 12 servings
- Difficulty: Easy
- Cuisine: American
- Course: Side Dish
Ingredients
- 12 cups cubed day-old bread
- 1 cup butter
- 2 cups diced celery
- 2 cups diced onion
- 3 cups chicken broth
- 2 large eggs
- 2 teaspoons poultry seasoning
- 1 teaspoon dried sage
- 1 teaspoon dried thyme
- 1/2 teaspoon salt
- 1/2 teaspoon black pepper
- 1/4 cup fresh parsley, chopped
Instructions
- Cut day-old bread into 3/4 to 1-inch cubes and spread them out in a large bowl or on baking sheets. Allow to dry completely, or dry in a 300°F oven for 15 minutes if needed.
- Melt butter in a large skillet over medium heat. Add diced onion and celery, and sauté for 8-10 minutes until softened and translucent.
- Add poultry seasoning, sage, thyme, salt, and pepper to the skillet. Stir and cook for 1 minute until fragrant. Remove from heat.
- Transfer dried bread cubes to a very large mixing bowl. Add the sautéed vegetable mixture and chopped fresh parsley. Toss to combine evenly.
- In a separate bowl, whisk together the eggs and chicken broth until well combined.
- Gradually pour the egg and broth mixture over the bread mixture, tossing gently as you go to ensure even distribution. The bread should be moistened throughout but not soggy.
- Generously grease a 6-quart slow cooker insert with butter or cooking spray.
- Transfer the stuffing mixture to the prepared slow cooker, spreading it out evenly without packing it down too tightly.
- Cover and cook on LOW for 3-4 hours, until the center reaches 165°F on an instant-read thermometer and the stuffing is heated through.
- Once fully cooked, switch to WARM setting and keep warm until ready to serve, up to 2 hours.
Recipe Notes
- The bread must be completely dry before using. Fresh bread will result in mushy stuffing.
- Adjust the amount of broth based on your bread type. Start with 2.5 cups and add more if needed until bread is evenly moistened.
- For a crispy top, transfer portions to a baking dish and broil for 3-5 minutes before serving.
- This recipe works best in a 6-quart slow cooker. For smaller slow cookers, halve the recipe.
- Always check that the center reaches 165°F to ensure the eggs are fully cooked.
- Leftovers can be refrigerated for up to 4 days or frozen for up to 3 months.
Nutrition Information (Per Serving, Estimated)
- Calories: 285
- Carbohydrates: 28g
- Protein: 7g
- Fat: 16g
- Saturated Fat: 9g
- Fiber: 2g
- Sugar: 4g
- Sodium: 580mg
Nutrition information is estimated and may vary based on specific ingredients used.
