
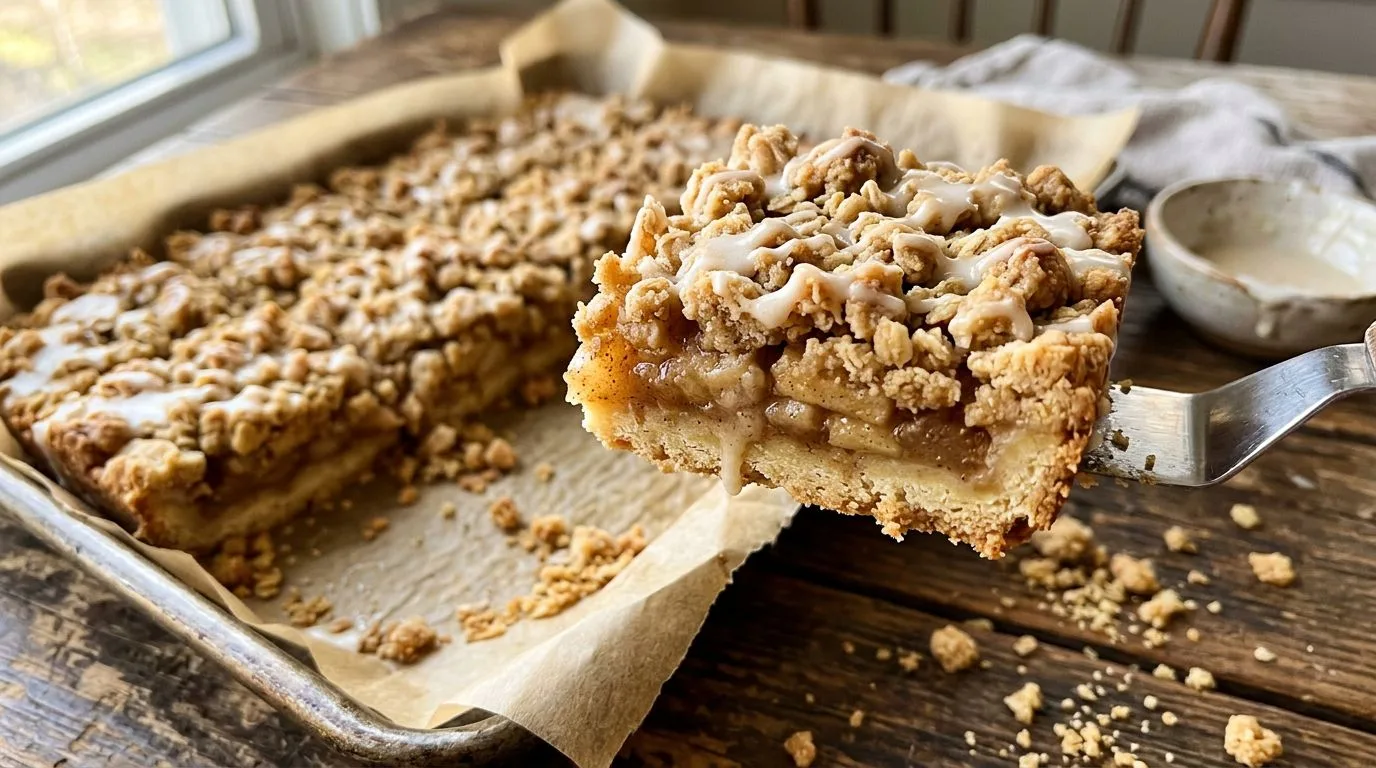
There’s something wonderfully nostalgic about the flavors of apple pie, but I’ll be honest—sometimes I want all that cinnamon-spiced goodness without the fuss of rolling out pie dough and crimping edges. That’s exactly where these old-fashioned apple pie bars come in. They deliver every bit of that classic apple pie experience with a buttery shortbread crust, tender cinnamon-kissed apples, and a golden streusel topping that adds the perfect crumbly texture.
What I love most about these apple pie bars is how easy they are to slice and serve. No worrying about soggy bottoms or slices falling apart—just clean, beautiful bars that are perfect for potlucks, Thanksgiving dessert tables, or any time you’re craving the comforting taste of homemade apple pie. The buttery crust holds everything together beautifully, while the streusel topping adds that irresistible crunch that makes each bite memorable.
Whether you’re an experienced baker or just starting out, I think you’ll find these bars incredibly approachable. The recipe uses simple pantry ingredients and straightforward techniques that yield impressive results every single time. Let me walk you through everything you need to know to make these delicious apple pie bars at home.
Why You’ll Love This Recipe
I recommend these apple pie bars for so many reasons, but here are the highlights that make them stand out. First, they’re incredibly convenient—you can make them in a standard 9×13-inch pan, which means you get more servings than a traditional pie with less effort. No pie plates, no lattice work, no stress about perfectly crimped edges.
The texture combination is absolutely perfect. The shortbread-style crust is rich and buttery, providing a sturdy foundation that doesn’t get soggy even after the apples release their juices. The apple filling itself is perfectly spiced with cinnamon and nutmeg, with just a touch of lemon juice to brighten the flavors. And that streusel topping? It bakes up golden and crumbly, adding wonderful texture contrast to the tender apples below.
I also love how portable these bars are. They’re much easier to transport than a whole pie, making them ideal for bake sales, office parties, or family gatherings. You can cut them into neat squares, wrap them individually, or arrange them on a platter—they always look beautiful and inviting.
Another major advantage is the make-ahead friendly nature of this recipe. You can bake these bars a day in advance, and they actually taste even better after the flavors have had time to meld together overnight. This makes them a lifesaver during busy holiday seasons when you’re juggling multiple dishes.
Ingredients and Substitutions
Let me break down the ingredients you’ll need for these apple pie bars and discuss some helpful substitutions. The recipe has two main components: the crust and streusel topping share a base mixture, while the apple filling brings all those classic pie flavors.
For the crust and topping base, you’ll need all-purpose flour, granulated sugar, baking powder, salt, cold unsalted butter, and one large egg. The cold butter is crucial here—it creates that wonderful crumbly texture we’re looking for. If you only have salted butter on hand, you can use it, but I recommend reducing the added salt to 1/4 teaspoon.
The apple filling calls for peeled and diced apples, packed brown sugar, cornstarch, lemon juice, ground cinnamon, nutmeg, and vanilla extract. I find that using a mix of apple varieties gives the best flavor and texture. Granny Smith apples provide tartness and hold their shape well, while Honeycrisp or Gala apples add sweetness and soften nicely. You’ll need about 5-6 medium apples to get 5 cups of diced fruit.
If you don’t have brown sugar, you can substitute granulated sugar, though you’ll lose some of that lovely molasses depth. The cornstarch acts as a thickener to prevent the filling from being too runny—if you only have flour, use 3 tablespoons instead of 2 tablespoons of cornstarch. The lemon juice is important for balancing the sweetness and preventing the apples from browning, so I don’t recommend skipping it.
For the spices, cinnamon and nutmeg are traditional, but you could also add a pinch of allspice or cardamom if you want to experiment. The vanilla extract adds warmth and rounds out all the flavors beautifully.
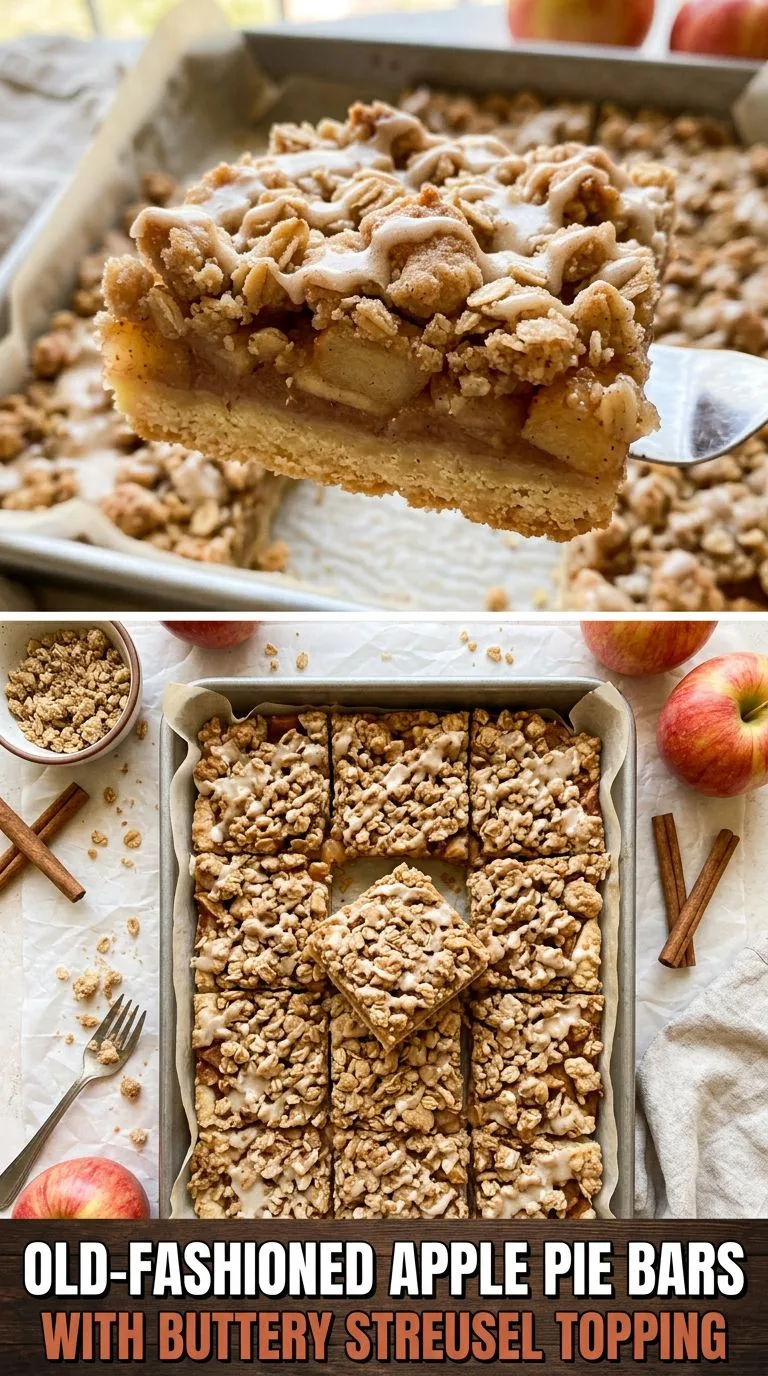
How to Make Apple Pie Bars
Making these apple pie bars is straightforward, but I’ll walk you through each step to ensure perfect results. The process involves preparing the crust, making the apple filling, and creating the streusel topping before baking everything together.
Start by preheating your oven to 350°F (175°C) and lining a 9×13-inch baking pan with parchment paper. I like to leave some overhang on the sides—this makes it much easier to lift the bars out of the pan later for clean cutting.
For the crust, combine the flour, granulated sugar, baking powder, and salt in a large bowl. Add the cubed cold butter and use a pastry cutter, fork, or your fingers to work it into the flour mixture until it resembles coarse crumbs. Mix in the egg until the mixture just comes together. The texture should be crumbly but hold together when pressed.
Take about two-thirds of this mixture and press it firmly into the bottom of your prepared pan. I find that using the bottom of a measuring cup helps create an even layer. Bake this crust for 15 minutes—it should be just starting to turn golden around the edges. This partial baking ensures the bottom crust will be fully cooked and won’t be soggy.
While the crust is baking, prepare your apple filling. Peel and dice your apples into roughly 1/2-inch pieces for even cooking. In a large bowl, toss the diced apples with brown sugar, cornstarch, lemon juice, cinnamon, nutmeg, and vanilla extract. Make sure the apples are evenly coated—the cornstarch needs to be distributed throughout to thicken the juices properly.
When the crust comes out of the oven, spread the apple filling evenly over the warm crust. For the streusel topping, take the remaining crumb mixture and work in a bit more cold butter until you have nice clumps. You can also add a tablespoon or two of oats for extra texture if you like, though the original recipe works beautifully as written.
Sprinkle the streusel evenly over the apples, then return the pan to the oven. Bake for 40 to 45 minutes, until the apples are tender when pierced with a knife and the streusel topping is golden brown. The edges should be bubbling slightly.
This next step requires patience, but it’s important: let the bars cool completely in the pan. I know it’s tempting to cut into them right away, but cooling allows the filling to set properly. Once completely cool, use the parchment paper overhang to lift the entire slab out of the pan, then cut into bars using a sharp knife.
Expert Tips for Best Results
I’ve made these apple pie bars many times, and I’ve picked up some helpful tips along the way. First, don’t skip the step of partially baking the crust. Those 15 minutes make a huge difference in preventing a soggy bottom layer. The crust needs that head start to stay crisp under all those juicy apples.
When it comes to cutting the butter into the flour, make sure it stays cold. If your kitchen is warm or you’re working slowly, I recommend chilling the flour mixture and butter cubes in the freezer for 10 minutes before combining them. Cold butter creates those wonderful flaky, crumbly textures we’re after.
For the apple filling, try to cut your apple pieces uniformly. This ensures even cooking—you don’t want some pieces mushy while others are still crunchy. I aim for about 1/2-inch cubes, which cook through perfectly in the baking time.
Don’t overmix the crust mixture once you add the egg. You want it to just come together—overworking it can make the crust tough rather than tender and crumbly. Similarly, when pressing the crust into the pan, press firmly enough that it holds together, but don’t compact it too much.
If your streusel topping isn’t forming nice clumps, add an extra tablespoon of cold butter and work it in with your fingers. The clumps create that wonderful textured topping that makes these bars so appealing.
I recommend using a combination of tart and sweet apples for the most complex flavor. My favorite mix is half Granny Smith and half Honeycrisp, but you can use what you have available. Just avoid apples that turn to mush when cooked, like Red Delicious or McIntosh.
Serving Suggestions
These apple pie bars are delicious on their own, but I love dressing them up for special occasions. My favorite way to serve them is slightly warm with a scoop of vanilla ice cream melting over the top. The contrast between the warm, spiced apples and cold, creamy ice cream is absolutely heavenly.
For a more elegant presentation, try serving them with a drizzle of salted caramel sauce and a dollop of freshly whipped cream. The caramel enhances the brown sugar notes in the filling, while the whipped cream adds lightness. A light dusting of powdered sugar also makes them look bakery-beautiful.
These bars are perfect for Thanksgiving dessert tables alongside your classic apple pie. I like offering both options—some people prefer traditional pie, while others love the convenience of a handheld bar. They’re also wonderful for fall potlucks, harvest parties, or any autumn gathering.
For breakfast or brunch, I find these bars pair wonderfully with hot coffee or spiced chai tea. They’re not overly sweet, so they work well as a morning treat. You could also serve them as an afternoon snack with a glass of cold milk.
If you’re serving these at a party, I recommend cutting them into smaller squares—about 24 pieces from a 9×13 pan. This makes them perfect finger food that guests can enjoy while mingling. For a family dessert, cut them into 12 larger bars.
Variations and Substitutions
While this recipe is wonderful as written, there are plenty of ways to customize these apple pie bars to suit your preferences. If you love the combination of apples and other fruits, try adding 1 cup of fresh or frozen cranberries to the apple filling. The tartness of cranberries complements the sweet apples beautifully and adds a festive touch.
For a nuttier version, fold 1/2 cup of chopped pecans or walnuts into the streusel topping. The nuts add wonderful crunch and make the bars even more satisfying. You could also add 1/4 cup of old-fashioned oats to the streusel for extra texture—this makes them similar to apple crisp in flavor.
If you want to reduce the sugar, you can cut the granulated sugar in the crust mixture down to 3/4 cup and the brown sugar in the filling to 1/3 cup. The bars will be less sweet but still delicious, especially if you’re using naturally sweet apples.
For a gluten-free version, substitute a 1:1 gluten-free flour blend for the all-purpose flour. I recommend adding 1/2 teaspoon of xanthan gum if your blend doesn’t already include it. The texture will be slightly different but still very good.
You can also experiment with different spice combinations. Try adding 1/2 teaspoon of ground ginger for a spicier kick, or use apple pie spice blend instead of separate cinnamon and nutmeg. A pinch of cardamom adds an unexpected but delightful warmth.
For individual servings, you can make these in a muffin tin. Press the crust into the bottom of greased muffin cups, add a spoonful of filling, top with streusel, and bake for about 25-30 minutes. These mini versions are adorable and perfect for portion control.
Storage, Freezing, and Reheating
Proper storage keeps these apple pie bars fresh and delicious for days. Once completely cooled, I recommend storing them in an airtight container at room temperature for up to 2 days. If your kitchen is particularly warm, or if you want to keep them longer, refrigerate them in an airtight container for up to 5 days.
I find that these bars actually taste even better the next day after the flavors have had time to meld together. The crust softens slightly but still maintains a pleasant texture, and the filling becomes even more cohesive.
For longer storage, these bars freeze beautifully. Cut them into individual portions, wrap each bar tightly in plastic wrap, then place them in a freezer-safe container or zip-top bag. They’ll keep in the freezer for up to 3 months. I like to label the container with the date so I know when I made them.
To thaw frozen bars, transfer them to the refrigerator overnight. You can also thaw them at room temperature for a few hours if you’re in a hurry. Once thawed, they’re ready to eat as is or can be warmed slightly.
For reheating, I recommend warming individual bars in the microwave for 15-20 seconds, just until slightly warm. This brings back that fresh-from-the-oven appeal. You can also reheat them in a 300°F oven for about 10 minutes if you’re warming several at once. Avoid overheating, as this can make the crust too hard.
If you want to freeze the bars before baking, you can assemble everything in the pan, cover tightly with plastic wrap and foil, and freeze for up to 2 months. Bake from frozen, adding an extra 10-15 minutes to the baking time.
Frequently Asked Questions
Can I use apple pie filling from a can?
While you can use canned apple pie filling in a pinch, I really recommend using fresh apples for the best flavor and texture. Fresh apples give you control over the sweetness and spice level, and they don’t have the overly processed taste that canned filling sometimes has. Plus, fresh apples are usually more affordable and create a more authentic homemade taste.
Why is my crust soggy?
A soggy crust usually happens when the bottom layer isn’t pre-baked long enough or when the bars are cut before they’ve completely cooled. Make sure you bake the crust for the full 15 minutes before adding the filling, and always let the bars cool completely so the filling can set properly. Using cornstarch in the filling also helps absorb excess moisture.
What’s the best type of apple to use?
I find that a combination of tart and sweet apples works best. Granny Smith apples are excellent because they hold their shape well and provide tartness, while Honeycrisp, Gala, or Fuji apples add sweetness. Avoid apples that turn mushy when baked, like Red Delicious or McIntosh. A 50-50 mix of tart and sweet varieties gives you the most complex, balanced flavor.
Can I make these bars ahead of time?
Absolutely! These bars are perfect for making ahead. You can bake them up to 2 days in advance and store them covered at room temperature, or up to 5 days in advance if refrigerated. They actually taste even better after sitting overnight as the flavors develop. You can also freeze them for up to 3 months.
How do I get clean cuts when slicing?
The key to clean cuts is making sure the bars are completely cool before slicing. Use a sharp knife and wipe it clean between cuts. I find that chilling the bars in the refrigerator for an hour before cutting makes them even easier to slice cleanly. Lifting the entire slab out of the pan using the parchment paper overhang also makes cutting much easier.
Can I double this recipe?
Yes, you can double the recipe to make two pans. I don’t recommend trying to fit a double batch into a larger pan, as the baking times would be difficult to adjust and the crust might not cook evenly. It’s better to make two separate 9×13-inch pans using the same baking times.
My streusel topping is too crumbly and won’t form clumps. What should I do?
If your streusel isn’t forming clumps, it needs more moisture. Add an extra tablespoon or two of cold butter and work it in with your fingers until you get nice, clumpy pieces. You can also add a tablespoon of cold water if needed, but usually extra butter does the trick and adds more flavor.
Old-Fashioned Apple Pie Bars with Buttery Streusel Topping
These old-fashioned apple pie bars feature a buttery shortbread crust, tender cinnamon-spiced apples, and a golden streusel topping. Easy to slice and serve, they deliver all the comforting flavors of homemade apple pie in a convenient dessert bar perfect for any occasion.
- Prep Time: 20 minutes
- Cook Time: 55 minutes
- Total Time: 1 hour 15 minutes (plus cooling time)
- Servings: 12 bars
- Difficulty: Easy
- Cuisine: American
- Course: Dessert
Ingredients
For the Crust and Streusel Topping:
- 3 cups all-purpose flour
- 1 cup granulated sugar
- 1 teaspoon baking powder
- 1/2 teaspoon salt
- 1 cup cold unsalted butter, cubed
- 1 large egg
For the Apple Filling:
- 5 cups peeled and diced apples (about 5-6 medium apples)
- 1/2 cup packed brown sugar
- 2 tablespoons cornstarch
- 1 tablespoon lemon juice
- 1 1/2 teaspoons ground cinnamon
- 1/4 teaspoon nutmeg
- 1 teaspoon vanilla extract
Instructions
- Preheat your oven to 350°F (175°C). Line a 9×13-inch baking pan with parchment paper, leaving some overhang on the sides for easy removal.
- In a large bowl, combine the flour, granulated sugar, baking powder, and salt. Add the cubed cold butter and use a pastry cutter or your fingers to work it into the flour mixture until it resembles coarse crumbs.
- Mix in the egg until the mixture just comes together. The texture should be crumbly but hold together when pressed.
- Take about two-thirds of the crumb mixture and press it firmly and evenly into the bottom of the prepared pan. Bake for 15 minutes until just starting to turn golden around the edges.
- While the crust bakes, prepare the apple filling. In a large bowl, toss the peeled and diced apples with brown sugar, cornstarch, lemon juice, cinnamon, nutmeg, and vanilla extract until evenly coated.
- When the crust comes out of the oven, spread the apple filling evenly over the warm crust.
- Take the remaining crumb mixture and sprinkle it evenly over the apple filling, creating a streusel topping. Gently press some of the crumbs together to form larger clumps for texture.
- Return the pan to the oven and bake for 40 to 45 minutes, until the apples are tender when pierced with a knife and the streusel topping is golden brown.
- Remove from the oven and let the bars cool completely in the pan on a wire rack. This is important for the filling to set properly.
- Once completely cool, use the parchment paper overhang to lift the bars out of the pan. Cut into 12 squares using a sharp knife, wiping the blade clean between cuts for the neatest slices.
Recipe Notes
- For best results, use a combination of tart and sweet apples such as Granny Smith and Honeycrisp.
- Make sure the butter stays cold when making the crust and streusel for the best crumbly texture.
- Don’t skip the pre-baking step for the crust—it prevents sogginess.
- Allow the bars to cool completely before cutting for clean slices.
- These bars taste even better the next day after the flavors have melded together.
- Store in an airtight container at room temperature for up to 2 days, or refrigerate for up to 5 days.
- These bars freeze well for up to 3 months when wrapped individually.
Estimated Nutrition Per Serving (1 bar)
- Calories: 385
- Carbohydrates: 58g
- Protein: 4g
- Fat: 16g
- Saturated Fat: 10g
- Fiber: 3g
- Sugar: 32g
- Sodium: 185mg
Nutrition information is estimated and will vary based on exact ingredients and portion sizes.
