
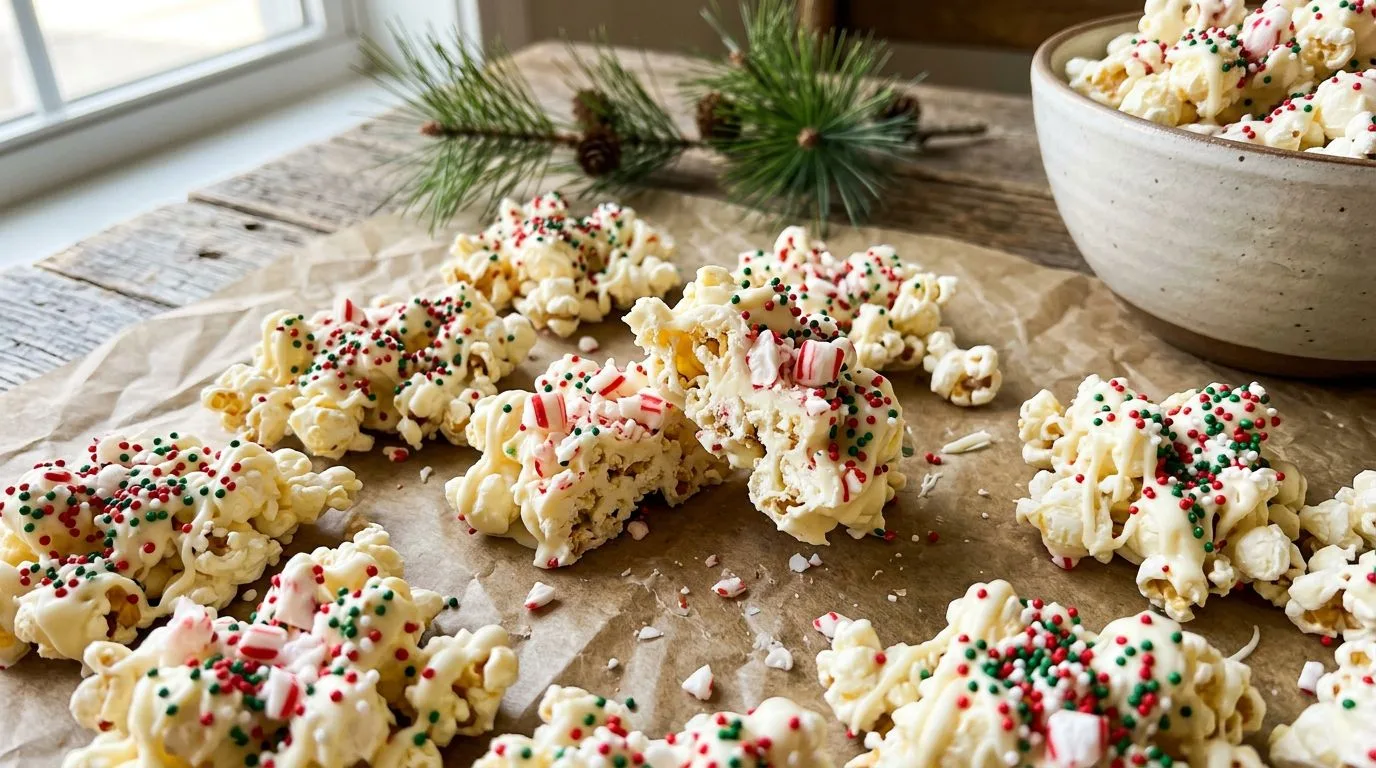
When the holiday season arrives, I love creating festive treats that are as beautiful as they are delicious. This white chocolate Christmas popcorn is one of my absolute favorite no-bake holiday snacks—it’s incredibly easy to make, requires just a handful of ingredients, and delivers that perfect combination of sweet, crunchy, and festive. Freshly popped popcorn gets coated in smooth, creamy white chocolate, then decorated with colorful red and green M&Ms, cheerful Christmas sprinkles, fluffy mini marshmallows, and optional crushed candy canes for a minty twist.
What makes this Christmas popcorn so appealing is how quickly it comes together. In less than 30 minutes from start to finish, you’ll have a gorgeous holiday snack ready for parties, gift-giving, or simply enjoying while watching your favorite Christmas movies. I find that this recipe is perfect for involving kids in the kitchen—they absolutely love sprinkling on all the colorful toppings. Whether you’re hosting a holiday gathering, need a last-minute homemade gift, or want an easy treat to bring to a potluck, this white chocolate Christmas popcorn delivers festive cheer in every crunchy, sweet bite.
Why You’ll Love This White Chocolate Christmas Popcorn
This festive popcorn recipe has become a holiday staple in my kitchen for several wonderful reasons. First and foremost, it’s incredibly simple—you don’t need any special equipment or advanced baking skills. If you can pop popcorn and melt chocolate, you can make this treat successfully. I love that it requires no oven time, which is especially valuable during the busy holiday season when oven space is at a premium.
The flavor and texture combination is absolutely delightful. The light, airy popcorn provides the perfect crunchy base, while the white chocolate adds a rich, creamy sweetness that isn’t overly heavy. The mix-ins bring both visual appeal and additional flavors—the M&Ms add little bursts of chocolate, the marshmallows contribute soft, pillowy sweetness, and the candy canes (if you include them) provide a refreshing minty note that balances the richness beautifully.
I also appreciate how versatile this recipe is for different occasions. Package it in clear cellophane bags tied with festive ribbons for homemade gifts that neighbors and teachers will genuinely appreciate. Serve it in a large bowl at holiday parties where it disappears quickly. Or simply keep a batch on hand for snacking throughout the season. The visual impact is stunning—those bright red and green colors against the white chocolate make it unmistakably festive and Instagram-worthy.
Ingredients and Substitutions
The beauty of this recipe lies in its straightforward ingredient list. Here’s what you’ll need and some helpful substitutions I recommend:
Popped Popcorn: You’ll need 10 cups of plain, unsalted popped popcorn. I prefer using an air popper for the lightest, fluffiest results, but stovetop popping works beautifully too. Just make sure to use plain popcorn without butter or salt—you want a neutral base that lets the white chocolate and toppings shine. Avoid microwave popcorn, as it often contains butter and salt that can interfere with the coating.
White Chocolate Melting Wafers: I use 12 ounces of white chocolate melting wafers (also called candy melts or almond bark). These are specifically formulated to melt smoothly and set up nicely at room temperature. You can substitute with high-quality white chocolate chips, though they may require a bit more care when melting and might benefit from the addition of coconut oil to achieve the right consistency.
Coconut Oil: This optional tablespoon helps thin the melted chocolate slightly, making it easier to drizzle and coat the popcorn evenly. If you prefer, you can use vegetable oil or shortening instead. If your chocolate melts to a nice, pourable consistency on its own, you can skip this entirely.
Red and Green M&Ms: The half cup of holiday-colored M&Ms adds festive color and little pockets of milk chocolate flavor. You can buy special Christmas M&M mixes, or simply pick out red and green candies from a regular bag. For variety, try using mini M&Ms or substitute with other small candies like Reese’s Pieces or holiday-themed chocolate candies.
Christmas Sprinkles: A quarter cup of festive sprinkles adds color, crunch, and holiday spirit. Look for Christmas-themed sprinkle mixes with red, green, and white colors, or snowflake and tree shapes. Regular nonpareils or jimmies work perfectly fine too.
Mini Marshmallows: The half cup of mini marshmallows adds soft, pillowy texture that contrasts beautifully with the crunchy popcorn. Regular-sized marshmallows can be used if you cut them into smaller pieces, though mini marshmallows distribute more evenly throughout the mix.
Crushed Candy Canes: This optional quarter cup adds a wonderful peppermint flavor and beautiful red-and-white streaks. I like to place candy canes in a sealed plastic bag and crush them with a rolling pin or the bottom of a heavy glass. If you’re not a mint fan, simply omit them—the recipe is delicious either way.
How to Make This Recipe
Making this white chocolate Christmas popcorn is wonderfully straightforward. I’ll walk you through each step to ensure perfect results every time.
Prepare Your Workspace: Start by lining two large baking sheets with parchment paper. This prevents sticking and makes cleanup incredibly easy. Having two sheets gives you plenty of space to spread the popcorn in a single layer, which is important for even coating.
Pop the Popcorn: Pop your popcorn using your preferred method—air popper, stovetop, or even plain kernels in a brown paper bag in the microwave. Once popped, carefully go through and remove any unpopped kernels or partially popped pieces. These hard kernels can be unpleasant to bite into and don’t coat well with chocolate. Spread the popcorn evenly across your prepared baking sheets.
Melt the White Chocolate: Place the white chocolate melting wafers in a microwave-safe bowl. Microwave in 20-second intervals, stirring thoroughly after each interval. This gradual approach prevents the chocolate from scorching or seizing. Continue until the chocolate is completely smooth and melted. If the chocolate seems too thick, stir in the tablespoon of coconut oil to achieve a more pourable consistency.
Coat the Popcorn: Working quickly while the chocolate is still fluid, drizzle the melted white chocolate over the popcorn. I like to use a spoon and move it back and forth in a zigzag pattern to distribute the chocolate as evenly as possible. Once drizzled, use clean hands or a large spoon to gently toss the popcorn, ensuring each piece gets coated with chocolate. Don’t worry about perfection—a rustic, uneven coating is part of the charm.
Add the Toppings: Immediately after coating with chocolate (before it sets), sprinkle the red and green M&Ms, Christmas sprinkles, mini marshmallows, and crushed candy canes over the popcorn. Work quickly here, as the chocolate begins setting within a few minutes. Toss everything lightly to distribute the toppings throughout the popcorn.
Let It Set: Allow the chocolate to set completely at room temperature for 20 to 30 minutes. If you’re in a hurry or your kitchen is particularly warm, you can refrigerate the baking sheets for about 10 minutes to speed up the process. Once set, the chocolate should be firm to the touch and no longer tacky.
Break and Serve: Once the chocolate has hardened, break the popcorn into clusters of various sizes. Transfer to a large serving bowl or package into festive gift bags. The popcorn is now ready to enjoy!
Expert Tips for Best Results
After making this recipe many times, I’ve learned a few tricks that ensure the best possible outcome every time.
Use Fresh Popcorn: Pop your popcorn as close to coating time as possible. Fresh popcorn is crispier and coats more evenly than popcorn that’s been sitting around. If you must pop it ahead, store it in an airtight container to maintain crispness.
Don’t Overheat the Chocolate: White chocolate is more delicate than dark or milk chocolate and can seize or become grainy if overheated. The 20-second intervals with thorough stirring are crucial. If your microwave runs hot, try 15-second intervals instead.
Work Quickly with Toppings: White chocolate sets faster than you might expect, especially in a cool kitchen. Have all your toppings measured and ready to go before you start drizzling the chocolate. This ensures you can add everything while the chocolate is still tacky enough to hold the decorations.
Avoid Humid Conditions: Humidity can prevent the chocolate from setting properly and can make the popcorn lose its crispness. If possible, make this recipe on a dry day, or in an air-conditioned kitchen during humid weather.
Customize the Coating Amount: If you prefer a lighter chocolate coating, use 8 to 10 ounces of white chocolate instead of the full 12 ounces. For an extra-decadent version, increase to 14 or 16 ounces. Adjust the coconut oil proportionally if needed.
Prevent Candy Cane Stickiness: Crushed candy canes can become sticky in humid conditions or if stored for extended periods. If you’re making this recipe for gifting or long-term storage, I recommend adding the crushed candy canes just before serving rather than mixing them in initially.
Serving Suggestions
This white chocolate Christmas popcorn is incredibly versatile when it comes to serving. I love setting out a large decorative bowl of this popcorn at holiday parties—it’s a conversation starter and disappears quickly. The festive colors make it a natural fit for Christmas gatherings, but it works beautifully for any winter celebration.
For movie nights during the holiday season, serve this popcorn alongside other sweet and salty snacks. It pairs wonderfully with hot chocolate, apple cider, or even a glass of cold milk. I find that the sweet richness of the white chocolate is nicely balanced by a warm beverage.
This popcorn also makes an excellent addition to dessert tables. Serve it in individual paper cones or small cups for easy grab-and-go portions at buffets or potlucks. The individual servings look charming and prevent people from double-dipping into a communal bowl.
For gift-giving, package the popcorn in clear cellophane bags tied with red or green ribbon. You can also use festive tins, mason jars with holiday fabric on the lids, or decorative boxes. Include a small tag with the recipe name and a warm holiday message. Teachers, neighbors, mail carriers, and coworkers all appreciate this thoughtful homemade gift.
If you’re looking for other festive treats to serve alongside this popcorn, I recommend trying these Christmas sugar cookie bars with vanilla buttercream frosting or these delightful cranberry orange shortbread cookies with orange glaze for a complete holiday dessert spread.
Variations and Substitutions
One of my favorite aspects of this recipe is how easily it adapts to different flavor preferences and dietary needs. Here are some variations I’ve tried and loved:
Dark Chocolate Version: Swap the white chocolate for dark or semi-sweet chocolate for a less sweet, more sophisticated flavor. This works especially well if you’re serving adults who prefer darker chocolate.
Milk Chocolate Option: Use milk chocolate instead of white chocolate for a classic flavor that appeals to everyone, especially kids.
Peppermint Bark Popcorn: Increase the crushed candy canes to half a cup and add a few drops of peppermint extract to the melted white chocolate for an intense peppermint flavor reminiscent of peppermint bark.
Nutty Addition: Toss in half a cup of chopped pecans, almonds, or cashews along with the other toppings for added crunch and richness. Toasting the nuts first enhances their flavor beautifully.
Pretzel Mix: Add a cup of small pretzel pieces for a sweet-and-salty combination that’s absolutely addictive.
Colored Chocolate Drizzle: After the white chocolate sets, drizzle melted red or green candy melts over the top for extra color and visual interest.
Sprinkle Variations: Change up the sprinkles based on the occasion—use red, white, and blue for Fourth of July, pastels for Easter, or orange and black for Halloween. This base recipe works year-round with different color schemes.
Coconut Addition: Sprinkle sweetened shredded coconut over the chocolate-coated popcorn for a tropical twist that pairs beautifully with white chocolate.
Storage, Freezing, and Reheating
Room Temperature Storage: Store the white chocolate Christmas popcorn in an airtight container at room temperature for up to one week. I like to use large plastic containers with tight-fitting lids or resealable plastic bags with as much air pressed out as possible. Keep the container in a cool, dry place away from direct sunlight and heat sources. Proper storage maintains the popcorn’s crispness and prevents the chocolate from melting or becoming sticky.
Refrigerator Storage: While not necessary, you can refrigerate this popcorn in an airtight container for up to two weeks. This is especially helpful in warm climates or during summer months if you want to make a Christmas-in-July treat. Let the popcorn come to room temperature before serving for the best texture and flavor.
Freezing Instructions: This popcorn freezes surprisingly well. Place it in a freezer-safe airtight container or heavy-duty freezer bag, removing as much air as possible. Freeze for up to two months. Thaw at room temperature for about 30 minutes before serving. I don’t recommend freezing popcorn with crushed candy canes, as they can become sticky when thawed—add those fresh if serving previously frozen popcorn.
Maintaining Freshness: The biggest enemy of this popcorn is humidity, which can make it lose its crispness. If your popcorn becomes slightly soft, you can spread it on a baking sheet and place it in a 200°F oven for about 5 minutes to re-crisp it. Let it cool completely before storing again.
Gift Packaging Timeline: If you’re making this popcorn for gifts, I recommend preparing it no more than 3 to 4 days before giving. This ensures maximum freshness and crispness. Package it in airtight bags or containers to maintain quality.
Frequently Asked Questions
Can I use regular white chocolate chips instead of melting wafers?
Yes, you can use white chocolate chips, though they may require a bit more care when melting. White chocolate chips often contain stabilizers that make them hold their shape, so they might not melt as smoothly. Adding the coconut oil helps create a more pourable consistency. High-quality white chocolate bars, chopped into small pieces, also work well.
Why is my white chocolate seizing or becoming lumpy?
White chocolate can seize if it gets too hot or if any water comes into contact with it. Make sure your bowl and utensils are completely dry, and heat the chocolate in short intervals, stirring frequently. If your chocolate does seize, try stirring in a teaspoon of coconut oil or vegetable shortening to smooth it out.
Can I make this popcorn ahead of time?
Absolutely! This popcorn actually stores quite well. Make it up to a week ahead and store it in an airtight container at room temperature. It’s perfect for holiday prep when you want to get some treats made in advance.
How do I prevent the popcorn from getting soggy?
The key is using plain, unsalted popcorn and storing it properly in an airtight container. Avoid adding butter to the popcorn, and make sure the chocolate is completely set before storing. Keep it away from humid environments.
Can I use different colors for other holidays?
Definitely! This recipe is wonderfully adaptable. Use pink and red M&Ms and sprinkles for Valentine’s Day, pastels for Easter, orange and black for Halloween, or red, white, and blue for patriotic holidays. The base recipe remains the same—just change the colors of your mix-ins.
Is there a way to make this recipe dairy-free?
Yes! Use dairy-free white chocolate chips or melting wafers (several brands make these), and substitute the regular M&Ms with a dairy-free candy alternative or simply use more sprinkles and candy canes. Check all ingredient labels to ensure they meet your dietary requirements.
Why did my chocolate not stick to the popcorn well?
This usually happens if the popcorn was oily or if the chocolate was too thick. Make sure you’re using plain, unsalted popcorn without any butter or oil. If the chocolate seems thick, add a bit of coconut oil to thin it to a drizzling consistency.
Can I add food coloring to the white chocolate?
You can, but use oil-based or powder food coloring specifically designed for chocolate. Water-based food coloring will cause the chocolate to seize. Gel food colorings formulated for candy work best.
White Chocolate Christmas Popcorn
Freshly popped popcorn coated in creamy melted white chocolate and decorated with colorful Christmas sprinkles, M&Ms, marshmallows, and candy canes. This easy, festive treat requires no baking and comes together in less than 30 minutes—perfect for holiday parties, gift-giving, or movie night snacking.
- Prep Time: 10 minutes
- Setting Time: 20 minutes
- Total Time: 30 minutes
- Servings: 10 servings
- Difficulty: Easy
- Cuisine: American
- Course: Dessert, Snack
Ingredients
- 10 cups popped popcorn (plain and unsalted)
- 12 oz white chocolate melting wafers
- 1 tbsp coconut oil (optional)
- 1/2 cup red and green M&M candies
- 1/4 cup Christmas sprinkles
- 1/2 cup mini marshmallows
- 1/4 cup crushed candy canes (optional)
Instructions
- Line two large baking sheets with parchment paper and set aside.
- Pop the popcorn using an air popper or stovetop method. Carefully remove and discard any unpopped kernels or partially popped pieces.
- Spread the popcorn evenly across the prepared baking sheets in a single layer.
- Place the white chocolate melting wafers in a microwave-safe bowl. Microwave in 20-second intervals, stirring thoroughly after each interval, until the chocolate is completely smooth and melted.
- If the melted chocolate seems too thick, stir in the coconut oil until well combined and the chocolate reaches a pourable consistency.
- Drizzle the melted white chocolate over the popcorn, moving back and forth to distribute evenly.
- Gently toss the popcorn with clean hands or a large spoon until all pieces are coated with chocolate.
- Immediately sprinkle the red and green M&Ms, Christmas sprinkles, mini marshmallows, and crushed candy canes over the chocolate-coated popcorn.
- Toss lightly to distribute the toppings throughout the popcorn.
- Allow the chocolate to set at room temperature for 20 to 30 minutes, or refrigerate for about 10 minutes to speed up the process.
- Once the chocolate is completely set and firm to the touch, break the popcorn into clusters of various sizes.
- Transfer to a serving bowl or package into festive gift bags. Serve and enjoy!
Recipe Notes
- For the crispiest results, use freshly popped popcorn and avoid any butter or salt.
- White chocolate melting wafers (candy melts) work best for this recipe as they’re formulated to melt smoothly and set firmly at room temperature.
- Work quickly when adding toppings—white chocolate sets faster than dark chocolate, especially in cool kitchens.
- If making this recipe for long-term storage or humid conditions, consider adding crushed candy canes just before serving to prevent stickiness.
- This recipe is easily doubled for larger gatherings or gift-giving.
- Store in an airtight container at room temperature for up to one week, or freeze for up to two months.
Nutrition Information (Per Serving, Estimated)
- Calories: 245
- Carbohydrates: 38g
- Protein: 2g
- Fat: 10g
- Saturated Fat: 7g
- Fiber: 1g
- Sugar: 28g
- Sodium: 45mg
Nutrition information is estimated based on standard ingredient values and serving sizes. Actual nutritional content may vary based on specific brands used and portion sizes.
