
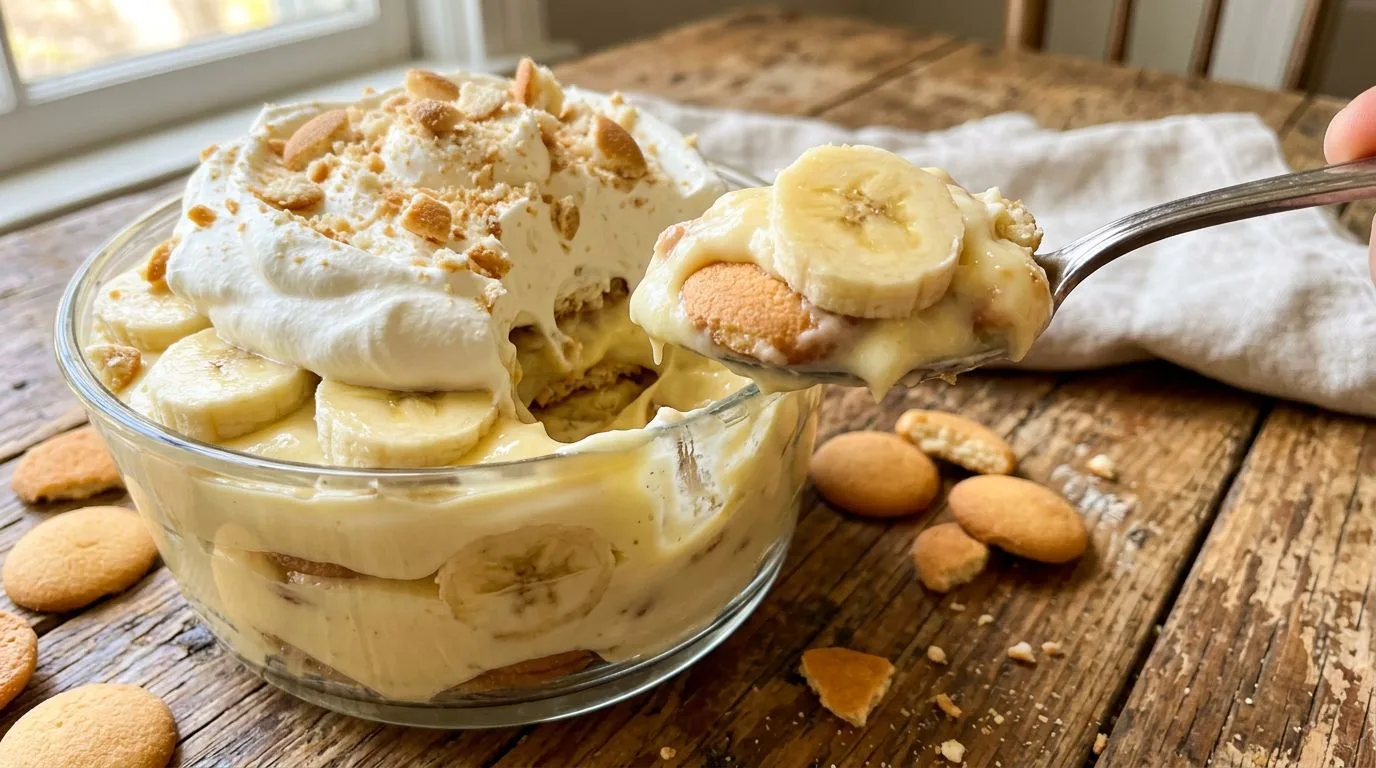
There’s something truly special about Southern banana pudding that makes it a beloved classic at potlucks, church suppers, and family gatherings across the South. I love how this dessert combines simple ingredients—creamy homemade vanilla pudding, crisp Nilla Wafers, fresh banana slices, and fluffy whipped cream—into layers of pure comfort. Unlike many modern shortcuts, this recipe uses a from-scratch pudding that delivers authentic flavor and silky texture that boxed mixes simply can’t match.
What makes this Southern banana pudding so irresistible is the contrast of textures. The vanilla wafers soften just enough to blend with the pudding while maintaining a pleasant bite, the bananas add natural sweetness and creaminess, and the homemade pudding brings everything together with rich vanilla flavor. I find that making the pudding from scratch takes only a few extra minutes but elevates this dessert from good to absolutely unforgettable. Whether you’re serving it at a summer barbecue or a holiday dinner, this classic Southern dessert never fails to disappear quickly.
The beauty of this recipe lies in its make-ahead convenience. Once assembled, the pudding needs at least four hours in the refrigerator for the flavors to meld and the wafers to soften to that perfect consistency. I recommend making it the night before your event, which not only saves time but actually improves the texture and flavor as everything comes together beautifully.
Why You’ll Love This Southern Banana Pudding
This classic dessert has earned its place as a Southern staple for excellent reasons. The homemade vanilla pudding is incredibly creamy and flavorful, far superior to instant pudding mixes. I love that you can taste the real vanilla and the richness from the egg yolks and whole milk. The process of making pudding from scratch might seem intimidating, but it’s actually quite straightforward and requires just a few basic pantry ingredients.
The layering technique creates visual appeal and ensures every spoonful contains all the essential components. Nilla Wafers provide that signature vanilla cookie flavor that’s become synonymous with banana pudding, while fresh bananas add natural sweetness and a creamy texture that complements the pudding perfectly. The whipped cream topping adds a light, airy finish that balances the richness of the pudding layers below.
Another reason I recommend this recipe is its crowd-pleasing nature. I’ve never met anyone who doesn’t enjoy a well-made banana pudding, making it perfect for gatherings where you need to feed a variety of tastes. It’s also wonderfully nostalgic—many people have fond memories of this dessert from childhood, and serving it often sparks happy conversations around the table.
Ingredients and Substitutions
The ingredient list for Southern banana pudding is refreshingly simple, with most items already in your pantry. For the homemade pudding, you’ll need granulated sugar, all-purpose flour, salt, whole milk, egg yolks, unsalted butter, and vanilla extract. The combination of flour and egg yolks creates the perfect thickening base, while the butter adds richness and the vanilla provides that classic flavor.
Whole milk is essential for creating a rich, creamy pudding. I don’t recommend substituting with low-fat or skim milk, as the pudding won’t have the same luxurious texture. If you need a dairy-free version, full-fat coconut milk can work, though the flavor will be noticeably different. The egg yolks are crucial for both thickening and adding richness—there’s no good substitute for them in this traditional recipe.
For the layers, you’ll need an 11-ounce box of Nilla Wafers and five medium ripe bananas. The bananas should be ripe but still firm—not overly soft or brown. I find that bananas with a few brown spots have the best flavor while maintaining enough structure to slice cleanly. If you can’t find Nilla Wafers, other vanilla wafer cookies will work, though the flavor may vary slightly from the traditional version.
The whipped cream topping requires heavy whipping cream and powdered sugar. I prefer making fresh whipped cream rather than using store-bought whipped topping because it tastes significantly better and has a lighter, more natural texture. If you’re in a pinch, you can use stabilized whipped topping, but I strongly encourage trying the homemade version—it only takes a few minutes and makes a noticeable difference.
How to Make Southern Banana Pudding
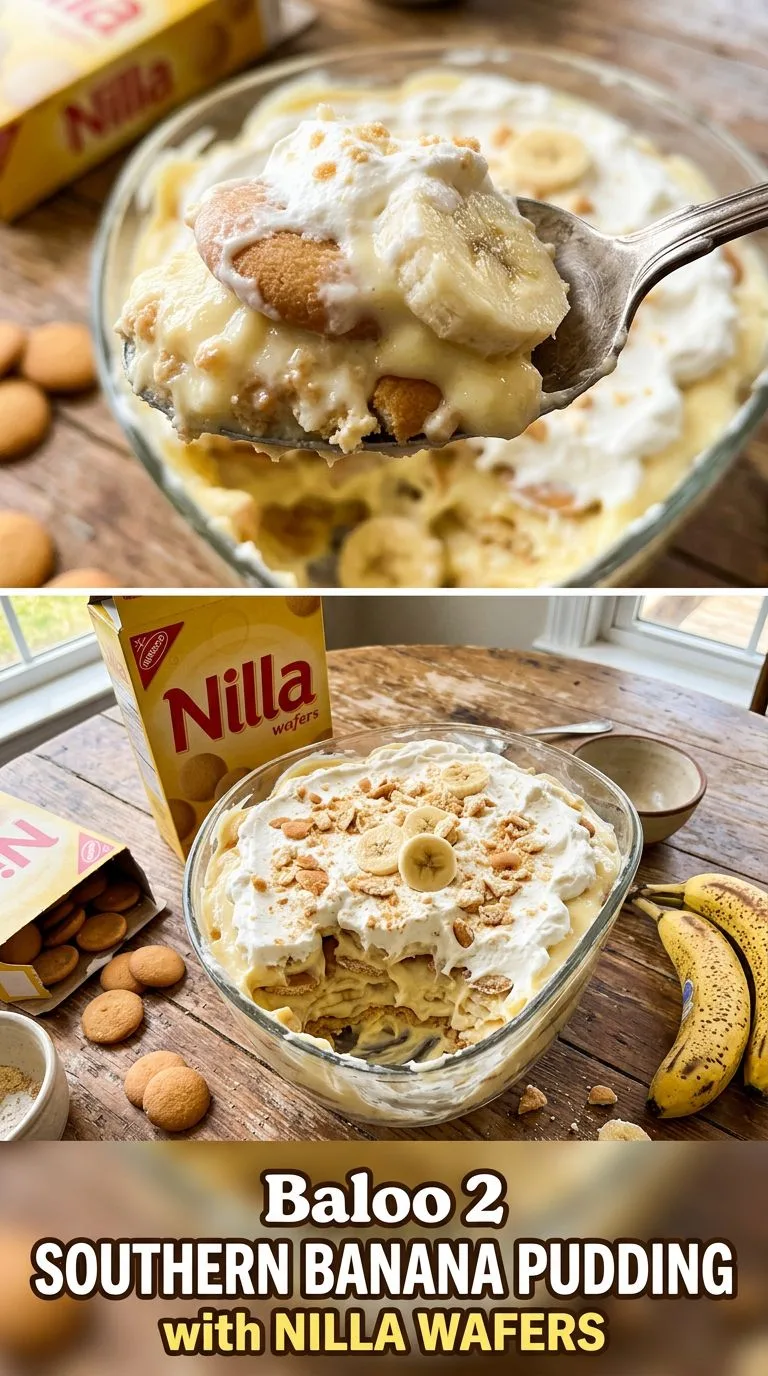
Making this Southern banana pudding from scratch is easier than you might think. The process begins with preparing the homemade vanilla pudding, which forms the heart of this dessert. Start by whisking together the granulated sugar, flour, and salt in a medium saucepan. This dry mixture helps prevent lumps when you add the liquid ingredients. Gradually whisk in the whole milk until the mixture is completely smooth with no flour clumps visible.
Place the saucepan over medium heat and cook the mixture, stirring constantly with a whisk or wooden spoon. This constant stirring is important to prevent scorching on the bottom and to ensure even thickening. As the mixture heats, it will gradually thicken and begin to gently bubble. Once it reaches this stage, reduce the heat to low and continue cooking for one additional minute, still stirring constantly.
The next step involves tempering the egg yolks, which is a technique that prevents them from scrambling when added to the hot pudding. Beat the egg yolks in a separate bowl, then gradually whisk in about one cup of the hot pudding mixture. This slowly raises the temperature of the yolks. Once combined, pour this egg mixture back into the saucepan with the remaining pudding.
Return the saucepan to medium-low heat and cook for two more minutes, stirring constantly, until the pudding is thick and gently bubbling. Remove from heat and stir in the butter and vanilla extract until the butter is completely melted and incorporated. Transfer the pudding to a clean bowl and press plastic wrap directly onto the surface to prevent a skin from forming. Let it cool to lukewarm before assembling the dessert.
To assemble the pudding, arrange a layer of Nilla Wafers on the bottom of a 2½ to 3-quart serving dish. Slice the bananas just before layering to prevent browning. Add a layer of banana slices over the wafers, then spread a portion of the pudding over the bananas. Repeat these layers—wafers, bananas, pudding—until you’ve used all the ingredients, finishing with a layer of pudding on top. Cover the dish and refrigerate for at least four hours or overnight.
Just before serving, prepare the whipped cream topping. Pour the cold heavy whipping cream into a chilled bowl and beat with an electric mixer on medium-high speed. As the cream begins to thicken, add the powdered sugar and continue beating until firm peaks form. Spread the whipped cream over the chilled pudding and serve immediately. For an extra touch, you can garnish with additional Nilla Wafers or banana slices.
Expert Tips for Best Results
The key to perfect homemade pudding is patience and constant stirring. I cannot stress enough how important it is to stir continuously while the pudding cooks. This prevents scorching on the bottom of the pan and ensures smooth, lump-free pudding. If you do notice any lumps forming, whisk vigorously or strain the pudding through a fine-mesh sieve.
When tempering the egg yolks, add the hot pudding very gradually while whisking constantly. If you add it too quickly, you risk scrambling the eggs, which will create an unpleasant texture. I like to add the hot pudding in a slow, steady stream while whisking continuously with my other hand. This technique takes practice but becomes second nature after a few tries.
Slice the bananas just before assembling the pudding to minimize browning. If you need to prepare them slightly ahead, toss the slices gently with a small amount of lemon juice to prevent oxidation. However, I find that assembling the pudding immediately after slicing works best for maintaining the bananas’ fresh appearance and flavor.
The chilling time is not optional—it’s essential for the proper texture and flavor development. During refrigeration, the Nilla Wafers absorb moisture from the pudding and soften to that perfect cake-like consistency that makes this dessert so special. I recommend a minimum of four hours, but overnight is even better if your schedule allows.
For the whipped cream, make sure both your bowl and beaters are very cold. I like to place them in the freezer for 10-15 minutes before whipping. This helps the cream whip faster and achieve better volume. Don’t overbeat the cream, or it will become grainy and eventually turn to butter. Stop beating as soon as firm peaks form.
Serving Suggestions
Southern banana pudding is delicious on its own, but there are several ways to make the presentation even more appealing. I love serving it in a clear glass trifle dish or large glass bowl so guests can see the beautiful layers. Individual serving glasses or mason jars also make charming presentations for parties or picnics, and they’re easy for guests to grab and enjoy.
This dessert pairs wonderfully with strong coffee or sweet tea, both Southern classics that complement the creamy sweetness of the pudding. For a special occasion, you might serve it alongside other Southern favorites like creamy no-bake cheesecake to give guests dessert options.
While banana pudding is traditionally a standalone dessert, you can enhance it with simple garnishes. A sprinkle of crushed Nilla Wafers on top of the whipped cream adds texture and visual interest. Fresh banana slices arranged decoratively on top look beautiful, though they should be added just before serving to prevent browning. A light dusting of cinnamon or a drizzle of caramel sauce can add an extra flavor dimension if you want to get creative.
I find that this dessert works for virtually any occasion—from casual weeknight dinners to elegant holiday gatherings. It’s substantial enough to satisfy after a light meal but not so heavy that it feels overwhelming after a large feast. The make-ahead nature makes it perfect for potlucks and gatherings where you need to prepare food in advance.
Variations and Substitutions
While traditional Southern banana pudding is perfect as written, there are several variations you might enjoy. For a richer version, some cooks add a layer of cream cheese mixture between the pudding layers. Simply beat softened cream cheese with a bit of sweetened condensed milk until smooth and spread it as an additional layer. This creates an even more decadent dessert that’s similar to no-bake pumpkin pie cups in its creamy richness.
For a toasted meringue topping instead of whipped cream, you can make a traditional meringue by beating egg whites with sugar until stiff peaks form, spreading it over the assembled pudding, and browning it under the broiler or with a kitchen torch. This creates a stunning presentation and adds a different textural element. Just watch carefully when browning to prevent burning.
If you want to add more flavor complexity, consider stirring a tablespoon of bourbon or rum into the finished pudding for an adult version. A layer of chocolate pudding alternated with the vanilla creates a banana split-inspired variation. You can also add a layer of crushed pineapple (well-drained) for a tropical twist, though this departs from the traditional Southern version.
For those who prefer a lighter version, you can use reduced-fat milk in the pudding and substitute part of the heavy cream with Greek yogurt in the topping. While this won’t be quite as rich as the traditional recipe, it still delivers good flavor with fewer calories. I recommend trying the classic version first before experimenting with lighter alternatives so you know what you’re aiming for.
Storage, Freezing, and Reheating
Proper storage is important for maintaining the quality of your banana pudding. Once assembled and chilled, the pudding should be covered tightly with plastic wrap or a lid and kept refrigerated. It will stay fresh for up to three days, though I find it’s best within the first two days. After that, the bananas may begin to brown and soften excessively, and the wafers can become too soft.
If you’ve already added the whipped cream topping, the pudding should be consumed within 24 hours for best quality. Whipped cream tends to deflate and become watery over time. For longer storage, I recommend keeping the whipped cream separate and adding it just before serving. The pudding layers without the cream topping will keep well for the full three days.
Freezing banana pudding is not recommended. The bananas will turn brown and mushy when thawed, and the pudding texture will separate and become watery. The whipped cream will also deflate and become grainy. If you need to make dessert well in advance, I suggest preparing the pudding component and freezing it separately, then assembling fresh layers with new bananas and wafers when you’re ready to serve.
This dessert is meant to be served cold, so there’s no reheating involved. Simply remove it from the refrigerator about 10-15 minutes before serving if you prefer it not ice-cold. The flavors are actually more pronounced when the pudding isn’t extremely cold, though many people enjoy it straight from the fridge on a hot summer day.
Frequently Asked Questions
Can I use instant pudding instead of homemade?
While you can use instant pudding for convenience, I strongly recommend making the pudding from scratch for this recipe. The homemade version has a superior flavor and texture that’s worth the extra 15 minutes of effort. Instant pudding tends to have a more artificial taste and a slightly gummy texture that doesn’t compare to the silky smoothness of homemade pudding. If you must use instant, prepare it according to package directions and proceed with the layering as directed.
Why did my pudding turn out lumpy?
Lumpy pudding usually results from not whisking thoroughly when combining the dry ingredients with the milk, or from not stirring constantly during cooking. Make sure to whisk vigorously when adding the milk to the flour mixture, ensuring no dry pockets remain. During cooking, stir continuously to prevent the flour from clumping. If you do end up with lumps, you can strain the pudding through a fine-mesh sieve while it’s still hot to remove them.
How do I prevent the bananas from turning brown?
The best prevention is to slice the bananas just before assembling the pudding and to cover the assembled dessert tightly so no air reaches the banana slices. The pudding itself acts as a barrier to oxygen, which helps. Some people toss banana slices in a small amount of lemon juice, but I find this can affect the flavor. Using bananas that are ripe but still firm also helps—overly ripe bananas brown more quickly.
Can I make this pudding dairy-free?
Making a dairy-free version is challenging because dairy is central to the recipe’s texture and flavor. You could try using full-fat coconut milk in place of the whole milk and coconut cream in place of the heavy cream, but the flavor will be noticeably different with a coconut undertone. Dairy-free butter can replace the regular butter. The result won’t taste exactly like traditional Southern banana pudding, but it can still be delicious in its own right.
What size dish should I use?
A 2½ to 3-quart serving dish works perfectly for this recipe. This could be a 9×13-inch baking dish, a large trifle bowl, or any similar-sized serving vessel. I prefer clear glass dishes so you can see the beautiful layers, but any material works fine. If you’re making individual servings, you can divide the ingredients among 8-10 small glasses or jars.
Can I add other fruits besides bananas?
While bananas are traditional and their flavor pairs perfectly with vanilla wafers and pudding, you can experiment with other fruits. Sliced strawberries work well and add a nice color contrast. Some people enjoy adding a layer of crushed pineapple or fresh berries. However, these variations create a different dessert that’s no longer traditional Southern banana pudding. I recommend trying the classic version first before experimenting with additions.
Southern Banana Pudding with Nilla Wafers
This classic Southern banana pudding features layers of Nilla Wafers, fresh banana slices, homemade vanilla pudding, and fluffy whipped cream. Perfect for potlucks, family gatherings, and special occasions, this make-ahead dessert delivers creamy, comforting flavor in every spoonful.
- Prep Time: 30 minutes
- Cooking Time: 10 minutes
- Chilling Time: 4 hours
- Total Time: 4 hours 40 minutes
- Servings: 10-12
- Difficulty: Medium
- Cuisine: Southern American
- Course: Dessert
Ingredients
For the Pudding:
- 3/4 cup granulated sugar
- 1/3 cup all-purpose flour
- 1/4 teaspoon salt
- 3 cups whole milk
- 3 large egg yolks
- 2 tablespoons unsalted butter
- 2 teaspoons vanilla extract
For the Layers:
- 1 box (11 oz) Nilla Wafers
- 5 medium ripe bananas
For the Topping:
- 1 cup heavy whipping cream
- 2 tablespoons powdered sugar
Instructions
- In a medium saucepan, whisk together the granulated sugar, flour, and salt until well combined. Gradually whisk in the whole milk until the mixture is completely smooth with no lumps.
- Place the saucepan over medium heat and cook, stirring constantly with a whisk or wooden spoon, until the mixture thickens and begins to gently bubble, about 6-8 minutes. Reduce the heat to low and continue cooking for 1 additional minute, stirring constantly.
- In a separate bowl, beat the egg yolks. Gradually whisk in about 1 cup of the hot pudding mixture, adding it in a slow, steady stream while whisking constantly to temper the eggs.
- Pour the egg mixture back into the saucepan with the remaining pudding. Return to medium-low heat and cook, stirring constantly, for 2 minutes until the pudding is thick and gently bubbling.
- Remove the saucepan from heat and stir in the butter and vanilla extract until the butter is completely melted and incorporated. Transfer the pudding to a clean bowl and press plastic wrap directly onto the surface to prevent a skin from forming. Let cool to lukewarm, about 30 minutes.
- To assemble, arrange a layer of Nilla Wafers on the bottom of a 2½ to 3-quart serving dish. Slice the bananas and arrange a layer of banana slices over the wafers. Spread about one-third of the pudding over the bananas.
- Repeat the layers two more times: wafers, bananas, and pudding, finishing with a layer of pudding on top. Cover the dish tightly with plastic wrap and refrigerate for at least 4 hours or overnight.
- Just before serving, prepare the whipped cream topping. In a chilled bowl using an electric mixer, beat the heavy whipping cream on medium-high speed until it begins to thicken. Add the powdered sugar and continue beating until firm peaks form.
- Spread the whipped cream over the chilled pudding. Serve immediately, garnishing with additional Nilla Wafers or banana slices if desired.
Recipe Notes
- Constant stirring while cooking the pudding is essential to prevent scorching and ensure a smooth, lump-free texture.
- Slice bananas just before assembling to minimize browning. Use bananas that are ripe but still firm for best results.
- The pudding must chill for at least 4 hours to allow the wafers to soften properly. Overnight chilling is even better.
- For best results, add the whipped cream topping just before serving. If added too far in advance, it may deflate and become watery.
- Store leftovers covered in the refrigerator for up to 3 days. The pudding is best within the first 2 days.
- For a decorative presentation, reserve a few whole Nilla Wafers to arrange on top of the whipped cream before serving.
Estimated Nutrition (Per Serving)
Based on 12 servings. Values are approximate.
- Calories: 285
- Carbohydrates: 42g
- Protein: 4g
- Fat: 12g
- Saturated Fat: 7g
- Fiber: 1g
- Sugar: 28g
- Sodium: 125mg
