
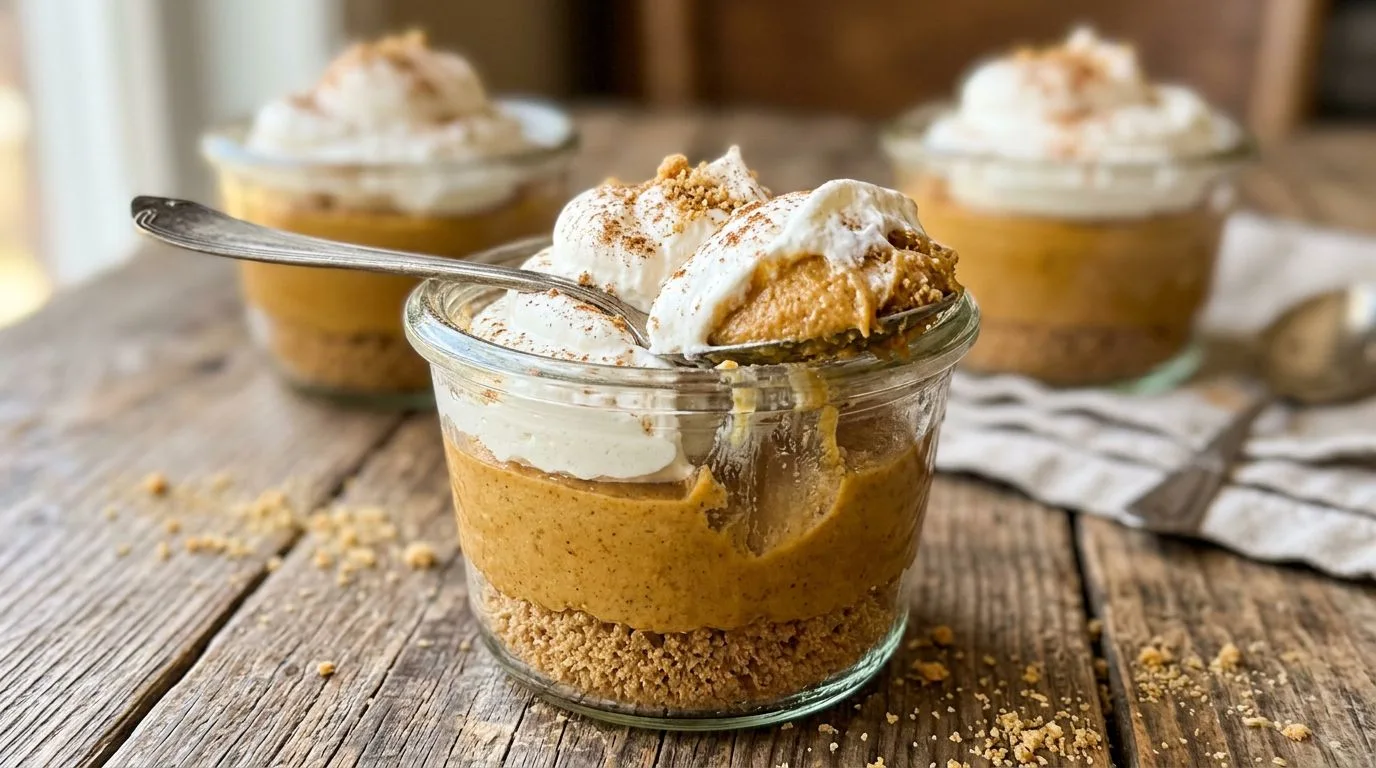
When Thanksgiving rolls around, I’m always looking for desserts that deliver all the cozy pumpkin spice flavor without the stress of oven space or complicated techniques. These no bake pumpkin pie cups are my answer to that challenge. They combine everything I love about traditional pumpkin pie—the warm spices, creamy texture, and buttery graham cracker crust—but they’re assembled in individual serving glasses and require absolutely no baking. The result is an elegant, make-ahead dessert that looks impressive but comes together in about 20 minutes of active work.
I find that serving desserts in individual portions makes entertaining so much easier. There’s no slicing, no mess, and guests can grab their dessert whenever they’re ready. These pumpkin pie dessert cups layer a buttery graham cracker crust with a smooth, spiced pumpkin filling that’s lightened with whipped cream, then topped with a generous dollop of fluffy whipped topping and a sprinkle of cinnamon. They’re rich enough to satisfy but not so heavy that you feel weighed down after a big holiday meal.
What I really appreciate about this recipe is how forgiving it is. You can make these cups up to two days ahead, they travel well if you’re bringing dessert to someone else’s house, and they’re endlessly customizable. Whether you’re hosting a crowd or just want a simple fall dessert for your family, these no bake pumpkin pie cups deliver every time.
Why You’ll Love This Recipe
This recipe checks all the boxes for a successful holiday dessert. First and foremost, it’s incredibly easy. If you can mix ingredients in a bowl and layer them in glasses, you can make these pumpkin pie cups. There’s no pie dough to roll, no oven temperature to worry about, and no risk of a cracked filling or soggy crust.
I love that these dessert cups are completely make-ahead friendly. You can prepare them one or two days before your gathering, which frees up valuable time and oven space on the actual day. They chill beautifully in the refrigerator, and the flavors actually improve as they meld together overnight.
The presentation is another major win. Serving dessert in clear glasses or jars lets everyone see the beautiful layers—the golden graham cracker base, the creamy orange pumpkin filling, and the cloud of whipped cream on top. It looks like you spent hours on these, but your secret is safe with me.
The texture is absolutely perfect. The filling is creamy and smooth like a pumpkin cheesecake mousse, with just the right amount of spice. It’s not overly sweet, which I appreciate after a rich Thanksgiving dinner. The graham cracker crust adds a pleasant crunch and buttery flavor that balances the creamy filling beautifully.
Ingredients and Substitutions
Let me walk you through what you’ll need for these no bake pumpkin pie cups and some helpful substitutions if you need to adapt the recipe.
For the graham cracker crust: You’ll need graham cracker crumbs, melted unsalted butter, and brown sugar. I recommend buying whole graham crackers and crushing them yourself in a food processor or by placing them in a sealed bag and crushing with a rolling pin. Pre-made crumbs work too, but freshly crushed crackers have better texture. If you want to substitute, gingersnap cookies make an excellent alternative and add extra spice. Vanilla wafers or even crushed Biscoff cookies would be delicious too.
For the pumpkin filling: Use pure pumpkin puree, not pumpkin pie filling. The puree is unsweetened and gives you control over the flavor. Cream cheese is essential for the rich, tangy base—make sure it’s fully softened to room temperature so it blends smoothly without lumps. I use brick-style cream cheese, not the spreadable kind. Powdered sugar sweetens the filling and dissolves easily without grittiness. Pumpkin pie spice and cinnamon provide that classic warm flavor, and vanilla extract rounds everything out.
For the whipped cream: Cold heavy whipping cream whips up into soft, fluffy peaks when beaten with a bit of powdered sugar. You can substitute store-bought whipped topping like Cool Whip if you prefer, but I find that freshly whipped cream tastes so much better and isn’t difficult to make.
If you need a lighter version, you can use reduced-fat cream cheese (though I don’t recommend fat-free, as it doesn’t blend as smoothly). For a dairy-free version, coconut cream can replace both the cream cheese and heavy cream, though the flavor will be noticeably different.
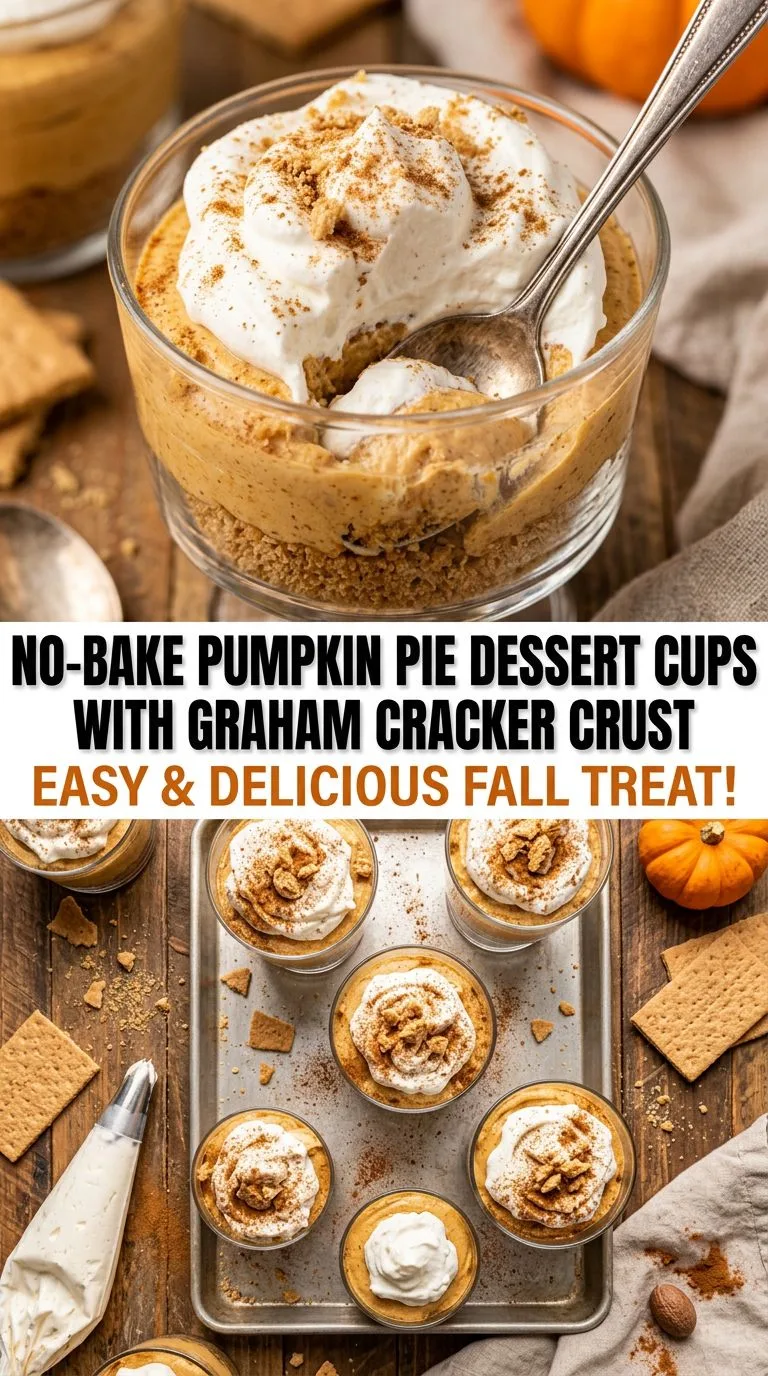
How to Make No Bake Pumpkin Pie Cups
The process for making these pumpkin dessert cups is straightforward and doesn’t require any special equipment beyond a mixing bowl and beaters.
Prepare the crust: Start by combining your graham cracker crumbs with melted butter and brown sugar. Mix everything together until the mixture resembles wet sand and holds together when you squeeze it. The butter binds the crumbs so they form a cohesive crust layer. Spoon about 2 tablespoons of this mixture into the bottom of each dessert cup or glass, then press it down firmly with the back of a spoon or a small glass. You want a compact layer that won’t crumble when you dig in with a spoon.
Make the pumpkin filling: In a large mixing bowl, beat the softened cream cheese with powdered sugar until the mixture is completely smooth and fluffy. This usually takes about 2 minutes with an electric mixer. Scrape down the sides of the bowl to make sure everything is incorporated. Add the pumpkin puree, pumpkin pie spice, cinnamon, and vanilla extract, then beat again until fully combined and smooth. The mixture should be a beautiful orange color with no streaks of white cream cheese remaining.
Whip the cream: In a separate bowl, beat the cold heavy whipping cream with powdered sugar until stiff peaks form. This takes about 3-4 minutes. The cream should hold its shape when you lift the beaters. Gently fold this whipped cream into the pumpkin mixture using a spatula. Use a folding motion rather than stirring to keep the mixture light and airy. Fold until no white streaks remain, but don’t overmix or you’ll deflate the whipped cream.
Assemble the cups: Spoon or pipe the pumpkin filling over the graham cracker crust in each cup. I like to use a piping bag or a large zip-top bag with the corner snipped off for neat, professional-looking layers, but a spoon works perfectly fine too. Fill each cup, leaving a little room at the top for the whipped cream garnish.
Chill and garnish: Cover the cups with plastic wrap or lids and refrigerate for at least 2 hours, or until the filling is set and firm. Just before serving, top each cup with a dollop of whipped cream, a sprinkle of ground cinnamon, and some crushed graham cracker crumbs for extra texture and visual appeal.
Expert Tips for Best Results
I’ve made these pumpkin pie cups many times, and I’ve learned a few tricks that make them turn out perfectly every time.
Soften the cream cheese properly: This is crucial. If your cream cheese is cold, it will form lumps that are difficult to smooth out. Let it sit at room temperature for at least an hour before you start, or cut it into small cubes to speed up the softening process. You can also microwave it in short 10-second bursts, but be careful not to melt it.
Use cold cream for whipping: The opposite is true for the heavy cream—it needs to be very cold to whip properly. I recommend chilling your mixing bowl and beaters in the freezer for 10 minutes before whipping. This helps the cream reach stiff peaks faster and hold its structure better.
Don’t skip the chilling time: While these cups are technically ready to eat as soon as you assemble them, they really benefit from at least 2 hours in the refrigerator. The filling firms up, the flavors meld together, and the crust softens slightly from the moisture, creating a better overall texture.
Choose the right serving vessels: I like to use clear glasses or small mason jars so you can see the pretty layers. Make sure whatever you use has a wide enough opening that you can easily spoon in the filling and eat from it comfortably. Small tumblers, wine glasses, or dessert cups all work beautifully.
Adjust the spice level: If you love a really spiced pumpkin flavor, feel free to increase the pumpkin pie spice or add a pinch of nutmeg or ginger. Taste the filling before you assemble the cups and adjust to your preference.
Serving Suggestions
These no bake pumpkin pie cups are versatile and can be served in several different ways depending on your occasion.
For Thanksgiving dinner, I recommend making them in 6-8 ounce glasses for a generous individual portion. Set them out on a dessert table alongside classic pumpkin pie and other traditional desserts so guests can choose their favorite.
If you’re serving these as part of a dessert buffet with multiple options, smaller 4-ounce portions work well. This allows people to sample several different treats without feeling too full. You can make 10-12 smaller cups from this recipe instead of 6-8 larger ones.
I love garnishing these cups with extra flair for special occasions. Try adding a small gingersnap cookie stuck into the whipped cream, a drizzle of caramel sauce, candied pecans, or even a sprinkle of toffee bits. A small cinnamon stick makes an elegant garnish that also hints at the flavors inside.
These cups pair beautifully with coffee or hot apple cider. The warm beverages complement the cool, creamy dessert perfectly. For an adults-only gathering, a splash of bourbon or rum in the filling adds a sophisticated twist.
Variations and Substitutions
One of the things I appreciate most about this recipe is how easily it adapts to different preferences and dietary needs.
Chocolate pumpkin cups: Add 2 tablespoons of cocoa powder to the pumpkin filling for a chocolate-pumpkin combination. You can also use chocolate graham crackers or crushed Oreos for the crust.
Maple pumpkin version: Replace half of the powdered sugar with pure maple syrup for a lovely maple-pumpkin flavor. This pairs especially well with crushed gingersnap cookies as the crust.
Pumpkin cheesecake cups: For an even richer, more cheesecake-like texture, increase the cream cheese to 12 ounces and reduce the whipped cream to 1 cup. The result will be denser and more indulgent.
Vegan version: Use vegan cream cheese, coconut cream (the thick part from a can of full-fat coconut milk), and coconut whipped cream. The flavor will be different but still delicious.
Gluten-free option: Simply use gluten-free graham crackers or gluten-free gingersnaps for the crust. The rest of the recipe is naturally gluten-free.
Lighter version: Use reduced-fat cream cheese and substitute half of the heavy cream with Greek yogurt. The texture will be slightly different but still creamy and satisfying.
You can also experiment with different crusts entirely. Try crushed pretzels for a sweet-salty combination, vanilla wafers for a milder flavor, or even a pecan-based crust made from ground pecans, butter, and sugar.
Storage, Freezing, and Reheating
These pumpkin pie dessert cups are excellent for making ahead, which is one of their biggest advantages for holiday entertaining.
Refrigerator storage: Store the assembled cups covered in the refrigerator for up to 3 days. I recommend adding the whipped cream garnish, extra graham crumbs, and cinnamon just before serving to keep them looking fresh. The cups themselves can be made 1-2 days ahead without any loss of quality.
Freezing: These cups can be frozen, though the texture of the whipped cream will change slightly upon thawing. If you want to freeze them, assemble the cups without the final whipped cream garnish, cover tightly with plastic wrap and aluminum foil, and freeze for up to 1 month. Thaw overnight in the refrigerator before serving, then add fresh whipped cream on top.
Make-ahead tips: For the best make-ahead strategy, I recommend preparing the graham cracker crust and the pumpkin filling separately up to 2 days in advance. Store the crust mixture in an airtight container at room temperature and the filling covered in the refrigerator. Assemble the cups the day before you plan to serve them, then add the final garnishes just before serving.
If you have leftover filling, it makes an excellent dip for graham crackers or apple slices. The crust mixture can be pressed into a small pan to make graham cracker bars.
Frequently Asked Questions
Can I use pumpkin pie filling instead of pumpkin puree?
I don’t recommend it. Pumpkin pie filling is already sweetened and spiced, which would make your dessert cups too sweet and throw off the flavor balance. Stick with pure pumpkin puree for the best results.
Do I have to use fresh whipped cream?
No, you can use store-bought whipped topping like Cool Whip if you prefer. You’ll need about 2 cups to fold into the filling, plus extra for garnish. The texture will be slightly different, but it’s a convenient shortcut that still tastes good.
Can I make these in a large dish instead of individual cups?
Absolutely! Press the graham cracker crust into the bottom of an 8×8-inch dish, spread the pumpkin filling over it, and top with whipped cream. Chill and cut into squares to serve. It won’t have the elegant individual presentation, but it’s easier for a casual gathering.
How far in advance can I make these?
I recommend making them no more than 2 days ahead. The graham cracker crust will start to soften from the moisture in the filling after that, though they’ll still taste good. For the best texture, 1 day ahead is ideal.
What size glasses should I use?
I typically use 6-8 ounce glasses or jars, which gives you 6-8 servings. If you want smaller portions, use 4-ounce cups and you’ll get 10-12 servings. Just make sure the opening is wide enough to eat from comfortably.
Can I add gelatin to make the filling firmer?
You can, though I don’t find it necessary. If you want a very firm, sliceable filling, you can dissolve 1 teaspoon of unflavored gelatin in 2 tablespoons of warm water and mix it into the cream cheese mixture before folding in the whipped cream.
Why is my filling runny?
This usually happens if the cream cheese wasn’t beaten enough before adding the other ingredients, or if the whipped cream wasn’t whipped to stiff peaks. Make sure your cream cheese is very smooth and fluffy, and that your whipped cream holds its shape firmly before folding them together.
These no bake pumpkin pie cups have become one of my go-to desserts for fall and winter gatherings. They’re elegant enough for Thanksgiving dinner but easy enough for a casual weeknight treat. The combination of creamy pumpkin filling, buttery graham cracker crust, and fluffy whipped cream is simply irresistible. I hope you enjoy them as much as I do, and if you’re looking for more pumpkin desserts, you might also love this creamy pumpkin spice tiramisu for another no-bake option with Italian flair.
No-Bake Pumpkin Pie Dessert Cups with Graham Cracker Crust
These easy no-bake pumpkin pie dessert cups layer buttery graham cracker crumbs with a smooth, creamy pumpkin spice filling and fluffy whipped cream. Served in individual glasses, they make an elegant make-ahead Thanksgiving dessert without using the oven.
- Prep Time: 20 minutes
- Chilling Time: 2 hours
- Total Time: 2 hours 20 minutes
- Servings: 6-8 dessert cups
- Difficulty: Easy
- Cuisine: American
- Course: Dessert
Ingredients
For the Graham Cracker Crust:
- 1 1/2 cups graham cracker crumbs
- 5 tablespoons unsalted butter, melted
- 2 tablespoons brown sugar
For the Pumpkin Filling:
- 1 cup pumpkin puree
- 8 oz cream cheese, softened
- 1/2 cup powdered sugar
- 1 teaspoon pumpkin pie spice
- 1/2 teaspoon cinnamon
- 1 teaspoon vanilla extract
- 1 1/2 cups cold heavy whipping cream
- 1/4 cup powdered sugar (for whipped cream)
For Garnish:
- 1/2 cup crushed graham crackers
- Extra whipped cream
- Ground cinnamon
Instructions
- In a medium bowl, mix together the graham cracker crumbs, melted butter, and brown sugar until the mixture resembles wet sand and holds together when squeezed.
- Spoon about 2 tablespoons of the crumb mixture into the bottom of each dessert cup or glass. Press down firmly with the back of a spoon to create a compact crust layer. Set aside.
- In a large mixing bowl, beat the softened cream cheese and 1/2 cup powdered sugar with an electric mixer on medium speed until completely smooth and fluffy, about 2 minutes. Scrape down the sides of the bowl as needed.
- Add the pumpkin puree, pumpkin pie spice, cinnamon, and vanilla extract to the cream cheese mixture. Beat on medium speed until fully combined and smooth with no streaks remaining, about 1-2 minutes.
- In a separate bowl, beat the cold heavy whipping cream with 1/4 cup powdered sugar on high speed until stiff peaks form, about 3-4 minutes. The whipped cream should hold its shape when you lift the beaters.
- Gently fold the whipped cream into the pumpkin mixture using a spatula, using a folding motion to keep the mixture light and airy. Continue folding until no white streaks remain, being careful not to overmix.
- Spoon or pipe the pumpkin filling into each dessert cup over the graham cracker crust, dividing evenly among the cups. Smooth the tops with a spoon or offset spatula.
- Cover the cups with plastic wrap or lids and refrigerate for at least 2 hours, or until the filling is set and firm.
- Just before serving, top each cup with a dollop of whipped cream, a sprinkle of ground cinnamon, and some crushed graham cracker crumbs for garnish.
Recipe Notes
- Make sure to use pure pumpkin puree, not pumpkin pie filling, which is already sweetened and spiced.
- Cream cheese must be fully softened to room temperature to avoid lumps in the filling.
- For best results, chill your mixing bowl and beaters in the freezer for 10 minutes before whipping the cream.
- These cups can be made 1-2 days ahead. Add the whipped cream garnish just before serving for the freshest appearance.
- You can use store-bought whipped topping (about 2 cups) instead of making fresh whipped cream if you prefer.
- For smaller portions, divide the mixture among 10-12 smaller cups instead of 6-8 larger ones.
- Store covered in the refrigerator for up to 3 days.
Nutrition Information (Per Serving, Estimated)
Based on 8 servings. Values are approximate.
- Calories: 385
- Carbohydrates: 32g
- Protein: 4g
- Fat: 28g
- Saturated Fat: 17g
- Fiber: 1g
- Sugar: 22g
- Sodium: 195mg
