

If you’re looking for a side dish that’s guaranteed to disappear from the table, this Jiffy corn casserole with sour cream is exactly what you need. I love how this recipe transforms a simple box of Jiffy corn muffin mix into a rich, creamy casserole that’s both comforting and crowd-pleasing. The combination of sweet corn, tangy sour cream, and buttery goodness creates a dish that’s become a staple at holiday gatherings across the South.
What makes this corn casserole so special is its incredible texture—it’s somewhere between cornbread and corn pudding, with a moist, almost spoonable consistency that pairs beautifully with everything from roasted turkey to grilled chicken. I find that the sour cream adds a subtle tang that balances the natural sweetness of the corn, while the melted butter ensures every bite is rich and satisfying. Whether you’re planning your Thanksgiving menu or just want an easy weeknight side dish, this recipe delivers big flavor with minimal effort.
This casserole has earned its place as a beloved Southern classic for good reason. It comes together in minutes, requires just a handful of pantry-friendly ingredients, and bakes into a golden, slightly puffed dish that looks as impressive as it tastes. I recommend making this for any occasion where you need a reliable, delicious side that everyone will love.
Why You’ll Love This Jiffy Corn Casserole
This recipe has so much going for it that it’s hard to know where to start. First and foremost, it’s incredibly easy—if you can stir ingredients in a bowl and pour them into a baking dish, you can make this casserole. There’s no complicated technique or special equipment required, which makes it perfect for both experienced cooks and kitchen beginners.
I love how versatile this dish is. It works beautifully as a Thanksgiving side alongside Southern cornbread dressing, but it’s equally at home at a summer barbecue or a casual weeknight dinner. The slightly sweet flavor profile means it complements both savory and smoky dishes, and the creamy texture provides a nice contrast to crispy or grilled foods.
Another reason I recommend this recipe is its make-ahead friendliness. You can assemble the entire casserole several hours in advance, refrigerate it, and then pop it in the oven when you’re ready to serve. This makes holiday meal planning so much easier when you’re juggling multiple dishes. Plus, it reheats beautifully, so leftovers are just as delicious as the first serving.
The ingredient list is wonderfully straightforward, using items you likely already have in your pantry. There’s no hunting for specialty ingredients or making trips to multiple stores. Just grab a box of Jiffy mix, a couple cans of corn, and some basic dairy products, and you’re ready to go.
Ingredients and Substitutions
Let me walk you through what you’ll need for this delicious corn casserole and offer some helpful substitutions if you need to work with what you have on hand.
Jiffy Corn Muffin Mix: This is the foundation of the recipe, providing structure, sweetness, and that classic corn muffin flavor. The 8.5-ounce box is the standard size. I don’t recommend substituting with another brand, as Jiffy has a unique texture and sweetness that really makes this dish work. If you absolutely must substitute, use another corn muffin mix but be aware the results may vary slightly.
Whole Kernel Corn: The 15-ounce can adds texture and bursts of sweet corn throughout the casserole. Make sure to drain it well before adding. You can use frozen corn that’s been thawed and drained, or even fresh corn cut from the cob if you have it available. I find that canned corn works perfectly well and is the most convenient option.
Cream-Style Corn: This 14.75-ounce can provides moisture and creaminess to the casserole. It’s essential for achieving that pudding-like texture. I don’t recommend substituting this ingredient, as it really defines the character of the dish.
Sour Cream: One cup of sour cream adds tanginess and richness. You can substitute with Greek yogurt if you prefer, though the flavor will be slightly different. Full-fat sour cream gives the best results, but light sour cream will work in a pinch.
Butter: Half a cup of melted butter adds richness and helps create that golden top. I recommend using unsalted butter so you can control the salt level. You can substitute with margarine if necessary, though butter provides superior flavor.
Eggs: Two large eggs help bind everything together and provide structure. They’re essential for the casserole to set properly, so I don’t recommend omitting them.
Cheddar Cheese: The optional half cup of shredded cheddar adds a savory element and creates little pockets of melted cheese throughout. You can use sharp or mild cheddar depending on your preference, or try Monterey Jack or Colby for a different flavor profile.
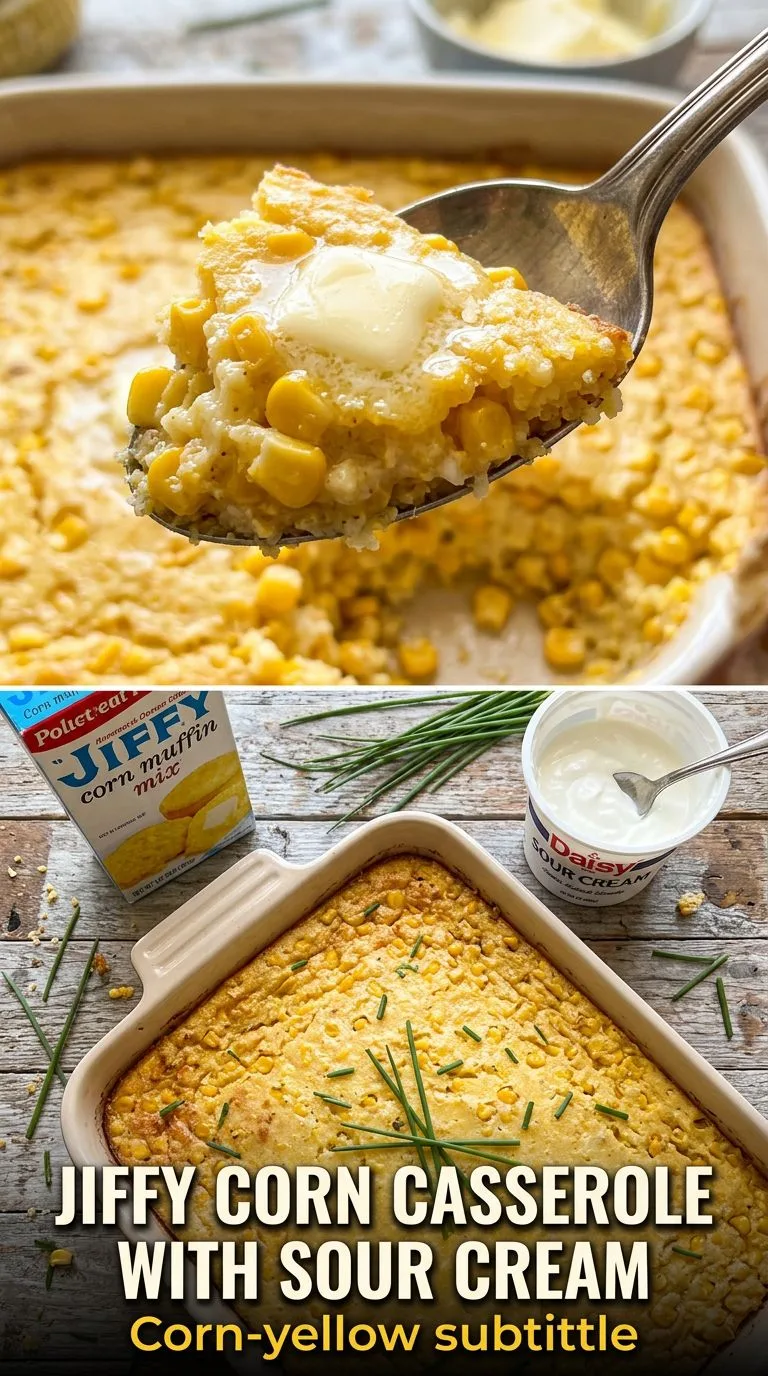
How to Make Jiffy Corn Casserole with Sour Cream
Making this casserole is wonderfully straightforward, but I’ll walk you through each step to ensure perfect results every time.
Start by preheating your oven to 350°F (175°C). This temperature is ideal for baking the casserole evenly without drying it out or leaving the center undercooked. While the oven heats, grease a 9×13-inch baking dish with butter or cooking spray. I like to use butter for extra flavor, but any method that prevents sticking will work.
In a large mixing bowl, combine all your ingredients. Add the Jiffy corn muffin mix straight from the box, the drained whole kernel corn, the entire can of cream-style corn, the sour cream, and the melted butter. Crack your eggs into a small bowl, beat them lightly with a fork, and then add them to the mixture. If you’re using cheddar cheese, you can add it now or fold it in at the end—either way works perfectly.
Stir everything together until the ingredients are evenly combined. I recommend using a wooden spoon or rubber spatula and mixing with gentle, deliberate strokes. You want everything incorporated, but you don’t want to overmix, which can make the casserole tough. The batter will be quite wet and pourable, which is exactly what you want.
Pour the mixture into your prepared baking dish and spread it evenly with a spatula. The batter should fill the dish to about halfway or slightly more. Don’t worry if it looks very liquid—it will set beautifully as it bakes.
Place the dish in your preheated oven and bake uncovered for 40 to 50 minutes. The casserole is done when the center is set and no longer jiggles when you gently shake the pan, and the top has turned a lovely light golden brown. A toothpick inserted in the center should come out mostly clean, though a few moist crumbs are fine.
Once baked, remove the casserole from the oven and let it rest for 5 to 10 minutes before serving. This resting time allows the casserole to firm up slightly, making it easier to serve and ensuring the best texture.
Expert Tips for Best Results
After making this casserole many times, I’ve learned a few tricks that ensure perfect results every time.
First, make sure your butter is fully melted but not scorching hot when you add it to the mixture. If it’s too hot, it can start to cook the eggs prematurely, creating an uneven texture. I like to melt the butter and then let it cool for a minute or two before adding it to the bowl.
Don’t skip draining the whole kernel corn. That extra liquid can make the casserole too wet and prevent it from setting properly. Give the can a good shake in the strainer to remove as much moisture as possible.
When checking for doneness, look for a set center and a golden top. The casserole will puff up slightly during baking and may settle a bit as it cools—this is completely normal. If the top is browning too quickly but the center isn’t set, tent the dish loosely with aluminum foil for the remaining baking time.
I find that using room temperature eggs and sour cream helps everything combine more smoothly. If your ingredients are very cold from the refrigerator, let them sit out for 15-20 minutes before mixing.
For the best flavor, use real butter rather than margarine or oil substitutes. The butter contributes significantly to the rich, comforting taste that makes this casserole so special.
If you’re adding cheese, I recommend folding it in gently at the end rather than stirring vigorously. This helps distribute it evenly without overmixing the batter.
Serving Suggestions
This Jiffy corn casserole is incredibly versatile and pairs beautifully with a wide variety of main dishes. I love serving it alongside roasted turkey or baked ham during the holidays—the slightly sweet flavor complements savory meats perfectly. It’s also wonderful with fried chicken, grilled pork chops, or barbecued ribs.
For a complete Southern-style meal, serve this casserole with green beans, collard greens, or a fresh garden salad. The creamy, rich texture of the corn casserole provides a nice contrast to crisp vegetables. It also works beautifully alongside other comfort food favorites like mashed potatoes or Mexican street corn soup for a corn-themed feast.
I find this casserole is substantial enough to serve as part of a vegetarian meal when paired with other hearty sides. Consider serving it with roasted vegetables, a bean dish, and a fresh salad for a satisfying meatless dinner.
For holiday gatherings, this casserole is perfect for buffet-style serving. It holds its shape well when scooped, travels easily to potlucks, and stays warm for a reasonable amount of time. I like to serve it directly from the baking dish for a rustic, homestyle presentation.
Don’t forget about breakfast and brunch! This casserole makes a surprisingly delicious addition to a brunch spread, especially when served alongside scrambled eggs, bacon, and fresh fruit.
Variations and Substitutions
While this recipe is delicious as written, there are several ways you can customize it to suit your preferences or dietary needs.
For a spicier version, add a 4-ounce can of diced green chiles or a diced jalapeño pepper to the mixture. The heat pairs wonderfully with the sweetness of the corn. You can also sprinkle some cayenne pepper or hot sauce into the batter for a subtle kick.
If you want to make this casserole more savory and less sweet, reduce the amount of cream-style corn and increase the whole kernel corn. You can also add sautéed onions, bell peppers, or scallions for extra flavor and texture.
For a Mexican-inspired twist, add a teaspoon of cumin, some chopped cilantro, and substitute pepper jack cheese for the cheddar. You can also stir in some black beans or corn kernels that have been roasted with chili powder.
To make this dish a bit lighter, you can use reduced-fat sour cream and cut the butter down to 1/3 cup. The texture will be slightly less rich, but it will still be delicious. You can also use egg substitute in place of whole eggs if you’re watching cholesterol.
For added crunch, sprinkle crushed crackers, panko breadcrumbs, or additional shredded cheese on top during the last 10 minutes of baking. This creates a nice textural contrast with the creamy interior.
Some people like to add a small can of diced tomatoes with green chiles for a Southwestern flair, or stir in some cooked, crumbled bacon for a smoky flavor. Fresh or frozen corn kernels can replace the canned corn if you prefer a less processed option.
Storage, Freezing, and Reheating
This corn casserole stores beautifully, making it perfect for meal prep or enjoying leftovers throughout the week.
To store leftovers, let the casserole cool completely to room temperature, then cover the baking dish tightly with plastic wrap or aluminum foil. You can also transfer portions to airtight containers. The casserole will keep in the refrigerator for up to 4 days. I find that the flavors actually develop and deepen slightly after a day in the fridge.
For freezing, I recommend using a freezer-safe baking dish or dividing the casserole into individual portions in freezer-safe containers. Wrap everything tightly with plastic wrap and then aluminum foil to prevent freezer burn. Properly stored, the casserole will maintain good quality for up to 3 months in the freezer. Label the container with the date so you remember when you made it.
To reheat refrigerated casserole, cover it with foil and warm it in a 350°F oven for about 20-25 minutes, or until heated through. You can also reheat individual portions in the microwave for 1-2 minutes, stirring halfway through. If the casserole seems dry after reheating, I like to add a small pat of butter on top or drizzle with a little milk before warming.
For frozen casserole, the best method is to thaw it overnight in the refrigerator and then reheat as you would refrigerated leftovers. If you’re in a hurry, you can reheat from frozen—just add an extra 15-20 minutes to the reheating time and keep it covered with foil to prevent the top from over-browning while the center warms through.
You can also assemble this casserole completely and freeze it unbaked. Prepare the dish as directed but don’t bake it. Cover tightly and freeze for up to 2 months. When ready to serve, thaw overnight in the refrigerator and bake as directed, adding an extra 5-10 minutes to the baking time if needed.
Frequently Asked Questions
Can I make this casserole ahead of time?
Yes, absolutely! You can assemble the entire casserole up to 24 hours in advance. Mix all the ingredients, pour into your greased baking dish, cover tightly with plastic wrap, and refrigerate. When you’re ready to bake, remove the plastic wrap and bake as directed. You may need to add 5-10 minutes to the baking time since the casserole will be starting from a cold temperature.
Why is my corn casserole runny?
If your casserole is runny, it likely needs more baking time. The center should be completely set before you remove it from the oven. Make sure you’re draining the whole kernel corn well, as excess liquid can contribute to a runny texture. Also, check that you’re using the correct size of Jiffy mix box (8.5 ounces) and measuring your ingredients accurately.
Can I use fresh corn instead of canned?
Yes, you can substitute fresh corn for the whole kernel corn. You’ll need about 1.5 to 2 cups of fresh corn kernels cut from the cob. However, I still recommend using canned cream-style corn, as it’s difficult to replicate that texture with fresh corn. The cream-style corn is essential for the proper consistency of the casserole.
Can I make this without eggs?
Eggs are important for binding and structure in this recipe, so I don’t recommend omitting them. However, if you have an egg allergy, you can try using a commercial egg replacer following the package directions for 2 eggs. The texture may be slightly different, but it should still work reasonably well.
How do I know when the casserole is done?
The casserole is done when the center is set and doesn’t jiggle when you gently shake the pan, and the top is lightly golden brown. A toothpick or knife inserted in the center should come out mostly clean. The casserole will puff up slightly during baking and may settle as it cools, which is normal.
Can I double this recipe?
Yes, you can easily double this recipe for a crowd. Use two 9×13-inch baking dishes or one very large roasting pan. Keep in mind that if you use a deeper dish, you may need to increase the baking time by 10-15 minutes. Always check for doneness by testing the center.
What can I serve with corn casserole?
Corn casserole pairs beautifully with roasted meats like turkey, ham, chicken, or pork. It’s also delicious alongside barbecued ribs, grilled steaks, or fried chicken. For a complete meal, serve it with green vegetables, a fresh salad, and your favorite protein.
Can I use Greek yogurt instead of sour cream?
Yes, you can substitute plain Greek yogurt for the sour cream. Use the same amount (1 cup) and choose full-fat Greek yogurt for the best results. The flavor will be slightly tangier, but it works well in this recipe.
Jiffy Corn Casserole with Sour Cream
This easy Jiffy corn casserole with sour cream is a moist, buttery, and slightly sweet Southern side dish that’s perfect for holidays and family dinners. With just a handful of simple ingredients and minimal prep time, you’ll have a golden, creamy casserole that everyone will love.
- Prep Time: 10 minutes
- Cook Time: 45 minutes
- Resting Time: 5 minutes
- Total Time: 1 hour
- Servings: 12 servings
- Difficulty: Easy
- Cuisine: American, Southern
- Course: Side Dish
Ingredients
- 1 box Jiffy corn muffin mix (8.5 oz)
- 1 can whole kernel corn (15 oz, drained)
- 1 can cream-style corn (14.75 oz)
- 1 cup sour cream
- 1/2 cup melted butter
- 2 large eggs
- 1/2 cup shredded cheddar cheese (optional)
Instructions
- Preheat your oven to 350°F (175°C). Grease a 9×13-inch baking dish with butter or cooking spray and set aside.
- In a large mixing bowl, combine the Jiffy corn muffin mix, drained whole kernel corn, cream-style corn, sour cream, and melted butter.
- In a small bowl, beat the eggs lightly with a fork, then add them to the corn mixture.
- Stir all ingredients together until evenly combined, being careful not to overmix. The batter will be quite wet and pourable.
- If using cheddar cheese, gently fold it into the mixture.
- Pour the mixture into the prepared baking dish and spread it evenly with a spatula.
- Bake uncovered for 40-50 minutes, until the center is set and no longer jiggles, and the top is lightly golden brown. A toothpick inserted in the center should come out mostly clean.
- Remove from the oven and let the casserole rest for 5-10 minutes before serving. This allows it to firm up slightly for easier serving.
Recipe Notes
- Make sure to drain the whole kernel corn well to prevent excess moisture in the casserole.
- The casserole will puff up slightly during baking and may settle as it cools—this is completely normal.
- For best results, use full-fat sour cream and real butter rather than substitutes.
- If the top is browning too quickly but the center isn’t set, tent the dish loosely with aluminum foil.
- This casserole can be assembled up to 24 hours in advance and refrigerated until ready to bake.
- Leftovers can be stored covered in the refrigerator for up to 4 days.
- The casserole freezes well for up to 3 months when properly wrapped.
Nutrition Information (Per Serving, Estimated)
- Calories: 215
- Carbohydrates: 24g
- Protein: 4g
- Fat: 12g
- Saturated Fat: 7g
- Fiber: 2g
- Sugar: 7g
- Sodium: 380mg
Nutrition information is estimated based on standard ingredient measurements and may vary based on specific products used and serving sizes.
