
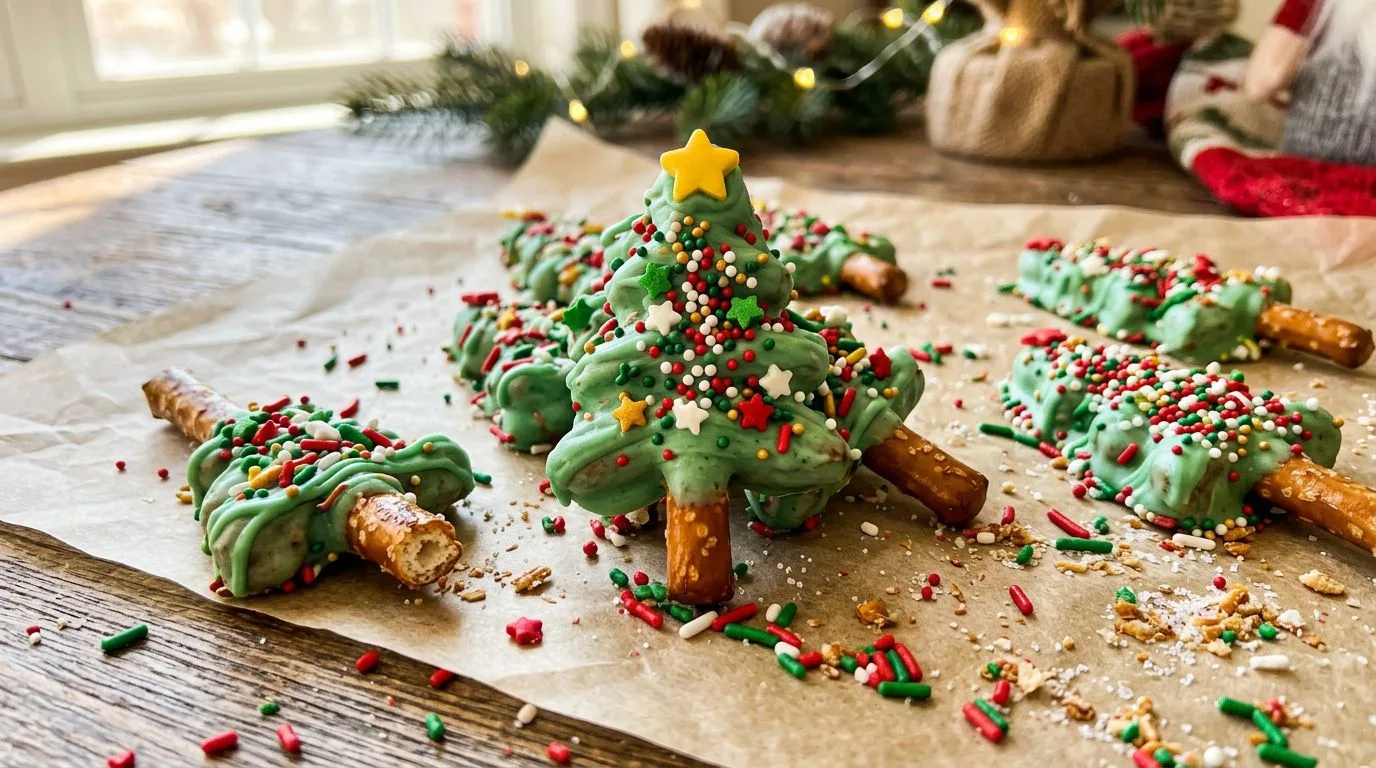
When the holiday season arrives, I love creating festive treats that are as fun to make as they are to eat. These chocolate-dipped pretzel Christmas trees combine the satisfying crunch of pretzel rods with sweet green candy coating and colorful sprinkles to create adorable edible decorations. They’re perfect for holiday parties, cookie exchanges, or simply enjoying with family while decorating the house.
What makes these pretzel Christmas trees so appealing is their simplicity. You don’t need any baking skills or special equipment—just a few ingredients and a little creativity. I find that kids especially love helping with these, making them an excellent activity for families during the busy Christmas season. The combination of salty pretzels and sweet chocolate creates an irresistible flavor contrast that keeps everyone coming back for more.
Whether you’re looking for a last-minute holiday treat, a homemade gift idea, or simply want to add something festive to your dessert table, these chocolate-dipped pretzel Christmas trees deliver on all fronts. They look impressive but require minimal effort, making them ideal for busy home cooks who still want to create something special.
Why You’ll Love This Recipe
These chocolate-dipped pretzel Christmas trees have become one of my go-to holiday treats for several compelling reasons. First and foremost, they require absolutely no baking. During the hectic holiday season when your oven is already working overtime, having a no-bake option is incredibly valuable. You can make these on the stovetop or in the microwave in less than 30 minutes from start to finish.
I love how customizable these pretzel trees are. While the basic recipe calls for green candy melts and Christmas sprinkles, you can easily adapt the decorations to match your party theme or personal preferences. The visual appeal is another major advantage—these treats look like you spent hours crafting them, but the reality is much simpler. They make beautiful additions to holiday dessert platters and gift boxes.
The flavor combination is another winner. The salty crunch of the pretzel rod provides the perfect contrast to the sweet candy coating. It’s that classic sweet-and-salty combination that keeps people reaching for just one more. I also appreciate that these treats hold up well at room temperature, making them ideal for shipping to distant friends and family or setting out at parties without worrying about melting or spoiling.
Ingredients and Substitutions
The ingredient list for chocolate-dipped pretzel Christmas trees is refreshingly short and straightforward. Let me walk you through each component and discuss some substitution options that work well.
Pretzel rods form the foundation of these treats. Their straight shape and sturdy structure make them ideal for decorating. I recommend using standard pretzel rods rather than thin pretzel sticks, as they provide a better surface for the candy coating and are easier to handle. If you can’t find pretzel rods, thick pretzel sticks can work, though they may be slightly more fragile.
Green candy melts create the Christmas tree appearance. I prefer candy melts over regular chocolate because they’re specifically formulated for coating and decorating—they melt smoothly, set quickly, and maintain their color beautifully. If you can’t find green candy melts, you can use white candy melts and add green food coloring, though the color may not be quite as vibrant. Regular green chocolate chips will also work, though they may require a small amount of vegetable oil or shortening to achieve the right consistency for piping.
Christmas sprinkles add festive color and texture. I like to use a mix of red, white, and green sprinkles, along with small nonpareils and jimmies. Feel free to choose any combination that appeals to you—silver dragées, snowflake sprinkles, or even edible glitter can create beautiful effects.
Yellow star-shaped sprinkles serve as the tree topper. If you can’t find star-shaped sprinkles, you can use yellow nonpareils, small yellow candies, or even pipe a small star using yellow candy melts. The star is a small detail, but it really completes the Christmas tree look.
White chocolate is optional but adds a lovely “snow” effect. You can use white candy melts, white chocolate chips, or even a white chocolate baking bar. This step is purely decorative, so feel free to skip it if you prefer a simpler look.
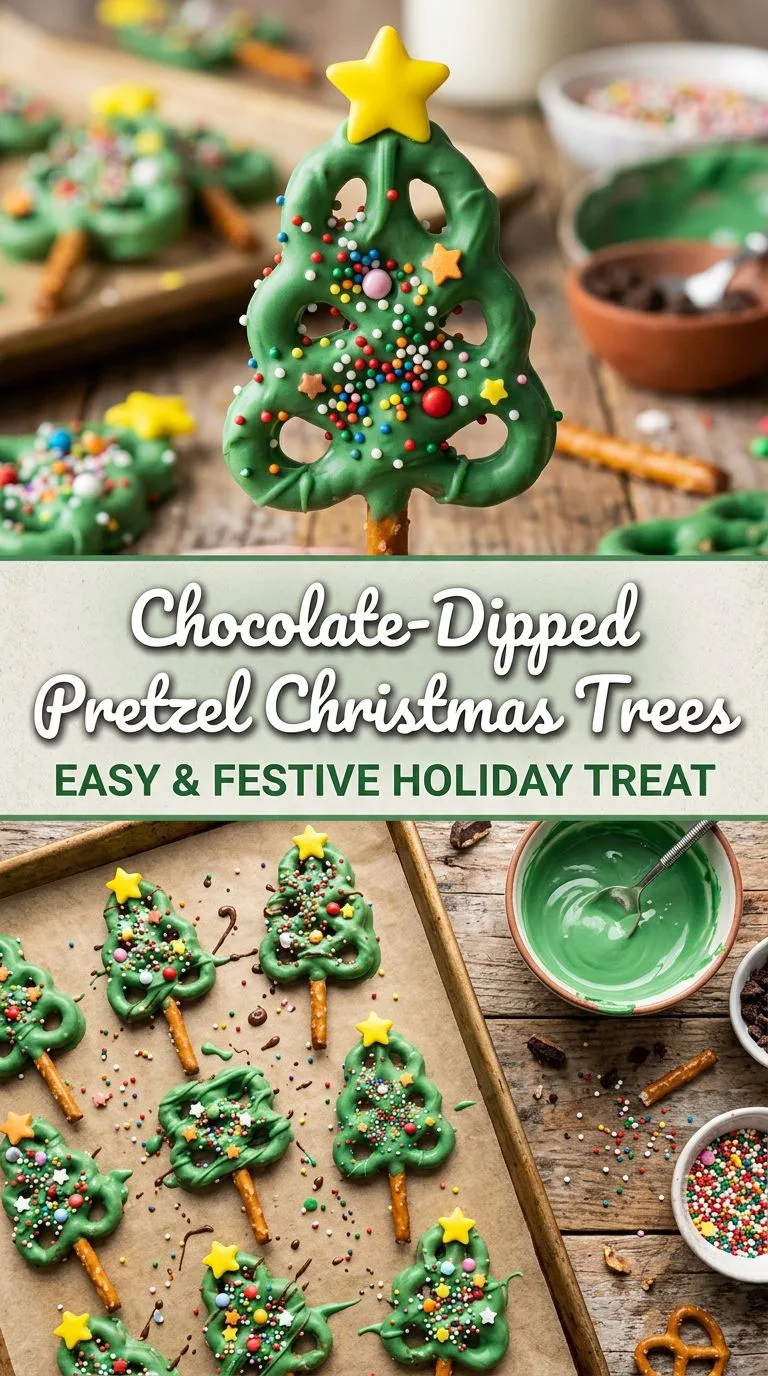
How to Make Chocolate-Dipped Pretzel Christmas Trees
Making these festive pretzel treats is remarkably straightforward. I recommend reading through all the steps before beginning so you can work efficiently while the candy coating is at the right temperature.
Start by preparing your workspace. Line a large baking sheet with parchment paper—this prevents the candy coating from sticking and makes cleanup much easier. Make sure you have enough space to arrange all 20 pretzel rods with several inches between them, as the candy coating will spread slightly as you pipe it.
Next, melt the green candy melts. I find the microwave method most convenient: place the candy melts in a microwave-safe bowl and heat in 20-second intervals, stirring thoroughly after each interval. This gradual heating prevents scorching and ensures smooth, evenly melted candy. The candy is ready when it’s completely smooth and flows easily off your spoon. If it seems too thick for piping, you can add a small amount of vegetable oil or shortening (about 1 teaspoon at a time) to thin it slightly.
Transfer the melted candy to a piping bag or a zip-top plastic bag with a small corner cut off. I prefer using a zip-top bag for this project because it’s disposable and easy to control. Cut only a small corner initially—you can always make the opening larger if needed, but you can’t make it smaller.
Arrange your pretzel rods on the prepared parchment paper, spacing them several inches apart. Now comes the fun part: piping the Christmas tree shape. Start near the top of each pretzel rod and pipe the melted green candy in a zigzag pattern, moving down the pretzel. The key is to gradually widen your zigzag as you move toward the bottom, creating a triangular tree shape. I like to leave the bottom 2-3 inches of the pretzel rod uncoated to serve as the “trunk.”
Immediately after piping each tree, sprinkle it with your assorted Christmas sprinkles while the candy coating is still wet. This ensures the sprinkles adhere properly. Place a yellow star sprinkle at the very top of each tree to complete the look. Work quickly, as the candy coating begins to set within a minute or two.
If you’re adding the optional white chocolate “snow,” melt the white chocolate using the same method as the green candy melts. Transfer it to another piping bag or zip-top bag and drizzle it lightly over the completed trees in a random pattern to resemble snow.
Once all the trees are decorated, refrigerate the entire baking sheet for 10-15 minutes. This chilling time ensures the candy coating hardens completely and makes the treats easier to handle. After chilling, carefully peel the pretzel trees off the parchment paper. They should release easily—if they stick, they may need a few more minutes in the refrigerator.
Expert Tips for Best Results
After making many batches of these chocolate-dipped pretzel Christmas trees, I’ve learned several tricks that ensure consistent, beautiful results every time.
First, temperature control is crucial when working with candy melts. If the candy becomes too cool while you’re working, it will thicken and become difficult to pipe. I recommend melting the candy in smaller batches if you’re new to this technique, or keeping a bowl of hot water nearby to set your candy bowl over if it starts to thicken. Just be careful not to get any water in the candy, as this will cause it to seize.
When piping the tree shape, I find it helpful to practice the zigzag motion a few times in the air before touching the pretzel. This helps you develop a rhythm and ensures more consistent results. Don’t worry if your first few trees aren’t perfect—they’ll still taste delicious, and you’ll improve quickly with practice.
For the most professional-looking results, try to maintain consistent spacing in your zigzag pattern. I like to think of it as creating horizontal “branches” that get progressively longer as I move down the pretzel. Starting with smaller zigzags at the top and gradually increasing the width creates a natural tree shape.
Apply sprinkles generously while the candy coating is still wet. I like to hold each pretzel over a bowl or plate while sprinkling so I can catch and reuse any excess sprinkles. This minimizes waste and keeps your workspace cleaner.
If you’re making these with children, consider setting up an assembly line. One person can pipe the trees while another adds the sprinkles and stars. This keeps the process moving smoothly and ensures the candy coating doesn’t harden before the decorations are applied.
For gift-giving, I recommend waiting until the candy coating is completely set before packaging. Place the pretzel trees in cellophane bags tied with festive ribbon, or arrange them in decorative tins with parchment paper between layers to prevent sticking.
Serving Suggestions
These chocolate-dipped pretzel Christmas trees are incredibly versatile when it comes to serving. I love displaying them upright in a tall glass or vase filled with sugar or white rice to hold them in place—this creates a beautiful “forest” effect that serves as both decoration and dessert.
For holiday parties, arrange the pretzel trees on a festive platter alongside other Christmas treats like Christmas sugar cookie bars with vanilla buttercream frosting or cranberry orange shortbread cookies with orange glaze. The variety of textures and flavors creates an appealing dessert spread.
I find these pretzel trees work wonderfully as place settings for holiday dinners. Simply wrap each one in clear cellophane and tie it with a ribbon that matches your table décor, then place one at each guest’s seat. It’s a festive touch that doubles as a party favor.
For a fun dessert station, set out plain pretzel rods alongside bowls of melted candy melts in different colors, various sprinkles, and other decorations. Let guests create their own pretzel trees—it’s an activity that works well for both children’s parties and adult gatherings.
These treats also pair beautifully with hot beverages. I particularly enjoy them with hot chocolate, coffee, or spiced cider. The salty-sweet combination complements warm drinks perfectly.
Variations and Substitutions
While the classic green Christmas tree version is always popular, I love experimenting with different variations of this recipe to keep things interesting.
For a winter wonderland theme, use white or light blue candy melts instead of green, and decorate with silver dragées and white sprinkles. These “snowy trees” look elegant and sophisticated.
You can create rainbow Christmas trees by using multiple colors of candy melts. Pipe stripes of different colors down the pretzel rod, or create an ombré effect by gradually transitioning from one color to another.
For a more traditional look, use dark or milk chocolate instead of candy melts. While chocolate requires more careful temperature control, it offers a richer flavor that many people prefer. Add a pinch of coconut oil to help the chocolate flow smoothly.
Try different pretzel shapes for variety. Pretzel twists can be dipped and decorated to look like wreaths, while small pretzel sticks can be turned into mini trees perfect for topping cupcakes or adding to gift boxes.
For adults, consider adding a sprinkle of sea salt flakes over the candy coating before it sets. This enhances the sweet-and-salty contrast and adds a gourmet touch.
You can also experiment with different toppings beyond sprinkles. Crushed peppermint candies, mini chocolate chips, chopped nuts, or even small candies like M&Ms can create interesting variations.
Storage, Freezing, and Make-Ahead Tips
One of the best features of these chocolate-dipped pretzel Christmas trees is how well they store, making them ideal for preparing ahead of busy holiday events.
For short-term storage, I recommend keeping the pretzel trees in an airtight container at room temperature. Layer them between sheets of parchment paper to prevent sticking. Stored this way, they’ll maintain their quality for up to two weeks. Keep them in a cool, dry place away from direct sunlight and heat sources, as warmth can cause the candy coating to soften or melt.
If you live in a particularly warm or humid climate, you may want to store these treats in the refrigerator. Just be aware that condensation can form when you remove them from the refrigerator, potentially affecting the appearance of the candy coating. To minimize this, let them come to room temperature while still in their sealed container.
These pretzel trees freeze surprisingly well. Arrange them in a single layer on a baking sheet and freeze until solid, then transfer to a freezer-safe container or bag with parchment paper between layers. They’ll keep in the freezer for up to two months. Thaw them at room temperature in their container to prevent condensation from forming on the candy coating.
For make-ahead preparation, I find it easiest to complete the entire recipe and store the finished treats rather than trying to prepare components in advance. The candy coating sets quickly, so there’s no real time savings in doing partial preparation.
These pretzel trees also ship well, making them excellent gifts for distant friends and family. Pack them carefully in sturdy containers with plenty of cushioning material, and include a layer of parchment paper between each layer of pretzels. I’ve successfully shipped these treats across the country without any breakage.
Frequently Asked Questions
Can I use regular chocolate instead of candy melts?
Yes, you can use regular chocolate, though candy melts are easier to work with because they’re formulated specifically for coating and decorating. If using regular chocolate, you may need to temper it properly or add a small amount of coconut oil or shortening to achieve the right consistency for piping.
Why is my candy coating too thick to pipe?
Candy melts can thicken as they cool. If this happens, reheat them briefly in the microwave (5-10 seconds at a time) or add a small amount of vegetable oil or shortening to thin the consistency. Make sure no water gets into the candy, as this will cause it to seize and become unusable.
How do I prevent the pretzels from breaking?
Handle pretzel rods gently, as they can be fragile. When removing them from the parchment paper after the candy coating has set, peel the paper away from the pretzel rather than pulling the pretzel off the paper. This reduces stress on the pretzel and minimizes breakage.
Can I make these without a piping bag?
Absolutely. A zip-top plastic bag with a small corner cut off works just as well as a piping bag. You can also use a spoon to drizzle the melted candy over the pretzels, though this method gives you less control over the shape.
What if I can’t find star-shaped sprinkles?
You can substitute any small yellow decoration—yellow nonpareils, small yellow candies, or even a small dollop of yellow candy melts piped into a star shape. The star is a nice detail but not essential to the overall look.
How far in advance can I make these?
These pretzel trees can be made up to two weeks in advance when stored properly in an airtight container at room temperature. This makes them perfect for holiday preparation and gift-giving.
Can I use different colored candy melts?
Definitely! While green is traditional for Christmas trees, you can use any color to match your party theme or personal preference. White, red, or even multicolored trees can be festive and fun.
Why are my sprinkles falling off?
Sprinkles need to be applied while the candy coating is still wet. If the coating has already started to set, the sprinkles won’t adhere properly. Work quickly after piping each tree, or pipe just a few trees at a time so you can decorate them before the coating hardens.
Chocolate-Dipped Pretzel Christmas Trees
Crunchy pretzel sticks decorated with melted green chocolate and colorful sprinkles to resemble miniature Christmas trees. An easy, festive holiday snack perfect for parties, gift-giving, or enjoying with family during the holiday season.
Chilling Time: 10-15 minutes
Total Time: 25-30 minutes
Yield: 20 pretzel trees
Difficulty: Easy
Cuisine: American
Course: Dessert
Ingredients
- 20 pretzel rods
- 12 oz green candy melts
- 1/4 cup assorted Christmas sprinkles
- 20 yellow star-shaped sprinkles
- 4 oz white chocolate (optional, for snow decoration)
- Parchment paper
Instructions
- Line a large baking sheet with parchment paper and set aside.
- Place green candy melts in a microwave-safe bowl. Microwave in 20-second intervals, stirring thoroughly after each interval, until completely melted and smooth.
- Transfer melted candy to a piping bag or zip-top plastic bag with a small corner cut off.
- Arrange pretzel rods on the prepared parchment paper, spacing them several inches apart.
- Pipe melted green candy in a zigzag pattern over the upper portion of each pretzel rod, starting near the top and gradually widening the zigzag as you move toward the bottom to create a Christmas tree shape. Leave the bottom 2-3 inches uncoated to serve as the trunk.
- Immediately decorate each tree with assorted Christmas sprinkles while the candy coating is still wet.
- Place a yellow star sprinkle at the top of each tree.
- If using white chocolate for snow decoration, melt it using the same method as the green candy melts. Transfer to a piping bag and drizzle lightly over the completed trees.
- Refrigerate the baking sheet for 10-15 minutes until the candy coating hardens completely.
- Carefully remove pretzel trees from parchment paper and store in an airtight container.
Recipe Notes
- Work quickly when decorating, as candy melts begin to set within 1-2 minutes.
- If candy melts become too thick while working, reheat briefly in the microwave or add a small amount of vegetable oil to thin.
- For easier cleanup, pipe trees over a plate or bowl to catch excess sprinkles for reuse.
- These treats can be made up to 2 weeks in advance when stored in an airtight container.
- For gift-giving, wrap individual trees in cellophane bags tied with festive ribbon.
Estimated Nutrition Per Serving (1 pretzel tree)
Note: Nutrition information is estimated and may vary based on specific ingredients used.
- Calories: 145
- Carbohydrates: 22g
- Protein: 2g
- Fat: 6g
- Saturated Fat: 4g
- Fiber: 1g
- Sugar: 14g
- Sodium: 180mg
