
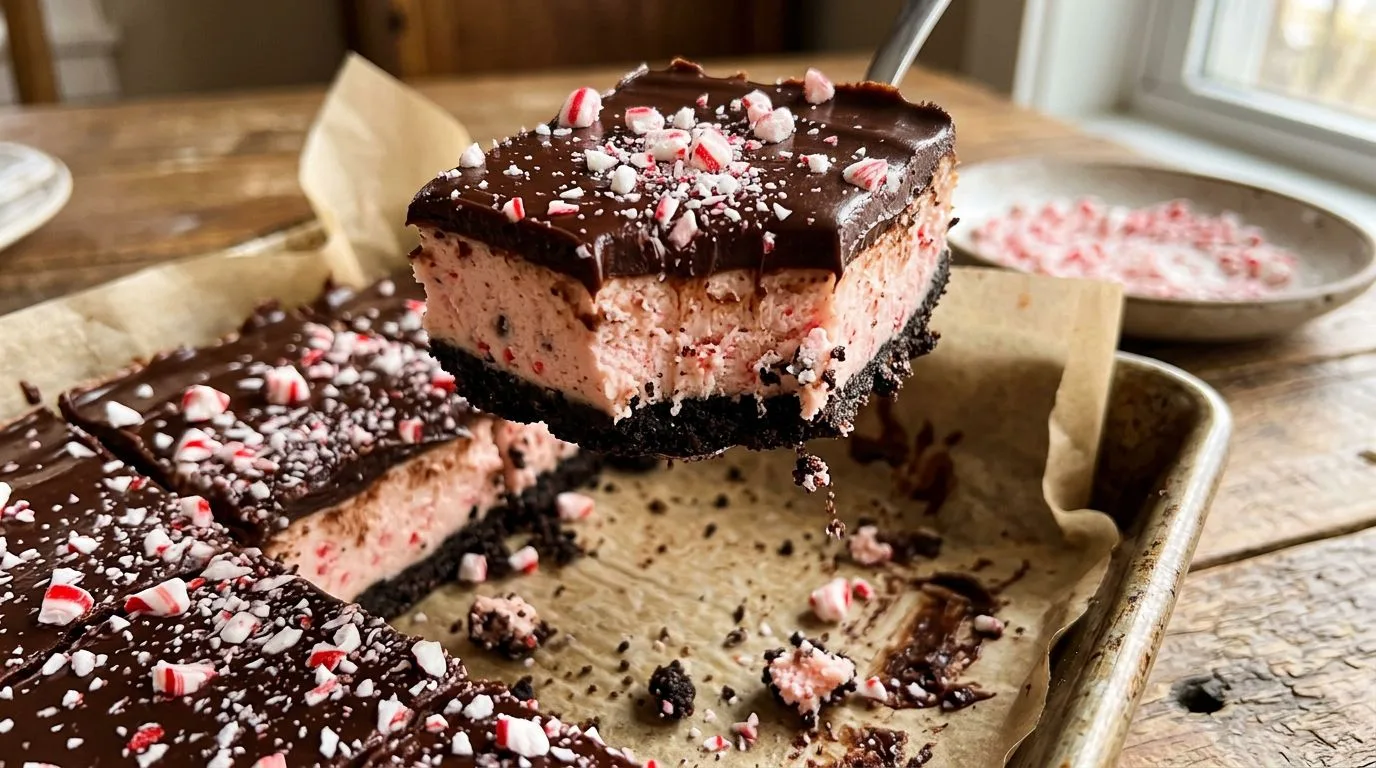
When the holiday season arrives, I find myself craving desserts that combine festive flavors with rich, indulgent textures. These chocolate peppermint cheesecake bars deliver exactly that—a perfect marriage of creamy chocolate cheesecake and refreshing peppermint, all nestled on a crunchy chocolate cookie crust and topped with silky ganache. The crushed candy canes on top add a delightful crunch and a beautiful pop of color that makes these bars look as impressive as they taste.
I love how these bars capture the essence of Christmas in every bite. The combination of chocolate and peppermint is classic for a reason—it’s simply irresistible. What makes this recipe particularly special is the layered approach: the firm cookie base provides structure, the creamy chocolate-peppermint filling offers richness, and the ganache topping with candy cane pieces brings everything together with elegance. Whether you’re hosting a holiday party, attending a potluck, or simply want to treat your family to something special, these cheesecake bars are guaranteed to impress.
Unlike traditional round cheesecakes that require a water bath and careful unmolding, these bars are wonderfully straightforward. I recommend them for bakers of all skill levels because they’re much more forgiving than their full-sized counterparts. The square pan makes portioning easy, and the bars hold their shape beautifully when cut, making them ideal for serving at gatherings or packaging as edible gifts.
Why You’ll Love This Recipe
These chocolate peppermint cheesecake bars offer everything you want in a holiday dessert without the fuss of more complicated recipes. I find that they strike the perfect balance between impressive presentation and manageable preparation. The chocolate cookie crust requires no baking skills beyond mixing and pressing, while the cheesecake filling comes together in one bowl with minimal effort.
The peppermint flavor is present but not overwhelming—just enough to remind you of candy canes and winter holidays without overpowering the rich chocolate base. I appreciate that the recipe uses both peppermint extract in the filling and crushed candy canes as a garnish, creating layers of flavor that develop as you eat. The texture is equally delightful, with the creamy filling contrasting beautifully against the crunchy crust and the smooth ganache topping.
Another reason I love these bars is their make-ahead nature. They actually need to chill for at least four hours, which means you can prepare them the day before your event. This advance preparation reduces stress and allows the flavors to meld perfectly. The bars also cut cleanly when properly chilled, giving you professional-looking portions that are perfect for plating or gift boxes.
Ingredients and Substitutions
The ingredient list for these chocolate peppermint cheesecake bars is straightforward, with most items readily available at any grocery store. The chocolate cookie crumbs form the foundation of your crust—I like using Oreos with the cream filling removed, or chocolate graham crackers work beautifully as well. If you only have whole cookies, simply pulse them in a food processor until you achieve fine crumbs.
The cream cheese must be fully softened to room temperature before you begin. This is crucial for achieving a smooth, lump-free filling. I recommend setting it out at least two hours before baking, or you can cut it into cubes to speed up the softening process. Full-fat cream cheese is essential here; reduced-fat versions will compromise the texture and richness.
For the chocolate component, semisweet chocolate provides the perfect level of sweetness without being cloying. You can substitute with dark chocolate if you prefer a more intense chocolate flavor, though I’d recommend staying above 60% cacao to maintain the right sweetness balance. The chocolate chips for the ganache can be semisweet or dark, depending on your preference.
Peppermint extract is potent, so the half teaspoon called for in this recipe provides just the right amount of minty freshness. If you only have peppermint oil, use it sparingly—start with just a few drops, as it’s significantly stronger than extract. The crushed candy canes add both flavor and visual appeal; you can use traditional red-and-white candy canes or the green-and-white varieties for a different look.
If you need to make substitutions, Greek yogurt can replace the sour cream in equal measure, though the tanginess will be slightly different. For a dairy-free version, you’d need to substitute every dairy component, which would significantly alter the recipe, so I recommend finding a recipe specifically designed for dairy-free cheesecake instead.
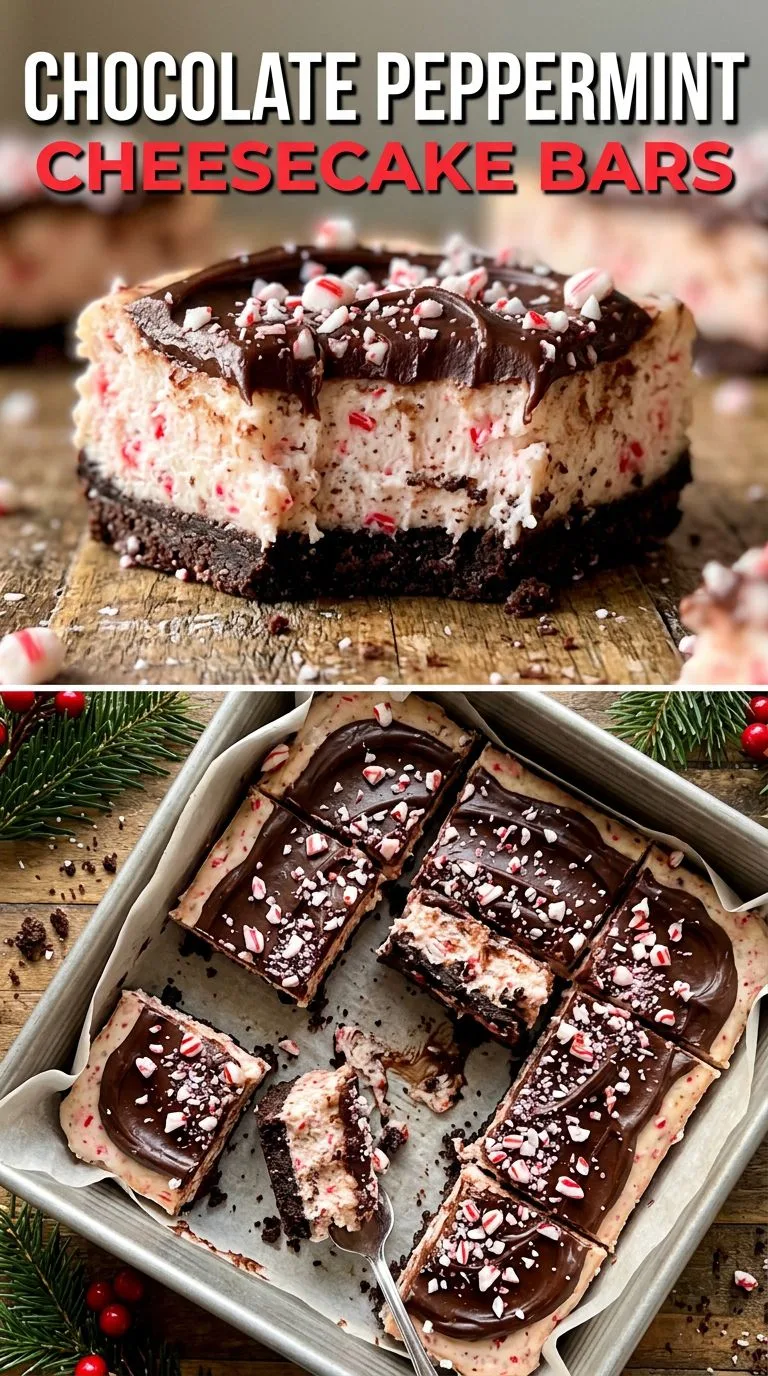
How to Make Chocolate Peppermint Cheesecake Bars
The preparation process for these cheesecake bars follows a logical sequence that builds flavor and texture in layers. I find it helpful to have all ingredients measured and ready before starting, as this makes the process smooth and enjoyable.
Begin by preheating your oven to 325°F and preparing your 9×9-inch baking pan with parchment paper. I like to leave some overhang on two sides, which makes lifting the finished bars out of the pan much easier. For the crust, combine the chocolate cookie crumbs with melted butter until the mixture resembles wet sand. Press this firmly into the bottom of your prepared pan—I use the bottom of a measuring cup to create an even, compact layer. The brief 8-minute bake sets the crust and prevents it from becoming soggy once the filling is added.
While the crust cools slightly, prepare your filling. Beat the softened cream cheese and sugar together until completely smooth and fluffy, scraping down the bowl as needed. This step is important for eliminating lumps. Add the sour cream, vanilla extract, and peppermint extract, mixing until everything is well incorporated and creamy. The eggs go in next, one at a time, and I recommend mixing on low speed just until combined—overmixing at this stage can incorporate too much air, which may cause cracks.
The melted and cooled semisweet chocolate gets stirred in last, creating a beautiful, rich chocolate filling with a hint of peppermint. Make sure your chocolate has cooled to room temperature before adding it; if it’s too hot, it could scramble the eggs or cause the cream cheese to separate. Pour this luscious filling over your prepared crust and spread it evenly to the edges.
Baking takes 30 to 40 minutes, and you’re looking for set edges with a center that still has a slight jiggle when you gently shake the pan. The residual heat will continue cooking the center as it cools, so don’t wait for it to be completely firm in the oven. Let the bars cool completely at room temperature before transferring to the refrigerator for at least four hours—overnight is even better.
The final touch is the chocolate ganache. Heat the heavy cream until it’s steaming but not boiling, then pour it over the chocolate chips. Let this sit undisturbed for two minutes to allow the heat to melt the chocolate, then stir until you have a smooth, glossy ganache. Spread this over your chilled cheesecake layer and immediately sprinkle with crushed candy canes. Return to the refrigerator until the ganache sets, then cut into bars using a sharp knife wiped clean between cuts.
Expert Tips for Best Results
Temperature control is crucial when making cheesecake bars. I cannot stress enough the importance of using room-temperature cream cheese and eggs. Cold ingredients don’t blend smoothly and can result in a lumpy filling. If you’re short on time, you can place sealed eggs in warm water for about 10 minutes to take the chill off.
When pressing the cookie crust into the pan, apply firm, even pressure. A loose crust will crumble when you cut the bars, while a well-compacted crust holds together beautifully. I find that using the flat bottom of a glass or measuring cup creates the most even surface.
Don’t skip the cooling and chilling steps. Cheesecake needs time to set properly, and rushing this process will result in bars that are too soft to cut cleanly. I recommend making these the day before you plan to serve them, which also allows the flavors to develop fully.
For the cleanest cuts, use a large, sharp knife and wipe it clean with a damp towel between each cut. You can also run the knife under hot water, dry it, and then make your cut—the warm blade slices through the chilled cheesecake like butter. For perfectly uniform bars, measure and mark your cutting lines before you begin slicing.
If you notice any cracks forming on the surface as your cheesecake cools, don’t worry—the ganache topping will cover them completely. However, to minimize cracking, avoid opening the oven door during baking, and allow the bars to cool gradually at room temperature rather than moving them directly to the refrigerator.
Serving Suggestions
These chocolate peppermint cheesecake bars are stunning on their own, but I love enhancing the presentation with a few simple touches. A dollop of freshly whipped cream on each bar adds a light, airy contrast to the rich cheesecake. You can even flavor the whipped cream with a tiny bit of peppermint extract for an extra festive touch.
For an elegant plated dessert, serve each bar with a drizzle of chocolate sauce and a small scoop of vanilla ice cream. The cold ice cream against the creamy cheesecake creates a wonderful temperature contrast. Fresh mint leaves make a beautiful garnish that echoes the peppermint flavor while adding a pop of green to your holiday table.
I find these bars pair wonderfully with coffee or hot chocolate, making them perfect for holiday brunches or afternoon gatherings. They’re also substantial enough to serve as the centerpiece dessert at a Christmas dinner. My favorite way to serve them at parties is on a white platter with the crushed candy canes catching the light—it’s simply beautiful.
For gift-giving, wrap individual bars in clear cellophane tied with festive ribbon. They transport well and make thoughtful homemade gifts for neighbors, teachers, or coworkers. Just be sure to keep them refrigerated until shortly before giving.
Variations and Substitutions
While the classic chocolate peppermint combination is hard to beat, these cheesecake bars are versatile enough to accommodate various flavor profiles. For a white chocolate peppermint version, substitute white chocolate for the semisweet chocolate in both the filling and ganache. The result is sweeter and more delicate, with the peppermint flavor taking center stage.
If peppermint isn’t your favorite, you can easily adapt this recipe to other extracts. Almond extract creates a sophisticated flavor reminiscent of chocolate-covered almonds, while orange extract offers a festive twist that’s perfect for the holidays. For a coffee-flavored variation, add one tablespoon of instant espresso powder to the filling along with the vanilla extract.
The crust is equally adaptable. Graham cracker crumbs create a more traditional cheesecake base, while crushed gingersnaps add warm spice notes that complement the chocolate beautifully. For an extra-decadent option, try using crushed brownie pieces or chocolate wafer cookies.
You can also experiment with the topping. Instead of ganache, try a white chocolate drizzle or a cream cheese frosting. Chopped Andes mints make an excellent alternative to crushed candy canes, or you can use a combination of both for varied texture and appearance.
For those who enjoy a bit of crunch throughout, fold mini chocolate chips or chopped peppermint bark into the filling before baking. This creates pockets of texture that surprise and delight with each bite. If you’re looking for more indulgent dessert ideas, you might also enjoy these chocolate pecan pie brownies with gooey pecan topping, which offer a similar richness with different flavor notes.
Storage, Freezing, and Reheating
Proper storage is essential for maintaining the quality and food safety of these cheesecake bars. I always store them in an airtight container in the refrigerator, where they’ll keep beautifully for up to five days. The ganache topping may develop slight condensation when stored, but this doesn’t affect the flavor or texture.
For longer storage, these bars freeze exceptionally well. I recommend freezing them before adding the ganache and candy cane topping, as the candy canes can become sticky when thawed. Wrap individual bars tightly in plastic wrap, then place them in a freezer-safe container or zip-top bag. They’ll maintain their quality for up to two months in the freezer.
To thaw frozen bars, transfer them to the refrigerator and let them defrost slowly overnight. This gradual thawing prevents condensation from making the bars soggy. Once thawed, you can add the ganache topping and crushed candy canes as directed in the recipe. If you’ve frozen bars that already have the ganache, they’ll still taste delicious, though the candy cane pieces may lose some of their crunch.
These bars are best served chilled, so there’s no need for reheating. In fact, I recommend keeping them refrigerated until about 10 minutes before serving, as they’re easier to cut when cold and the texture is most pleasant when they’re still chilled but not ice-cold. If you’re serving them at a party, you can keep them on a platter at room temperature for up to two hours, but return any leftovers to the refrigerator promptly.
For make-ahead convenience, you can prepare the crust and filling up to two days in advance, keeping them refrigerated until you’re ready to add the ganache and serve. This flexibility makes them ideal for holiday entertaining when you’re juggling multiple dishes. Similar to pumpkin cheesecake bars, these chocolate peppermint bars benefit from advance preparation, allowing flavors to meld and develop.
Frequently Asked Questions
Can I use a different size pan?
While a 9×9-inch pan is ideal for these bars, you can use an 8×8-inch pan for thicker bars—just increase the baking time by 5 to 10 minutes and watch for the same doneness cues. A 9×13-inch pan will create thinner bars that bake more quickly, requiring about 5 to 10 minutes less baking time. Keep in mind that changing the pan size will affect the number of servings and the thickness of each bar.
Why did my cheesecake crack?
Cracks in cheesecake typically result from overbaking, sudden temperature changes, or overmixing the batter. To minimize cracking, avoid opening the oven door during baking, mix the eggs on low speed just until incorporated, and allow the bars to cool gradually at room temperature. The good news is that the ganache topping will cover any surface cracks, so they won’t affect the final presentation.
Can I make these without peppermint?
Absolutely! Simply omit the peppermint extract and crushed candy canes for pure chocolate cheesecake bars. You can leave them plain or substitute another flavoring like vanilla, almond, or orange extract. The base recipe is versatile enough to accommodate many flavor variations.
How do I know when the cheesecake is done?
The edges should be set and slightly puffed, while the center should still have a slight jiggle when you gently shake the pan. The surface may look slightly shiny but shouldn’t appear wet or liquid. An instant-read thermometer inserted into the center should read about 150°F to 155°F. Remember that the bars will continue to set as they cool and chill.
Can I use store-bought chocolate cookies for the crust?
Yes, store-bought chocolate cookies work perfectly. Oreos (with the filling scraped out), chocolate graham crackers, or chocolate wafer cookies all make excellent crusts. Simply process them into fine crumbs in a food processor or place them in a sealed bag and crush them with a rolling pin.
Do I need to use a water bath?
No, these bars don’t require a water bath. The smaller size and shorter baking time mean they’re less prone to the issues that water baths help prevent in full-sized cheesecakes. The recipe is designed to work perfectly without this extra step, making it more accessible for home bakers.
Chocolate Peppermint Cheesecake Bars
Rich, creamy chocolate cheesecake bars with a crunchy chocolate cookie crust, refreshing peppermint flavor, and a decadent chocolate ganache topping finished with crushed candy canes. Perfect for Christmas celebrations and holiday gatherings.
- Prep Time: 25 minutes
- Cook Time: 40 minutes
- Chilling Time: 4 hours
- Total Time: 5 hours 5 minutes
- Servings: 16 bars
- Difficulty: Easy
- Cuisine: American
- Course: Dessert
Ingredients
For the Crust:
- 1 1/2 cups chocolate cookie crumbs
- 5 tablespoons melted butter
For the Cheesecake Filling:
- 16 oz cream cheese, softened
- 3/4 cup granulated sugar
- 2 large eggs
- 1/2 cup sour cream
- 1 teaspoon vanilla extract
- 1/2 teaspoon peppermint extract
- 6 oz semisweet chocolate, melted and cooled
For the Topping:
- 1/2 cup chocolate chips
- 1/2 cup heavy cream
- 1/3 cup crushed candy canes
Instructions
- Preheat your oven to 325°F (165°C). Line a 9×9-inch baking pan with parchment paper, leaving some overhang on two sides for easy removal.
- In a medium bowl, combine the chocolate cookie crumbs and melted butter, mixing until the mixture resembles wet sand. Press this mixture firmly and evenly into the bottom of the prepared pan.
- Bake the crust for 8 minutes, then remove from the oven and let cool slightly while you prepare the filling.
- In a large mixing bowl, beat the softened cream cheese and granulated sugar together until smooth and fluffy, about 2 to 3 minutes. Scrape down the sides of the bowl as needed.
- Add the sour cream, vanilla extract, and peppermint extract to the cream cheese mixture. Mix until well combined and creamy.
- Add the eggs one at a time, beating on low speed after each addition just until incorporated. Avoid overmixing.
- Stir in the melted and cooled semisweet chocolate, mixing until the filling is smooth and evenly colored.
- Pour the cheesecake filling over the prepared crust, spreading it evenly to the edges with a spatula.
- Bake for 30 to 40 minutes, until the edges are set and the center has a slight jiggle when gently shaken. The surface should look set but not dry.
- Remove from the oven and let cool completely at room temperature, about 1 to 2 hours.
- Once cooled, refrigerate the cheesecake for at least 4 hours or overnight until completely chilled and set.
- When ready to add the topping, heat the heavy cream in a small saucepan or microwave until steaming but not boiling.
- Pour the hot cream over the chocolate chips in a heatproof bowl. Let stand for 2 minutes without stirring.
- Stir the chocolate and cream together until smooth and glossy, creating a ganache.
- Spread the ganache evenly over the chilled cheesecake layer.
- Immediately sprinkle the crushed candy canes over the ganache while it’s still wet.
- Return the pan to the refrigerator for at least 30 minutes to allow the ganache to set.
- Using the parchment paper overhang, lift the cheesecake out of the pan. Cut into 16 bars using a sharp knife, wiping the blade clean between cuts for the neatest edges.
Recipe Notes
- Make sure all dairy ingredients are at room temperature before beginning for the smoothest filling.
- The chocolate for the filling should be melted and cooled to room temperature to prevent scrambling the eggs.
- For the cleanest cuts, use a sharp knife and wipe it clean with a damp towel between each slice.
- These bars can be made up to 2 days in advance and stored covered in the refrigerator.
- If you prefer a stronger peppermint flavor, you can increase the peppermint extract to 3/4 teaspoon, but taste as you go—peppermint extract is potent.
- Chocolate cookie crumbs can be made from Oreos (filling removed), chocolate graham crackers, or chocolate wafer cookies.
Estimated Nutrition Per Serving (1 bar)
- Calories: 285
- Carbohydrates: 28g
- Protein: 4g
- Fat: 18g
- Saturated Fat: 11g
- Fiber: 1g
- Sugar: 22g
- Sodium: 165mg
Nutrition information is estimated based on standard ingredient values and is provided as a courtesy. For the most accurate nutritional data, please calculate based on the specific brands and measurements you use.
