
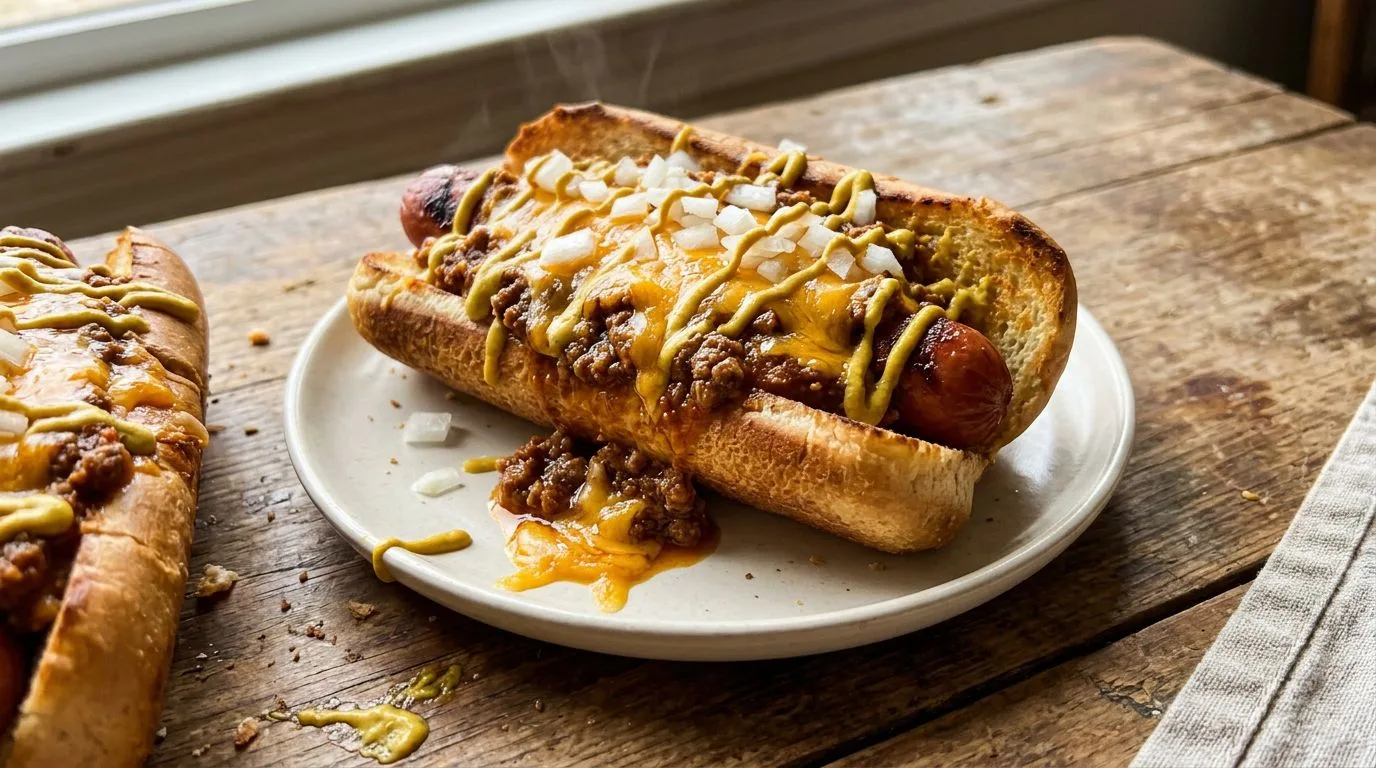
There’s something undeniably satisfying about a classic chili dog—the snap of the hot dog, the soft bun, and that thick, savory chili spooned generously on top. But here’s the thing: not just any chili will do. Regular bowl chili with big chunks of meat and beans doesn’t work for hot dogs. What you need is a smooth, thick, finely textured chili that clings to the hot dog and stays put with every bite. That’s exactly what this Chili Dog Chili Recipe delivers.
I love making this hot dog chili because it’s specifically designed for topping. The ground beef is broken down into very fine crumbles, the sauce is thick enough to spoon without dripping everywhere, and the spice blend hits all the right notes—savory, slightly tangy, with just enough warmth. Whether you’re hosting a backyard barbecue, feeding a crowd at a game day party, or just craving a nostalgic chili cheese dog on a weeknight, this recipe is your answer. It comes together in about 40 minutes and tastes better than anything you’ll find at a ballpark or fast-food joint.
This homemade hot dog chili is also incredibly versatile. While it’s perfect for chili dogs, you can also use it on burgers, fries, nachos, or even as a dip with tortilla chips. Once you make this from scratch, you’ll never go back to canned chili sauce again.
Why You’ll Love This Chili Dog Chili Recipe
This isn’t your typical bowl of chili. It’s a purpose-built topping that’s been perfected for hot dogs and burgers. Here’s why I think you’ll love it:
- Perfect texture: The beef is cooked into very fine crumbles, creating a smooth, spoonable consistency that doesn’t slide off your hot dog.
- Thick and clingy: After simmering, this chili reaches the ideal thickness—not watery, not too dry—just right for piling on top of your favorite frank.
- Flavorful without being overwhelming: The spice blend is savory and well-balanced, with warmth from chili powder and cumin, tang from tomato sauce, and depth from Worcestershire sauce.
- No beans: Traditional hot dog chili doesn’t include beans, keeping the focus on the rich, meaty sauce.
- Quick and easy: Ready in about 40 minutes with simple pantry ingredients.
- Crowd-pleaser: Perfect for feeding a group at cookouts, tailgates, or family dinners.
I find that homemade chili dog sauce has a fresher, more vibrant flavor than anything from a can. You control the seasoning, the texture, and the quality of the beef, which makes all the difference.
Ingredients and Substitutions
This recipe uses straightforward ingredients that you probably already have in your pantry. Here’s what you’ll need and some helpful substitutions:
- Ground beef (1½ lbs): I recommend using 80/20 ground beef for the best flavor and texture. Leaner beef works too, but you may want to add a bit more oil to prevent dryness. Ground turkey or chicken can be substituted for a lighter version.
- Onion (1 small, finely diced): Yellow or white onion works best. Dice it very finely so it blends into the chili. You can also use onion powder exclusively if you prefer a completely smooth texture.
- Garlic (3 cloves, minced): Fresh garlic adds great flavor. In a pinch, use ¾ teaspoon garlic powder.
- Tomato sauce (15 oz can): This is the base of the chili. Use plain tomato sauce, not pasta sauce with added herbs.
- Tomato paste (2 tbsp): Adds richness and helps thicken the chili.
- Beef broth (½ cup): Adds depth and helps create the right consistency. Chicken broth or water can substitute if needed.
- Chili powder (2 tbsp): The primary seasoning. Use a good-quality chili powder for best results.
- Ground cumin (1 tsp): Adds earthy warmth that’s essential to chili flavor.
- Paprika (1 tsp): Contributes mild sweetness and color.
- Worcestershire sauce (1 tsp): Adds umami depth and a subtle tang.
- Mustard powder (½ tsp): A classic hot dog chili ingredient that adds a subtle sharpness.
- Onion powder (½ tsp): Reinforces the onion flavor throughout.
- Olive oil (1 tbsp): For cooking the beef and onions. Vegetable oil works too.
- Salt and black pepper: To taste, added at the end.
I like to keep the ingredient list simple and focused. This isn’t about complexity—it’s about creating a perfectly seasoned, thick beef topping that lets the hot dog shine while adding incredible flavor.

How to Make This Chili Dog Chili Recipe
Making homemade hot dog chili is straightforward, but there are a few key techniques that ensure the perfect texture and flavor. Here’s how I make it:
Step 1: Brown the Beef
Heat the olive oil in a large skillet over medium-high heat. Add the ground beef and cook for 5–7 minutes, breaking it apart with a wooden spoon or spatula as it cooks. The key here is to break the meat into very fine crumbles—much smaller than you would for regular chili or tacos. I use the edge of the spoon to chop and mash the beef as it cooks, creating a smooth, almost paste-like texture. This is what gives hot dog chili its characteristic consistency.
Step 2: Drain and Add Onions
Once the beef is fully browned, drain off any excess grease. Return the skillet to the heat and add the finely diced onion. Cook for 3–4 minutes, stirring occasionally, until the onion is softened and translucent. The small dice ensures the onion blends seamlessly into the chili.
Step 3: Add Garlic and Spices
Stir in the minced garlic and cook for about 30 seconds until fragrant. Then add all the spices: chili powder, cumin, paprika, mustard powder, and onion powder. Also add the Worcestershire sauce. Stir everything together and cook for another 30 seconds to toast the spices slightly, which deepens their flavor.
Step 4: Add Tomato Products and Broth
Mix in the tomato paste first, stirring to coat the beef. Then pour in the tomato sauce and beef broth. Stir everything together until evenly combined. The mixture will look a bit loose at this point, but it will thicken as it simmers.
Step 5: Simmer Until Thick
Reduce the heat to low and let the chili simmer uncovered for 20–30 minutes, stirring occasionally. As it cooks, the liquid will reduce and the chili will thicken considerably. You’re looking for a consistency that’s thick enough to spoon onto a hot dog without running off—it should mound slightly when you scoop it. If it gets too thick, add a splash of broth or water. If it’s still too loose after 30 minutes, continue simmering a bit longer.
Step 6: Season and Serve
Taste the chili and season with salt and black pepper as needed. The amount will depend on the saltiness of your broth and tomato sauce. Once seasoned to your liking, it’s ready to serve warm over grilled hot dogs with your favorite toppings.
Expert Tips for Best Results
Here are my top tips for making the best chili dog chili:
- Break the beef into very fine crumbles: This is the most important step. Use your spoon to really chop and mash the beef as it cooks. The finer the texture, the better it will work as a hot dog topping.
- Don’t skip the simmering time: The chili needs at least 20 minutes to thicken properly and for the flavors to meld. Rushing this step will result in watery chili.
- Adjust consistency as needed: If your chili is too thick, add broth or water a tablespoon at a time. If it’s too thin, simmer longer or add a bit more tomato paste.
- Taste and adjust seasoning: Different brands of tomato sauce and broth have varying salt levels, so always taste before serving and adjust accordingly.
- Use quality chili powder: Since chili powder is the dominant spice, using a good-quality brand makes a noticeable difference in flavor.
- Make it ahead: This chili actually tastes better the next day after the flavors have had time to develop. It’s perfect for meal prep.
I recommend making a double batch if you’re feeding a crowd or want leftovers. This chili freezes beautifully and reheats perfectly.
Serving Suggestions
While this chili is designed specifically for hot dogs, there are plenty of delicious ways to serve it:
- Classic chili dogs: Grill or steam your hot dogs, place them in buns, and top generously with the chili. Add yellow mustard, diced raw onions, and shredded cheddar cheese for a traditional presentation.
- Chili cheese dogs: My favorite way to serve these is with a generous amount of shredded sharp cheddar cheese melted over the hot chili.
- Chili cheese fries: Spoon the chili over crispy French fries and top with cheese, jalapeños, and sour cream.
- Chili burgers: Use it as a topping for hamburgers along with cheese and onions.
- Chili nachos: Layer tortilla chips with the chili, cheese, jalapeños, and your favorite nacho toppings.
- Chili dip: Serve warm with tortilla chips as a hearty party dip.
- Over baked potatoes: Top a split baked potato with chili and cheese for a filling meal.
For a complete meal, I like to serve chili dogs with classic sides like coleslaw, potato salad, baked beans, or corn on the cob. If you’re looking for more chili inspiration, check out this Cincinnati Chili Recipe for a unique regional take, or try this Chili Mac and Cheese Recipe for a comforting one-pot dinner.
Variations and Substitutions
This recipe is quite flexible. Here are some variations you might enjoy:
- Spicier version: Add ½ teaspoon cayenne pepper or a diced jalapeño with the onions for extra heat.
- Sweeter chili: Add 1 tablespoon brown sugar or a splash of ketchup for a slightly sweeter profile, similar to some regional styles.
- Ground turkey or chicken: Substitute the beef with ground poultry for a lighter option. You may need to add a bit more oil.
- Vegetarian version: Use plant-based ground meat or very finely chopped mushrooms and vegetable broth.
- Extra smooth: Skip the diced onion entirely and use only onion powder for a completely smooth texture.
- Coney Island style: Add a pinch of cinnamon and a touch of cocoa powder for a Detroit/Coney Island-inspired flavor.
- Thicker consistency: Add an extra tablespoon of tomato paste or simmer longer.
Feel free to adjust the spice levels to your preference. I find the recipe as written has a nice balanced flavor that appeals to most people, but you can easily customize it.
Storage, Freezing, and Reheating
This chili stores and reheats beautifully, making it perfect for meal prep or making ahead for parties.
Refrigerator Storage
Let the chili cool to room temperature, then transfer it to an airtight container. It will keep in the refrigerator for up to 4 days. The chili often thickens as it sits, so you may need to add a splash of broth or water when reheating.
Freezing
This chili freezes exceptionally well. Let it cool completely, then portion it into freezer-safe containers or heavy-duty freezer bags. Remove as much air as possible and label with the date. It will keep frozen for up to 3 months. I like to freeze it in smaller portions so I can thaw just what I need for a quick meal.
Reheating
To reheat from the refrigerator, warm the chili in a saucepan over medium-low heat, stirring occasionally. Add a splash of broth or water if it’s too thick. You can also reheat individual portions in the microwave in 30-second intervals, stirring between each.
To reheat from frozen, thaw overnight in the refrigerator first, then reheat as directed above. In a pinch, you can reheat from frozen in a saucepan over low heat, stirring frequently and adding a bit of liquid to prevent sticking.
Frequently Asked Questions
What’s the difference between regular chili and hot dog chili?
Hot dog chili has a much finer texture with very small beef crumbles, no beans, and a thicker consistency that’s designed to stay on top of a hot dog. Regular chili typically has larger chunks of meat, often includes beans, and has a soupier consistency meant for eating in a bowl.
Can I use ground turkey instead of beef?
Yes, ground turkey works well as a lighter alternative. I recommend using 85/15 ground turkey (not extra lean) for better flavor and texture. You may need to add a bit more oil since turkey is leaner than beef.
Why is my chili too watery?
If your chili is too watery, continue simmering it uncovered to allow more liquid to evaporate. You can also add an extra tablespoon of tomato paste to help thicken it. Make sure you’re simmering long enough—at least 20 minutes is usually needed.
Can I make this in a slow cooker?
Yes, though I recommend browning the beef and sautéing the onions and garlic on the stovetop first for better flavor. Then transfer everything to a slow cooker and cook on low for 3-4 hours or high for 1-2 hours. Keep the lid slightly ajar if it’s too liquidy.
How do I make this chili spicier?
Add cayenne pepper, diced jalapeños, or hot sauce to taste. Start with ¼ teaspoon cayenne and adjust from there. You can also use hot chili powder instead of regular.
Can I double this recipe?
Absolutely! This recipe doubles easily. Just use a larger skillet or pot to accommodate the extra volume. The cooking time should remain about the same.
What kind of hot dogs work best?
Any hot dog you enjoy will work well. All-beef franks are classic, but pork, turkey, or chicken hot dogs all pair nicely with this chili. I like using good-quality hot dogs with natural casings for the best snap and flavor.
Do I need to add beans?
Traditional hot dog chili does not include beans, and I don’t recommend adding them for this purpose. Beans change the texture and make it harder to eat on a hot dog. If you want beans, consider making a regular bowl chili instead.
Chili Dog Chili Recipe (Hot Dog Topping Chili)
This thick, savory Chili Dog Chili is made with finely ground beef, tomato sauce, and a perfect blend of spices. It’s the ideal topping for hot dogs, burgers, fries, and more. Ready in about 40 minutes with simple ingredients.
- Prep Time: 10 minutes
- Cook Time: 30 minutes
- Total Time: 40 minutes
- Servings: 8 servings (about 4 cups)
- Difficulty: Easy
- Cuisine: American
- Course: Dinner, Main Course
Ingredients
- 1½ lbs ground beef
- 1 small onion, finely diced
- 3 garlic cloves, minced
- 1 can (15 oz) tomato sauce
- 2 tbsp tomato paste
- ½ cup beef broth
- 2 tbsp chili powder
- 1 tsp ground cumin
- 1 tsp paprika
- 1 tsp Worcestershire sauce
- ½ tsp mustard powder
- ½ tsp onion powder
- 1 tbsp olive oil
- Salt and black pepper to taste
Instructions
- Heat olive oil in a large skillet over medium-high heat.
- Add ground beef and cook for 5–7 minutes, breaking it into very fine crumbles with a wooden spoon or spatula. The finer the texture, the better it will work as a hot dog topping.
- Drain excess grease from the skillet, then return to heat.
- Add finely diced onion and cook for 3–4 minutes, stirring occasionally, until softened and translucent.
- Stir in minced garlic and cook for 30 seconds until fragrant.
- Add chili powder, cumin, paprika, mustard powder, onion powder, and Worcestershire sauce. Stir to combine and cook for 30 seconds to toast the spices.
- Mix in tomato paste, stirring to coat the beef evenly.
- Pour in tomato sauce and beef broth, stirring until everything is well combined.
- Reduce heat to low and simmer uncovered for 20–30 minutes, stirring occasionally, until the chili has thickened to a spoonable consistency that will stay on top of a hot dog.
- Taste and season with salt and black pepper as needed.
- Serve warm over grilled hot dogs with your favorite toppings such as mustard, diced onions, and shredded cheddar cheese.
Recipe Notes
- The key to perfect hot dog chili is breaking the beef into very fine crumbles during cooking. Use your spoon to chop and mash the meat as it browns.
- The chili will thicken as it simmers. If it becomes too thick, add a splash of broth or water. If it’s too thin after 30 minutes, continue simmering.
- This chili tastes even better the next day after the flavors have melded.
- Store leftovers in an airtight container in the refrigerator for up to 4 days or freeze for up to 3 months.
- For a spicier version, add ¼–½ teaspoon cayenne pepper or a diced jalapeño with the onions.
- Ground turkey or chicken can be substituted for a lighter version.
Nutrition Information (Per Serving, Estimated)
- Calories: 215
- Carbohydrates: 7g
- Protein: 18g
- Fat: 13g
- Saturated Fat: 5g
- Fiber: 2g
- Sugar: 4g
- Sodium: 420mg
Nutrition information is estimated based on standard ingredient measurements and may vary based on specific products used.
