
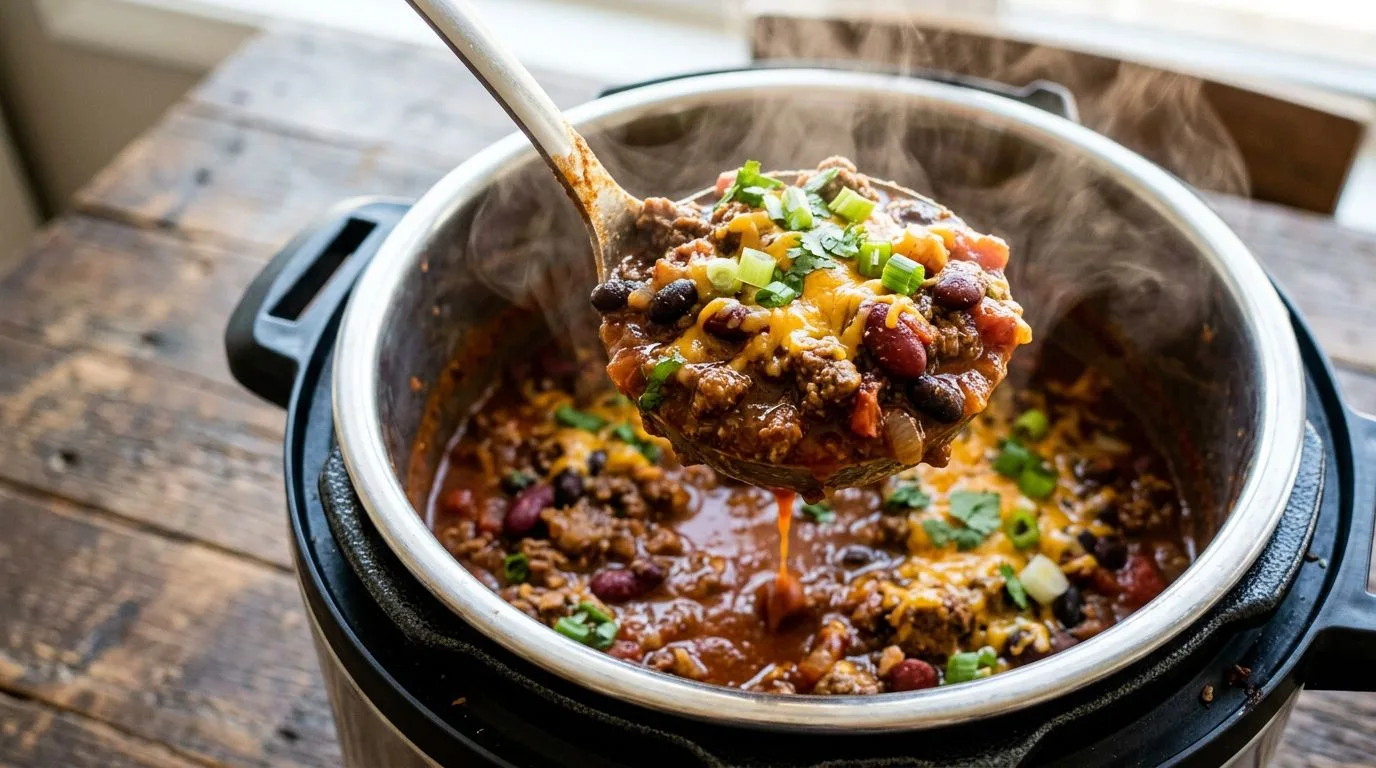
There’s nothing quite like a warm bowl of chili on a busy weeknight, and this Instant Pot Chili Recipe makes it easier than ever to get a hearty, flavorful dinner on the table in under an hour. I love how the pressure cooker transforms simple ingredients like ground beef, beans, and tomatoes into a rich, deeply seasoned chili that tastes like it’s been simmering all day. The beauty of making chili in the Instant Pot is that you get all those concentrated flavors without spending hours tending to a pot on the stove.
This recipe has become one of my go-to weeknight meals because it’s incredibly forgiving and delivers consistent results every time. The combination of chili powder, cumin, and smoked paprika creates a perfectly balanced flavor profile that’s neither too spicy nor too mild. I find that the pressure cooking process melds all the seasonings together beautifully while keeping the beans tender and the beef perfectly cooked. Whether you’re new to pressure cooking or an Instant Pot veteran, this chili recipe is straightforward enough for beginners yet satisfying enough to become a regular in your dinner rotation.
Why You’ll Love This Instant Pot Chili Recipe
This pressure cooker chili checks all the boxes for what makes a great weeknight dinner. First and foremost, it’s incredibly time-efficient—you’ll have a complete meal ready in about 40 minutes from start to finish, including prep time. I appreciate how the Instant Pot does most of the heavy lifting, allowing you to walk away while it cooks rather than standing over a hot stove stirring constantly.
The flavor development in this recipe is remarkable considering the short cooking time. The high pressure environment helps the spices penetrate the meat and beans thoroughly, creating a depth of flavor that rivals traditional slow-cooked chili. I love that you can brown the meat, sauté the vegetables, and pressure cook everything all in one pot, which means significantly less cleanup at the end of a busy day.
This chili is also wonderfully versatile and feeds a crowd. The recipe yields generous portions that are perfect for family dinners, meal prep, or casual gatherings. I find that it reheats beautifully, often tasting even better the next day as the flavors continue to meld. Plus, it’s easy to customize the heat level and toppings to suit different preferences, making it a crowd-pleaser for both adults and kids.
Ingredients and Substitutions
The ingredient list for this Instant Pot beef chili is straightforward and uses pantry staples you likely already have on hand. The ground beef provides a hearty protein base, but I recommend using 85/15 or 90/10 lean ground beef to avoid excess grease. If you prefer, ground turkey or ground chicken work well as leaner alternatives, though they’ll produce a slightly different flavor profile.
Kidney beans are traditional in chili, but you can absolutely substitute with black beans, pinto beans, or a combination of different beans. I like to drain and rinse canned beans to remove excess sodium and starch, which helps prevent the chili from becoming too thick. For the tomato components, the combination of diced tomatoes and tomato sauce creates the perfect consistency—the diced tomatoes add texture while the sauce provides body.
The aromatic vegetables—onion, bell pepper, and garlic—form the flavor foundation of this chili. I recommend using a yellow or white onion for the best flavor, and the green bell pepper adds a subtle sweetness that balances the spices. If you want more heat, you can add diced jalapeños or use a combination of green and red bell peppers for added color.
The spice blend is what really makes this chili shine. Chili powder is the star, providing that classic chili flavor, while ground cumin adds earthiness and smoked paprika contributes a subtle smokiness. I find that this combination creates a well-rounded flavor without being overpowering. You can adjust the quantities based on your heat preference, and adding a pinch of cayenne pepper will increase the spiciness if desired.

How to Make This Recipe
Making chili in the Instant Pot follows a simple process that builds flavor in layers. The first step is browning the ground beef using the Sauté function, which creates those flavorful browned bits on the bottom of the pot. I recommend breaking the meat apart with a wooden spoon as it cooks to ensure even browning and to prevent large clumps. This step typically takes 5-6 minutes and is crucial for developing rich flavor.
Once the beef is browned, you’ll add the diced onion and bell pepper, cooking them for about 3 minutes until they begin to soften. The vegetables will release moisture that helps prevent burning, and their natural sugars will start to caramelize slightly. Adding the minced garlic for just 30 seconds at the end prevents it from burning while still releasing its aromatic oils.
The next critical step is adding the spices directly to the browned meat and vegetables. This technique, called blooming the spices, helps release their essential oils and intensifies their flavors. After stirring in the chili powder, cumin, smoked paprika, salt, and pepper, you’ll immediately add the beef broth and thoroughly scrape the bottom of the pot. This deglazing step is essential—I cannot stress enough how important it is to remove all those browned bits from the bottom to prevent the dreaded “Burn” notice on your Instant Pot.
The layering technique for the remaining ingredients is intentional. After stirring in the drained kidney beans, you’ll add the diced tomatoes and tomato sauce on top without stirring. This creates a buffer between the bottom of the pot and the tomato products, which can sometimes stick and trigger the burn warning. I find this method works perfectly every time and ensures even cooking.
Once everything is in the pot, you’ll secure the lid, set the valve to the Sealing position, and pressure cook on High for 15 minutes. The actual cooking time is relatively short because the Instant Pot creates an environment where flavors concentrate quickly. After the cooking cycle completes, allow 10 minutes of natural pressure release before carefully switching the valve to Venting to release any remaining pressure. This gradual pressure release helps the chili maintain its texture and prevents the liquid from bubbling up through the valve.
Expert Tips for Best Results
Getting perfect Instant Pot chili every time comes down to a few key techniques. First, always ensure you properly deglaze the pot after browning the meat and sautéing the vegetables. I use a wooden spoon or silicone spatula to scrape every bit of browned food from the bottom—if you feel any resistance or see stuck-on bits, add a splash more broth and keep scraping. This single step prevents most pressure cooking problems.
Don’t skip the natural pressure release period. I know it’s tempting to quick-release immediately when you’re hungry, but allowing 10 minutes of natural release helps the chili finish cooking gently and prevents the beans from breaking apart. The texture is noticeably better when you’re patient with this step.
If your chili seems too thin after cooking, don’t worry—this is easily fixable. I recommend selecting the Sauté function again and letting the chili simmer uncovered for 5-10 minutes, stirring occasionally. The liquid will reduce and thicken naturally. Alternatively, you can mix 2 tablespoons of cornstarch with 2 tablespoons of cold water to create a slurry, stir it into the chili, and simmer for a few minutes until thickened.
For deeper flavor, consider adding a tablespoon of tomato paste along with the other tomato products, or stir in a square of dark chocolate or a teaspoon of cocoa powder after cooking. These additions add richness and complexity without making the chili taste sweet or chocolatey. I also like to taste and adjust the seasoning after cooking—a squeeze of fresh lime juice or a splash of apple cider vinegar can brighten the flavors beautifully.
Serving Suggestions
This hearty chili is delicious on its own, but the right toppings and sides can elevate it to something truly special. My favorite way to serve Instant Pot chili is with a toppings bar where everyone can customize their bowl. Classic options include shredded cheddar cheese, sour cream, diced red onions, sliced jalapeños, fresh cilantro, and crushed tortilla chips. The contrast of cool, creamy toppings against the warm, spicy chili is absolutely perfect.
For a complete meal, I love serving this chili with warm cornbread, which is ideal for soaking up the flavorful sauce. Alternatively, serve it over rice, baked potatoes, or even pasta for a Cincinnati-style chili experience. Tortilla chips or Fritos make excellent scoops and add a satisfying crunch. If you’re looking for more substantial sides, consider pairing it with a simple green salad or coleslaw to add freshness and balance the richness of the chili.
This chili also works wonderfully as a topping for hot dogs (chili dogs), nachos, or even as a filling for baked sweet potatoes. I find it’s incredibly versatile and can be dressed up or down depending on the occasion. For game day gatherings, set out the chili in a slow cooker on the “Keep Warm” setting alongside all the fixings for a build-your-own chili bar that guests will love.
Variations and Substitutions
One of the best things about this chili recipe is how easily it adapts to different preferences and dietary needs. For a leaner version, substitute ground turkey or chicken for the beef, though I recommend using at least 93/7 lean to maintain some moisture and flavor. You can also make a vegetarian version by omitting the meat entirely and doubling the beans or adding diced mushrooms and extra vegetables like zucchini or corn.
To create a white chicken chili variation, use diced chicken breast, white beans (cannellini or great northern), green chilies instead of tomatoes, and chicken broth. The cooking time remains the same, and the result is a completely different but equally delicious dish. For those who prefer a slow cooker approach, the same ingredients work beautifully with adjusted cooking times.
Heat level is easily customizable. For mild chili, reduce the chili powder to 1 tablespoon and omit the cayenne. For spicier chili, add diced jalapeños, increase the chili powder, or stir in hot sauce or red pepper flakes after cooking. I find that adding heat gradually and tasting as you go is the best approach, since you can always add more but can’t take it away.
You can also experiment with different bean combinations—try black beans, pinto beans, or even chickpeas for variety. Adding a can of corn (drained) creates a heartier, slightly sweeter chili that kids often enjoy. For a thicker, more traditional Texas-style chili, omit the beans entirely and increase the meat to 2 pounds.
Storage, Freezing, and Reheating
This Instant Pot chili stores exceptionally well, making it perfect for meal prep. I recommend letting the chili cool to room temperature before transferring it to airtight containers. It will keep in the refrigerator for up to 5 days, and honestly, I think it tastes even better on day two or three as the flavors continue to develop and meld together.
For freezing, portion the cooled chili into freezer-safe containers or heavy-duty freezer bags, leaving about an inch of headspace for expansion. I like to freeze it in 2-cup portions for easy single-serve meals or in larger quantities for family dinners. Properly stored, the chili will maintain its quality in the freezer for up to 3 months. Be sure to label containers with the date so you can keep track of freshness.
When you’re ready to enjoy frozen chili, the best method is to thaw it overnight in the refrigerator, then reheat it on the stovetop over medium heat, stirring occasionally until heated through. You can also reheat it in the microwave in 2-minute intervals, stirring between each interval. If you’re reheating from frozen, I recommend using the stovetop method with a splash of water or broth to prevent sticking, and allow extra time for thorough heating. The Instant Pot’s Sauté function also works well for reheating—just add a bit of liquid and stir frequently.
Frequently Asked Questions
Can I use dried beans instead of canned?
Yes, you can use dried beans, but you’ll need to adjust the cooking time and method. I recommend soaking 1½ cups of dried kidney beans overnight, draining them, and adding them with the other ingredients. Increase the pressure cooking time to 25-30 minutes to ensure the beans cook through completely. Keep in mind that dried beans can be unpredictable, so check for doneness and cook longer if needed.
Why did my Instant Pot display a “Burn” warning?
The burn warning typically occurs when food sticks to the bottom of the pot. This usually happens if you didn’t thoroughly deglaze after browning the meat or if tomato products are in direct contact with the bottom. If you get a burn warning, turn off the Instant Pot, release the pressure, open the lid, and scrape the bottom thoroughly. Add a bit more liquid, stir well, and try again. The layering method in this recipe is specifically designed to prevent this issue.
Can I double this recipe?
You can increase this recipe, but I don’t recommend more than 1.5 times the original amount to avoid overfilling your Instant Pot. Most models shouldn’t be filled more than two-thirds full for foods that expand or create liquid. If you need to feed a larger crowd, I suggest making two separate batches or using a larger 8-quart Instant Pot if you have one.
How can I make this chili thicker?
If your chili is too thin, use the Sauté function after pressure cooking to simmer it uncovered until it reaches your desired consistency. You can also add a cornstarch slurry (equal parts cornstarch and cold water mixed together) and simmer for a few minutes. Another option is to mash some of the beans against the side of the pot, which naturally thickens the chili while adding body.
Can I add other vegetables?
Absolutely! Diced carrots, celery, corn, or zucchini all work well in this chili. I recommend adding heartier vegetables like carrots with the onions and peppers, while more delicate vegetables like zucchini can be stirred in after pressure cooking and warmed through using the Sauté function. Just keep in mind that adding too many vegetables will increase the liquid content.
Do I need to drain the ground beef?
It depends on the fat content of your beef. If you’re using 85/15 or leaner ground beef, you typically don’t need to drain it—the small amount of fat adds flavor. However, if you’re using 80/20 or fattier ground beef, I recommend draining most of the excess fat after browning to prevent the chili from being greasy. Leave just a tablespoon or so for flavor.
Instant Pot Chili Recipe
This easy Instant Pot Chili is a hearty, flavorful pressure cooker meal made with seasoned ground beef, beans, tomatoes, and bold spices. Perfect for busy weeknights, this one-pot dinner delivers rich, slow-cooked flavor in a fraction of the time.
Prep Time: 10 minutes
Cook Time: 15 minutes
Additional Time: 15 minutes (pressure build-up and release)
Total Time: 40 minutes
Servings: 6-8 servings
Difficulty: Easy
Cuisine: American
Course: Dinner
Ingredients
- 1½ lbs ground beef
- 1 onion, diced
- 3 garlic cloves, minced
- 1 green bell pepper, diced
- 2 cans kidney beans (15 oz each), drained
- 1 can diced tomatoes (28 oz)
- 1 can tomato sauce (15 oz)
- 1 cup beef broth
- 2 tbsp chili powder
- 1 tsp ground cumin
- 1 tsp smoked paprika
- 1 tbsp olive oil
- Salt and black pepper to taste
Instructions
- Select the Sauté function on the Instant Pot and add olive oil. Allow it to heat for about 1 minute.
- Add ground beef and cook for 5-6 minutes, breaking it apart with a wooden spoon until browned and no longer pink.
- Stir in diced onion and bell pepper, cooking for 3 minutes until they begin to soften.
- Add minced garlic and cook for 30 seconds, stirring constantly to prevent burning.
- Add chili powder, cumin, smoked paprika, salt, and black pepper. Stir to coat the meat and vegetables with the spices.
- Pour in beef broth and scrape the bottom of the pot thoroughly with a wooden spoon to remove any browned bits stuck to the bottom.
- Stir in the drained kidney beans until evenly distributed.
- Layer the diced tomatoes and tomato sauce on top without stirring them in.
- Secure the lid on the Instant Pot, ensuring it’s properly locked. Set the pressure valve to the Sealing position.
- Select Pressure Cook or Manual mode and set to High pressure for 15 minutes.
- When the cooking cycle completes, allow 10 minutes of natural pressure release.
- Carefully turn the valve to Venting to release any remaining pressure. Wait until the float valve drops before opening the lid.
- Stir the chili well to combine all ingredients. If you prefer a thicker consistency, select the Sauté function and simmer uncovered for 5-10 minutes, stirring occasionally.
- Taste and adjust seasoning with additional salt and pepper if needed. Serve hot with your favorite chili toppings.
Recipe Notes
- For best results, use 85/15 or 90/10 lean ground beef to minimize excess grease.
- Always thoroughly scrape the bottom of the pot after adding the broth to prevent the burn warning.
- The layering technique (adding tomatoes on top without stirring) helps prevent sticking and ensures even cooking.
- Natural pressure release is important for maintaining the texture of the beans and preventing splattering.
- This chili thickens as it sits. If reheating, you may need to add a splash of broth or water to reach desired consistency.
- Adjust the heat level by increasing or decreasing the chili powder, or add diced jalapeños for extra spice.
- For a smokier flavor, add an additional ½ teaspoon of smoked paprika or a dash of liquid smoke.
Nutrition Information (Per Serving, Estimated)
Serving Size: 1 bowl (based on 8 servings)
Calories: 320
Carbohydrates: 28g
Protein: 26g
Fat: 12g
Saturated Fat: 4g
Fiber: 8g
Sugar: 6g
Sodium: 680mg
Nutrition information is estimated based on standard ingredient measurements and may vary based on specific products used and portion sizes.
