
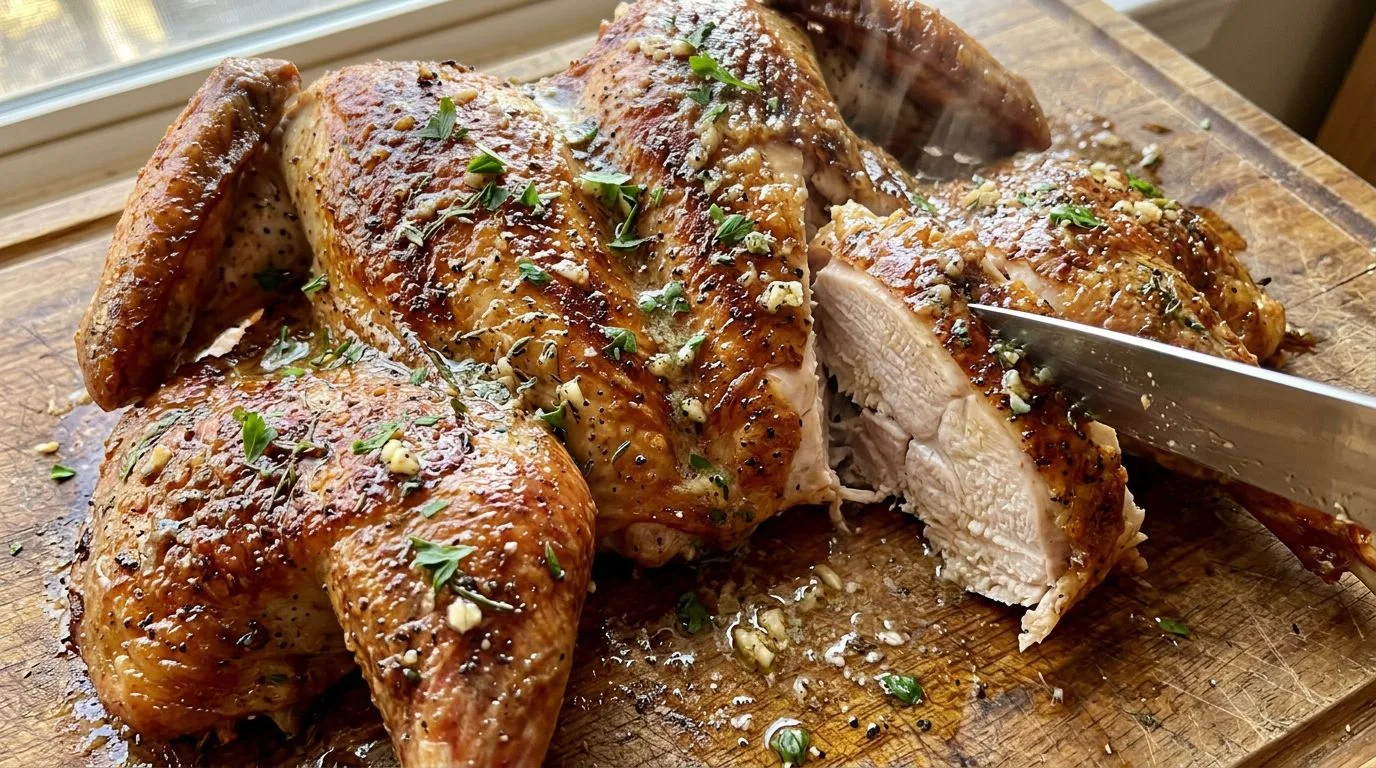
If you’ve ever struggled with a turkey that cooks unevenly—dry breast meat while you wait for the thighs to finish—then spatchcocking is about to become your new favorite technique. I love this method because it transforms the traditional Thanksgiving turkey into something that roasts faster, browns more evenly, and delivers incredibly juicy meat with the crispiest, most golden skin you’ve ever tasted. By removing the backbone and flattening the bird, you create a uniform thickness that allows heat to circulate evenly, cutting your cooking time nearly in half.
This Spatchcock Turkey with Garlic Herb Butter takes the technique one step further by tucking a luxurious blend of butter, fresh herbs, garlic, and lemon zest directly under the skin. As the turkey roasts, that butter bastes the meat from the inside out, infusing every bite with incredible flavor while keeping the breast tender and moist. The result is a stunning centerpiece that looks impressive, tastes phenomenal, and frees up valuable oven time for all those delicious side dishes.
Whether you’re hosting Thanksgiving dinner or simply want to elevate your holiday table, I find that this recipe delivers restaurant-quality results without the stress. The technique might sound intimidating if you’ve never done it before, but I promise it’s surprisingly straightforward—and once you try it, you’ll never want to roast a turkey the traditional way again.
Why You’ll Love This Spatchcock Turkey Recipe
There are so many reasons why this preparation method has become my go-to approach for cooking turkey. First and foremost, the time savings are remarkable. A traditional 12-14 pound turkey can take 3-4 hours to roast, but a spatchcocked turkey of the same size cooks in just 75-120 minutes. That’s nearly half the time, which means less stress on the big day and more flexibility with your oven schedule.
I also love how evenly everything cooks. Because the turkey lies flat in the pan, the breast and thighs are at roughly the same level, so they finish cooking at the same time. No more overcooked breast meat or undercooked dark meat—just perfectly cooked turkey throughout. The increased surface area also means more crispy, golden skin, which is honestly the best part of any roasted turkey.
The garlic herb butter adds another layer of excellence to this recipe. By spreading it under the skin, you’re essentially creating a self-basting system that keeps the meat incredibly moist while building deep, savory flavor. The combination of rosemary, thyme, sage, and parsley with garlic and lemon zest is classic and aromatic, filling your kitchen with the most wonderful holiday scents as it roasts.
Finally, I appreciate how this method makes carving so much easier. With the backbone removed and the turkey already flattened, you can simply cut along the breastbone and separate the halves, then portion out the legs, thighs, wings, and breast meat with minimal effort. It’s a practical, elegant solution that delivers maximum flavor with less fuss.
Ingredients and Substitutions
The ingredient list for this recipe is straightforward and focuses on quality over quantity. Here’s what you’ll need and some helpful substitutions if necessary:
Turkey: A 12-14 pound whole turkey is ideal for this recipe. I recommend choosing a fresh turkey if possible, as it tends to have better flavor and texture than frozen. If you’re using a frozen turkey, make sure it’s completely thawed before you begin—this typically takes 3-4 days in the refrigerator. Avoid pre-brined or self-basting turkeys, as they can become too salty with the additional seasoning.
Butter: Unsalted butter gives you complete control over the seasoning. Make sure it’s softened to room temperature so it mixes easily with the herbs and garlic. If you need a dairy-free option, you can substitute with softened ghee or a high-quality plant-based butter, though the flavor will be slightly different.
Fresh Herbs: I strongly recommend using fresh rosemary, thyme, parsley, and sage for the best flavor. Fresh herbs have a brightness and complexity that dried herbs simply can’t match. If you absolutely must substitute dried herbs, use about one-third the amount (so roughly 2 teaspoons of each dried herb instead of 2 tablespoons fresh), but know that the flavor won’t be quite as vibrant.
Garlic: Fresh minced garlic is essential here. I like to mince it finely so it distributes evenly throughout the butter. Avoid using pre-minced garlic from a jar, as it lacks the pungency and fresh flavor of freshly minced cloves.
Lemon Zest: The zest adds a subtle brightness that balances the richness of the butter. Use a microplane or fine grater to remove just the yellow outer layer, avoiding the bitter white pith underneath. If you don’t have fresh lemon, you can omit it, though I find it really enhances the overall flavor profile.
Aromatics: The quartered onion and chicken broth in the roasting pan create a flavorful base and help keep the turkey moist. You can substitute the onion with shallots, leeks, or even celery and carrots. Low-sodium chicken stock or turkey stock works well, and vegetable broth is a fine substitute if needed.
For a complete Thanksgiving spread, I recommend pairing this turkey with classic sides like Garlic Parmesan Roasted Brussels Sprouts, which complement the herb butter beautifully.
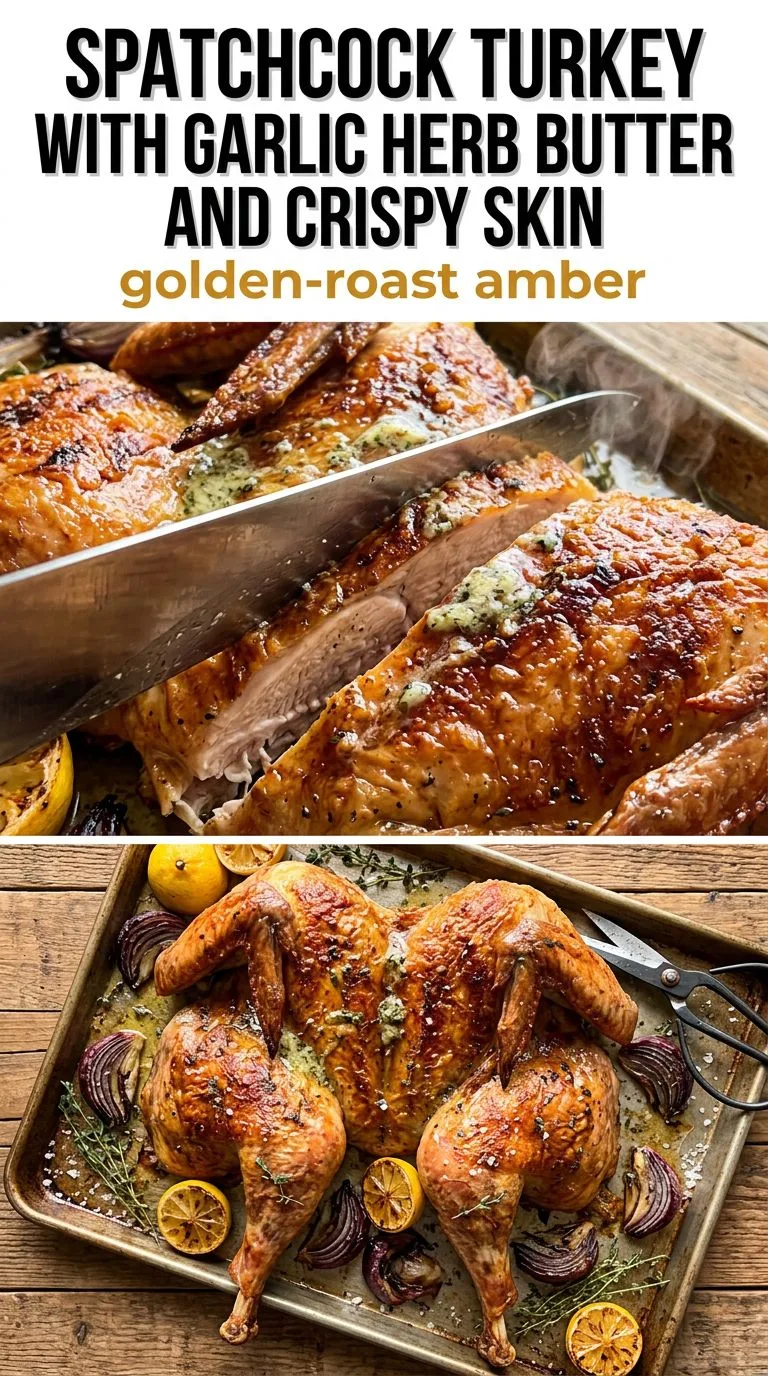
How to Make Spatchcock Turkey with Garlic Herb Butter
The process of spatchcocking and roasting this turkey is more straightforward than you might think. Here’s how I approach each step:
Preparing the Turkey
Start by preheating your oven to 425°F. Remove the turkey from its packaging and take out the giblets and neck from the cavity—these are usually tucked inside in a small bag. Pat the entire turkey completely dry with paper towels, inside and out. This step is crucial for achieving crispy skin, so don’t rush it. Any moisture on the surface will steam rather than crisp during roasting.
Place the turkey breast-side down on a large, sturdy cutting board. You’ll need a pair of heavy-duty kitchen shears or poultry shears for the next step. Starting at the tail end, cut along one side of the backbone, staying as close to the spine as possible. Then cut along the other side of the backbone to remove it completely. Save the backbone for making stock if you like—it adds wonderful flavor to gravy or soup.
Flip the turkey over so it’s breast-side up. Now comes the satisfying part: press down firmly on the breastbone with both hands until you hear a crack and the turkey lies flat. It might take a bit of pressure, but once it flattens, the turkey will stay in that position. This flattened shape is what allows for even cooking and maximum skin crisping.
Making the Garlic Herb Butter
In a small bowl, combine the softened butter with the minced garlic, chopped rosemary, thyme, parsley, sage, lemon zest, kosher salt, and black pepper. Mix everything together thoroughly until well combined. The butter should be fragrant and flecked with green herbs and golden garlic. I like to taste a tiny bit to make sure the seasoning is balanced—it should be savory, herby, and slightly garlicky.
Applying the Butter
This is where the magic happens. Starting at the neck end of the turkey, carefully slide your fingers under the skin of the breast, gently separating it from the meat without tearing it. Work your way down toward the thighs, loosening the skin as much as possible. You want to create pockets where you can spread the butter.
Take about two-thirds of the garlic herb butter and spread it under the skin, massaging it gently from the outside to distribute it evenly over the breast meat and thighs. This butter will melt during roasting and baste the meat from within, keeping it incredibly moist and flavorful. Use the remaining butter to rub over the outside of the turkey, coating the skin evenly.
Setting Up the Roasting Pan
Place the quartered onion in the bottom of a large roasting pan and pour in the chicken broth. Set a roasting rack over the pan and position the spatchcocked turkey on the rack, skin-side up. The rack elevates the turkey so hot air can circulate underneath, promoting even cooking and crispy skin all over. Drizzle the olive oil over the top of the turkey for an extra boost of browning.
Roasting the Turkey
Roast the turkey at 425°F for approximately 75-120 minutes, depending on the exact size of your bird. I recommend starting to check the temperature after about 75 minutes. Use an instant-read thermometer to check the temperature in several places: the thickest part of the breast and the innermost part of the thigh. You’re looking for a minimum internal temperature of 165°F in all areas.
If you notice any parts of the turkey browning too quickly—usually the wing tips or edges of the breast—tent those areas loosely with aluminum foil to prevent burning. Rotate the pan halfway through cooking if your oven has hot spots to ensure even browning.
Resting and Serving
Once the turkey reaches the proper temperature, remove it from the oven and tent it loosely with foil. Let it rest for 20-30 minutes before carving. This resting period allows the juices to redistribute throughout the meat, ensuring every slice is moist and flavorful. The turkey will continue to cook slightly during this time, and the internal temperature may rise by a few degrees.
After resting, carve the turkey by cutting along the breastbone to separate the two halves, then removing the legs, thighs, and wings. Slice the breast meat and arrange everything on a platter. Strain the pan juices and serve them alongside the turkey—they’re incredibly flavorful from the herbs, garlic, and onions.
Expert Tips for Best Results
I’ve learned a few tricks over the years that make a real difference in the final result:
- Dry the skin thoroughly: Moisture is the enemy of crispy skin. After patting the turkey dry initially, I like to let it sit uncovered in the refrigerator for a few hours or even overnight. This extra drying time helps achieve that restaurant-quality crispy skin.
- Use a meat thermometer: Don’t rely on timing alone. Ovens vary, and turkey sizes can differ even within the same weight range. An instant-read thermometer is the only reliable way to know when your turkey is perfectly cooked.
- Don’t skip the resting time: I know it’s tempting to carve immediately, but resting is crucial. Cutting into the turkey too soon causes all those precious juices to run out onto the cutting board instead of staying in the meat.
- Season generously: Turkey is a large bird with a lot of meat, so it needs adequate seasoning. Don’t be shy with the salt and herbs—they’re what make the difference between bland and delicious.
- Save the backbone: Even if you don’t make stock immediately, freeze the backbone for later. It’s perfect for making rich, flavorful turkey stock for soups and gravies.
- Room temperature matters: If possible, let the turkey sit at room temperature for about 30-45 minutes before roasting. This helps it cook more evenly. Just don’t leave it out for more than an hour for food safety reasons.
Serving Suggestions
This Spatchcock Turkey with Garlic Herb Butter is a stunning centerpiece that pairs beautifully with classic holiday sides. I love serving it with creamy mashed potatoes or garlic mashed potatoes to soak up the flavorful pan juices. The herb butter also complements roasted vegetables wonderfully—think roasted carrots, green beans, or Brussels sprouts.
For a traditional Thanksgiving feast, serve this turkey alongside stuffing (or dressing, depending on where you’re from), cranberry sauce, and gravy made from the pan drippings. The combination of savory turkey, tangy cranberries, and rich gravy is unbeatable. I also recommend a fresh salad to balance the richness of the meal—something simple with mixed greens, dried cranberries, and a light vinaigrette works perfectly.
If you’re looking for more inspiration, check out this Roast Turkey for Thanksgiving guide for additional tips and side dish ideas.
Don’t forget about the leftovers! This turkey makes incredible sandwiches the next day, especially on crusty bread with a bit of mayo, lettuce, and cranberry sauce. The meat is also perfect for turkey soup, turkey pot pie, or turkey salad.
Variations and Substitutions
While this recipe is delicious as written, there are several ways you can customize it to suit your preferences:
Different herb combinations: Feel free to adjust the herbs based on what you have or prefer. Oregano, marjoram, or tarragon would all work well. You could also add a bit of fresh chives or dill for a different flavor profile.
Spicy version: Add a teaspoon of red pepper flakes or a tablespoon of hot sauce to the herb butter for a kick of heat. Smoked paprika also adds a nice depth and subtle smokiness.
Citrus variations: Instead of lemon zest, try orange zest for a sweeter, more aromatic flavor. You could also use a combination of lemon and orange, or add lime zest for something different.
Maple glaze: During the last 15 minutes of roasting, brush the turkey with a mixture of maple syrup and Dijon mustard for a sweet-savory glaze that caramelizes beautifully.
Smaller bird: This technique works beautifully with smaller turkeys (8-10 pounds) or even large chickens. Just reduce the cooking time accordingly and always check with a thermometer.
Compound butter variations: You can change up the butter entirely—try a sun-dried tomato and basil butter, a blue cheese and walnut butter, or a simple lemon-pepper butter.
Storage, Freezing, and Reheating
Proper storage ensures your leftover turkey stays safe and delicious for days after your feast.
Refrigerator Storage
Once the turkey has cooled to room temperature, remove the meat from the bones and store it in airtight containers in the refrigerator. Properly stored, cooked turkey will keep for 3-4 days. I like to separate the white meat from the dark meat, as they have slightly different textures and you might want to use them for different purposes.
Store any pan juices separately in a sealed container. The fat will rise to the top and solidify, which actually helps preserve the juices underneath. You can skim off the fat before reheating or leave it for added richness.
Freezing
Turkey freezes exceptionally well. Slice or shred the meat and portion it into freezer-safe bags or containers, removing as much air as possible. Frozen turkey will maintain its quality for 2-3 months. I recommend labeling the containers with the date so you can keep track of how long it’s been frozen.
For best results when freezing, add a bit of the pan juices or some chicken broth to the container with the meat. This helps prevent freezer burn and keeps the turkey moist when you reheat it.
Reheating
The key to reheating turkey is doing it gently to avoid drying it out. For refrigerated turkey, place the sliced meat in a baking dish, add a splash of chicken broth or the reserved pan juices, cover tightly with foil, and warm in a 325°F oven for about 20-25 minutes until heated through.
For frozen turkey, thaw it overnight in the refrigerator first, then reheat using the same method. You can also reheat individual portions in the microwave—just add a bit of liquid and cover the dish to create steam, which helps keep the meat moist.
Frequently Asked Questions
What does spatchcocking mean?
Spatchcocking (also called butterflying) is a technique where you remove the backbone of a bird and flatten it so it lies in a single plane. This allows for faster, more even cooking and creates more surface area for crispy skin.
Do I need special equipment to spatchcock a turkey?
The main tool you need is a pair of sturdy kitchen shears or poultry shears. Regular scissors won’t be strong enough to cut through the bones. A large cutting board and a roasting pan with a rack are also helpful.
Can I spatchcock the turkey ahead of time?
Absolutely! You can spatchcock the turkey up to 24 hours in advance. After flattening it, pat it dry, cover it loosely with plastic wrap, and refrigerate until you’re ready to apply the butter and roast it. This actually helps dry out the skin for extra crispiness.
What should I do with the backbone?
Don’t throw it away! The backbone is perfect for making turkey stock. Roast it with some vegetables, then simmer it in water with herbs for a rich, flavorful stock that’s perfect for gravy or soup.
Why is my turkey skin not crispy?
The most common reason is moisture on the skin. Make sure to pat the turkey completely dry before roasting, and if possible, let it air-dry in the refrigerator for several hours. Also ensure your oven is fully preheated to 425°F before the turkey goes in.
Can I use this method for a larger turkey?
Yes, but keep in mind that very large turkeys (over 16 pounds) can be difficult to flatten and may not fit in a standard roasting pan. For turkeys larger than 14-15 pounds, you might need to increase the cooking time and use a larger pan.
How do I know when the turkey is done?
Always use a meat thermometer. The turkey is done when the thickest part of the breast and the innermost part of the thigh both reach 165°F. Check multiple spots to ensure even cooking throughout.
Can I make this recipe without butter?
Yes, you can substitute olive oil or avocado oil mixed with the herbs and garlic. The result won’t be quite as rich, but it will still be flavorful. Ghee is another excellent option if you’re avoiding dairy but still want that buttery flavor.
Spatchcock Turkey with Garlic Herb Butter and Crispy Skin
A juicy spatchcock turkey roasted with garlic herb butter until the skin turns golden and crispy. This flavorful Thanksgiving centerpiece cooks faster and more evenly than a traditional whole turkey, delivering tender meat and incredible flavor in every bite.
Prep Time: 20 minutes
Cook Time: 90 minutes (75-120 minutes depending on size)
Resting Time: 25 minutes
Total Time: 2 hours 15 minutes
Servings: 10-12
Difficulty: Medium
Cuisine: American
Course: Main Course (Dinner)
Ingredients
- 1 whole turkey (12–14 lb)
- 1 cup unsalted butter (softened)
- 6 garlic cloves (minced)
- 2 tbsp fresh rosemary (chopped)
- 2 tbsp fresh thyme (chopped)
- 2 tbsp fresh parsley (chopped)
- 1 tbsp fresh sage (chopped)
- 2 tsp kosher salt
- 1 tsp black pepper
- 1 lemon (zested)
- 1 tbsp olive oil
- 1 onion (quartered)
- 1 cup chicken broth
Instructions
- Preheat the oven to 425°F (220°C). Remove the giblets from the turkey, pat it completely dry with paper towels, and place it breast-side down on a large cutting board.
- Using sturdy kitchen shears, cut along both sides of the backbone and remove it. Flip the turkey over and press firmly on the breastbone until the turkey lies flat.
- In a small bowl, mix softened butter, minced garlic, rosemary, thyme, parsley, sage, lemon zest, salt, and black pepper until well combined.
- Carefully loosen the skin over the breasts and thighs by sliding your fingers underneath. Spread most of the garlic herb butter underneath the skin and rub the remaining butter over the outside of the turkey.
- Place the quartered onion in a large roasting pan, pour in the chicken broth, and position the turkey skin-side up on a roasting rack set over the pan. Drizzle the turkey with olive oil.
- Roast for approximately 75–120 minutes, depending on turkey size, rotating the pan halfway through if necessary. Check the internal temperature in several places (thickest part of breast and innermost part of thigh). Cover any areas browning too quickly with aluminum foil.
- Remove the turkey from the oven when the thickest parts of the breast and thighs reach at least 165°F (74°C). Tent loosely with foil and rest for 20–30 minutes before carving. Serve with the strained pan juices.
Recipe Notes
- For extra crispy skin, let the prepared turkey sit uncovered in the refrigerator for 2-4 hours or overnight before roasting.
- Cooking time varies based on turkey size. A 12-pound bird typically takes about 75-90 minutes, while a 14-pound bird may take 100-120 minutes. Always use a thermometer to confirm doneness.
- If you don’t have a roasting rack, you can create a makeshift rack using thick carrot and celery stalks arranged in the pan.
- Save the backbone and wing tips to make turkey stock for gravy or soup.
- The turkey will continue to cook slightly during the resting period, and the temperature may rise by 5-10 degrees.
- For easier carving, cut along the breastbone to separate the turkey into two halves, then remove the legs and slice the breast meat.
Nutrition Information (Per Serving, Estimated)
Serving Size: 1/12 of turkey (approximately 6 oz meat with skin)
Calories: 485
Carbohydrates: 2g
Protein: 52g
Fat: 28g
Saturated Fat: 12g
Fiber: 0g
Sugar: 0g
Sodium: 520mg
Nutrition information is estimated based on standard ingredient values and may vary based on actual ingredients used, portion sizes, and preparation methods.
