
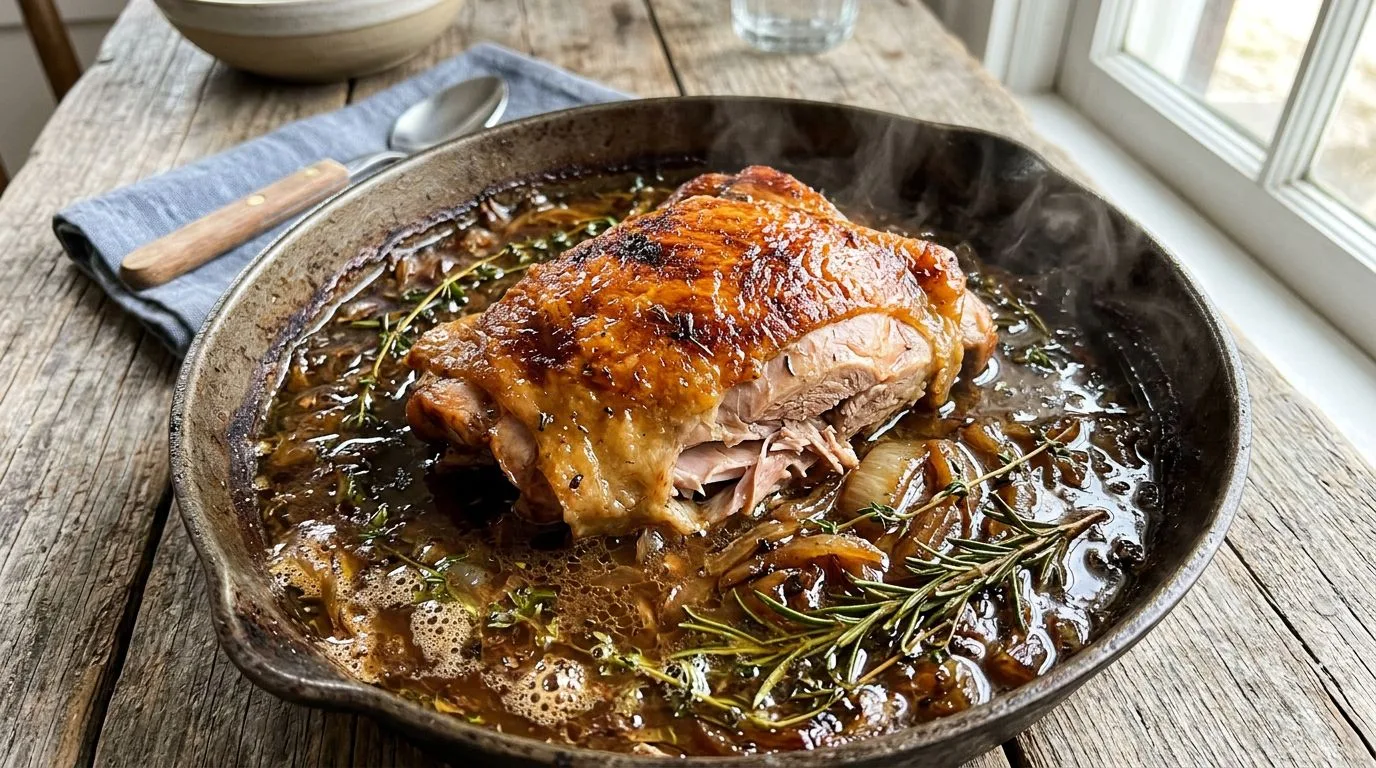
When I want to serve something truly special without the hassle of roasting an entire turkey, I turn to slow roasted turkey thighs. These tender, juicy pieces of dark meat are incredibly forgiving, packed with flavor, and so much easier to manage than a whole bird. Paired with a rich onion and herb gravy made right in the roasting pan, this dish delivers all the comfort and satisfaction of a traditional Thanksgiving dinner with a fraction of the stress.
Turkey thighs are one of the most underrated cuts of poultry. They stay moist during long cooking times, develop beautifully crispy skin, and absorb the flavors of herbs and aromatics like nothing else. I love how the slow roasting process transforms simple ingredients into something extraordinary—the onions caramelize, the garlic mellows, and the fresh herbs infuse every bite with warmth and depth. Whether you’re cooking for a small gathering or simply want an alternative to the traditional whole turkey, this recipe is a winner.
The best part? This is a one-pan wonder that practically cooks itself. Once you’ve seared the turkey and built the flavor base, the oven does all the work while you focus on side dishes or spend time with your guests. The result is fall-off-the-bone tender meat with a gorgeous golden skin and a gravy so good you’ll want to pour it over everything on your plate.
Why You’ll Love This Recipe
There are so many reasons why slow roasted turkey thighs have become one of my go-to recipes for special occasions and cozy family dinners. First and foremost, turkey thighs are incredibly flavorful. Dark meat has more fat than white meat, which means it stays juicy and tender even with extended cooking times. You don’t have to worry about dry, overcooked turkey when you’re working with thighs.
I also appreciate how forgiving this recipe is. Unlike a whole turkey that requires precise timing and temperature management, turkey thighs are much more flexible. If they cook a little longer than planned, they just become more tender. The slow roasting method at a moderate temperature ensures the meat cooks evenly and develops deep, rich flavors.
The onion and herb gravy is another highlight. By cooking the turkey directly on a bed of sliced onions with fresh rosemary, thyme, and sage, you’re building layers of flavor that become the foundation of an incredible gravy. The pan drippings, caramelized onions, and herbs combine to create a sauce that’s restaurant-quality but made entirely at home.
This recipe is also perfect for smaller gatherings. If you’re not feeding a crowd, roasting a whole turkey can feel wasteful. Four turkey thighs serve about 4-6 people comfortably, making it ideal for intimate holiday dinners or Sunday suppers. Plus, turkey thighs are generally more affordable than whole turkeys, so you get amazing flavor without breaking the bank.
Ingredients and Substitutions
The ingredient list for this recipe is straightforward, focusing on quality basics that work together to create maximum flavor. Here’s what you’ll need and some helpful substitutions if you want to customize the dish.
Turkey thighs are the star of the show. Look for thighs that are roughly the same size so they cook evenly. If you can only find smaller thighs, you may need to adjust the cooking time slightly. Bone-in, skin-on thighs are essential for the best flavor and texture—the bones add richness to the gravy, and the skin becomes wonderfully crispy.
Olive oil and butter provide the fat needed for searing and add richness to the dish. I like using a combination of both because the olive oil has a higher smoke point for searing, while the butter adds a luxurious flavor. You can use all olive oil if you prefer, or substitute with ghee for a slightly different taste.
Onions form the aromatic base of the gravy. I recommend yellow or sweet onions for the best balance of flavor. Red onions will work in a pinch, though they’ll add a slightly sharper taste. The onions should be sliced rather than diced so they hold their shape during the long roasting time.
Garlic adds depth and savory notes. Fresh garlic is best here—I don’t recommend substituting with garlic powder for this recipe since the fresh cloves mellow and sweeten as they roast.
Chicken or turkey broth creates the liquid base for the gravy. I prefer low-sodium broth so I can control the salt level. If you have homemade turkey stock, even better! Vegetable broth will work if that’s what you have on hand.
Fresh herbs—rosemary, thyme, and sage—are classic turkey seasonings that bring warmth and earthiness to the dish. Fresh herbs are significantly more flavorful than dried in this application, but if you must substitute, use about one-third the amount of dried herbs.
Smoked paprika adds a subtle smoky depth and helps with browning. Regular paprika works fine if you don’t have smoked, or you can omit it entirely.
Worcestershire sauce contributes umami and complexity to the gravy. Soy sauce or tamari can substitute if needed, though the flavor profile will be slightly different.
All-purpose flour thickens the gravy. For a gluten-free version, use cornstarch or a gluten-free flour blend, adjusting the quantity as needed.
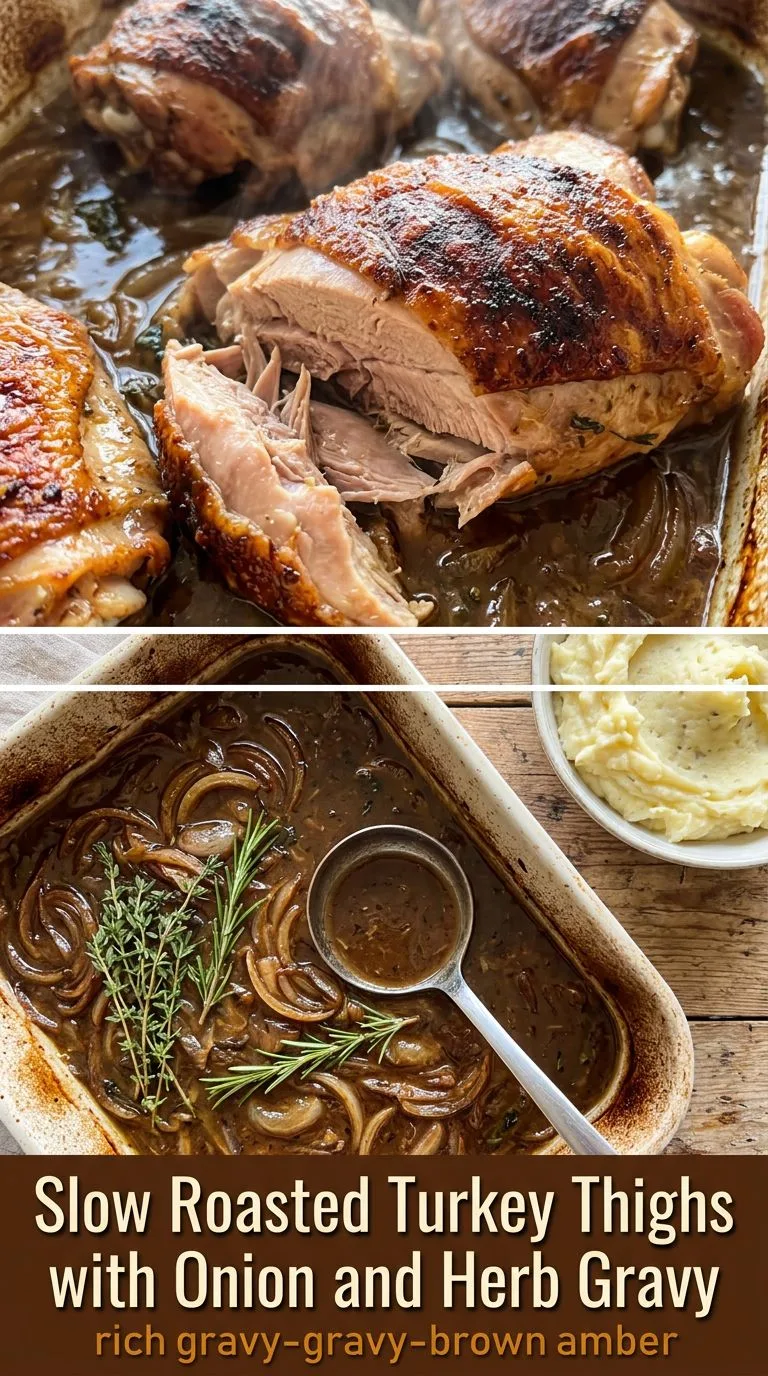
How to Make Slow Roasted Turkey Thighs
Making this recipe is surprisingly simple, especially considering how impressive the final result looks and tastes. The process breaks down into three main phases: seasoning and searing, building the flavor base, and slow roasting to perfection.
Start by preheating your oven to 325°F. This moderate temperature is ideal for slow roasting—it’s hot enough to cook the turkey thoroughly but gentle enough to keep the meat tender and juicy. While the oven heats, pat the turkey thighs completely dry with paper towels. This step is crucial for achieving crispy skin. Any moisture on the surface will steam rather than brown, so take your time here.
Season the thighs generously on all sides with kosher salt, black pepper, and smoked paprika. Don’t be shy with the seasoning—turkey thighs are substantial pieces of meat that can handle bold flavors. I like to season them about 15-20 minutes before cooking if possible, which gives the salt time to penetrate the meat.
Heat the olive oil and butter in a large oven-safe roasting pan or Dutch oven over medium-high heat. Once the butter is melted and the pan is hot, carefully place the turkey thighs skin-side down. Let them sear undisturbed for 4-5 minutes until the skin is deeply golden and releases easily from the pan. Flip and brown the other side for another 3-4 minutes. This searing step builds flavor through the Maillard reaction and creates a beautiful color on the finished dish.
Transfer the seared thighs to a plate and reduce the heat to medium. Add the sliced onions to the same pan—they’ll sizzle in the flavorful fat left behind. Sauté the onions for about 5 minutes, stirring occasionally, until they begin to soften and turn translucent. The onions will pick up all those delicious browned bits from the bottom of the pan.
Stir in the minced garlic, fresh rosemary, thyme, sage, and Worcestershire sauce. Cook for just 1 minute, stirring constantly, until the herbs become fragrant. You’ll know it’s ready when you can smell the aromatics throughout your kitchen.
Pour in the chicken or turkey broth and use a wooden spoon to scrape up any remaining browned bits from the bottom of the pan. These bits are pure flavor and will enrich your gravy beautifully. Bring the liquid to a simmer.
Nestle the turkey thighs back into the pan, arranging them skin-side up on top of the onion mixture. The liquid should come about halfway up the sides of the thighs—you want them partially submerged but with the skin exposed so it can crisp up later.
Cover the pan loosely with aluminum foil and transfer it to the preheated oven. Roast for 1½ to 2½ hours, depending on the size of your thighs. About 20-30 minutes before the end of cooking, remove the foil to allow the skin to crisp and brown.
The turkey is done when it reaches an internal temperature of at least 165°F in the thickest part of the thigh. However, I find that dark meat is even better when cooked to 175-185°F—at this temperature, the connective tissues break down completely, making the meat incredibly tender and easy to pull apart.
Once the turkey is cooked, transfer the thighs to a serving platter and tent loosely with foil to keep warm. To finish the gravy, place the roasting pan on the stovetop over medium heat. Whisk the flour into a small amount of the cooled pan liquid to create a slurry, then stir this back into the pan. Simmer for 3-5 minutes, whisking frequently, until the gravy thickens to your desired consistency. Taste and adjust the seasoning with additional salt and pepper if needed.
Expert Tips for Best Results
After making this recipe many times, I’ve learned a few tricks that ensure perfect results every time. First, don’t skip the searing step. While it adds a few extra minutes to the prep time, searing creates a depth of flavor that you simply can’t achieve otherwise. The caramelized surface on the turkey and the fond (browned bits) left in the pan are essential for a rich, complex gravy.
I recommend using an oven-safe roasting pan or Dutch oven that can go from stovetop to oven. This allows you to build all the flavors in one vessel and makes cleanup much easier. If you don’t have an oven-safe pan, you can sear the turkey in a skillet and then transfer everything to a roasting pan, but you’ll want to deglaze the skillet with a bit of the broth to capture all those flavorful bits.
Temperature is key when roasting turkey thighs. I always use a meat thermometer to check for doneness rather than relying solely on time. Thighs can vary significantly in size, which affects cooking time. Insert the thermometer into the thickest part of the thigh without touching the bone for the most accurate reading.
For extra crispy skin, you can finish the turkey under the broiler for 2-3 minutes after roasting. Watch it carefully during this time—broilers are powerful and can go from perfectly crispy to burnt very quickly. I only recommend this if your skin isn’t as crispy as you’d like after removing the foil.
If your gravy seems too thin, continue simmering it on the stovetop until it reduces to your preferred consistency. If it’s too thick, simply whisk in a bit more broth. The beauty of making gravy is that it’s very forgiving and easy to adjust.
Let the turkey rest for about 10 minutes before serving. This allows the juices to redistribute throughout the meat, ensuring every bite is moist and flavorful. Use this time to finish your gravy and get your side dishes ready.
Serving Suggestions
Slow roasted turkey thighs with onion and herb gravy are incredibly versatile and pair beautifully with classic comfort food sides. My favorite way to serve them is with traditional Thanksgiving accompaniments, even when it’s not November. The rich, savory flavors of the turkey and gravy complement so many dishes.
Mashed potatoes are a natural pairing—the creamy texture is perfect for soaking up all that delicious gravy. I love serving these turkey thighs with make-ahead crockpot mashed potatoes, which free up oven space and can be prepared in advance. The convenience factor is unbeatable when you’re juggling multiple dishes.
For a complete holiday-style meal, add Southern cornbread dressing to the table. The savory, herb-flecked dressing is a perfect complement to the turkey, and the combination feels festive and special.
Roasted vegetables are another excellent choice. I particularly like roasted Brussels sprouts, carrots, or green beans. The slight char and caramelization on roasted vegetables balance the richness of the turkey and gravy beautifully.
A simple green salad with a tangy vinaigrette provides a fresh, bright contrast to the hearty main dish. I recommend something with arugula or mixed greens, perhaps with some dried cranberries and toasted pecans for a seasonal touch.
Don’t forget about cranberry sauce! Whether you prefer the jellied kind from a can or a homemade version with fresh cranberries, the tart-sweet flavor is a classic turkey companion for good reason.
For a more casual presentation, you can shred the turkey meat and serve it on crusty rolls with plenty of gravy for incredible turkey sandwiches. This is a fantastic option for leftovers or for a more relaxed meal.
Variations and Substitutions
While this recipe is delicious as written, there are plenty of ways to customize it to suit your preferences or dietary needs. Here are some variations I’ve tried and loved.
Herb variations: While rosemary, thyme, and sage are classic turkey herbs, you can experiment with other combinations. Try adding fresh oregano, marjoram, or tarragon. A bay leaf or two added to the braising liquid also contributes wonderful depth.
Citrus addition: For a brighter flavor profile, add lemon or orange zest to the herb mixture, or tuck lemon slices under the turkey skin before roasting. A splash of white wine in place of some of the broth also adds pleasant acidity.
Spicy version: If you enjoy heat, add red pepper flakes to the herb mixture or include a diced jalapeño with the onions. A pinch of cayenne pepper in the seasoning rub also works well.
Mushroom gravy: For an earthier gravy, add sliced mushrooms (cremini or shiitake work beautifully) along with the onions. They’ll add umami and create an even richer sauce.
Root vegetable addition: Turn this into a complete one-pan meal by adding chunks of carrots, parsnips, or potatoes to the roasting pan during the last hour of cooking. They’ll absorb the flavors of the herbs and turkey drippings.
Gluten-free option: Use cornstarch instead of flour to thicken the gravy. Mix 1 tablespoon of cornstarch with 2 tablespoons of cold water to create a slurry, then whisk it into the simmering liquid.
Dairy-free version: Replace the butter with additional olive oil or use a plant-based butter substitute. The flavor will be slightly different but still delicious.
Storage, Freezing, and Reheating
One of the great things about this recipe is that it stores and reheats beautifully, making it perfect for meal prep or enjoying leftovers throughout the week.
Refrigerator storage: Allow the turkey and gravy to cool completely before storing. Place the turkey thighs in an airtight container and store the gravy separately in another container. Both will keep in the refrigerator for up to 4 days. Storing them separately prevents the turkey from becoming soggy.
Freezing: Turkey thighs freeze exceptionally well. Let them cool completely, then wrap each thigh individually in plastic wrap followed by aluminum foil, or place them in freezer-safe containers. The gravy can be frozen in a separate container or freezer bag. Both will keep frozen for up to 3 months. Label everything with the date so you can keep track.
Thawing: When you’re ready to enjoy your frozen turkey, transfer it to the refrigerator to thaw overnight. The gravy can be thawed the same way. Never thaw turkey at room temperature, as this can promote bacterial growth.
Reheating: For best results, reheat the turkey in the oven. Preheat to 325°F, place the thighs in a baking dish with a splash of broth or water to prevent drying, cover with foil, and heat for 20-25 minutes until warmed through. You can also reheat individual portions in the microwave—place the turkey on a microwave-safe plate, cover with a damp paper towel, and heat in 1-minute intervals until hot.
Reheat the gravy gently on the stovetop over medium-low heat, stirring frequently. If it’s too thick after refrigeration, whisk in a bit of broth to reach your desired consistency. You can also reheat gravy in the microwave, stirring every 30 seconds.
I find that leftover turkey thighs are fantastic shredded and used in sandwiches, salads, soups, or casseroles. The meat stays moist and flavorful, making it incredibly versatile for second-day meals.
Frequently Asked Questions
Can I use turkey drumsticks instead of thighs? Yes, turkey drumsticks work well with this recipe. They may require slightly longer cooking time due to their shape and density, so use a meat thermometer to ensure they reach the proper internal temperature.
Do I need to brine the turkey thighs first? Brining isn’t necessary for this recipe. The slow roasting method and the flavorful braising liquid keep the meat moist and tender without pre-brining. However, if you enjoy brined turkey, you can certainly brine the thighs for 4-8 hours before cooking. Just reduce the salt in the seasoning rub accordingly.
Can I make this recipe in a slow cooker? While you can adapt this recipe for a slow cooker, I recommend searing the turkey first on the stovetop for the best flavor. After searing and sautéing the aromatics, transfer everything to your slow cooker and cook on low for 6-7 hours or high for 3-4 hours until the turkey is tender.
What if I don’t have an oven-safe pan? You can sear the turkey and sauté the aromatics in a regular skillet, then transfer everything to a roasting pan or baking dish for the oven portion. Just make sure to deglaze the skillet with some of the broth to capture all the flavorful browned bits.
How do I know when the turkey is done? The most reliable method is using a meat thermometer. Insert it into the thickest part of the thigh without touching bone. The turkey is safe to eat at 165°F, but I recommend cooking dark meat to 175-185°F for the most tender, fall-off-the-bone texture.
Can I make the gravy ahead of time? Yes, you can make the gravy up to 2 days in advance. Store it in the refrigerator and reheat gently on the stovetop before serving, whisking in a bit of broth if needed to adjust the consistency.
Why is my turkey skin not crispy? The most common reason is moisture. Make sure to pat the turkey completely dry before seasoning, and don’t skip removing the foil during the last 20-30 minutes of cooking. If needed, you can finish under the broiler for 2-3 minutes, watching carefully to prevent burning.
Can I double this recipe? Absolutely! Just make sure you have a roasting pan large enough to accommodate all the thighs in a single layer. You may need to work in batches for the searing step if your pan isn’t large enough to sear all the thighs at once without crowding.
Slow Roasted Turkey Thighs with Onion and Herb Gravy
Tender, juicy turkey thighs slowly roasted with aromatic onions, garlic, and fresh herbs, then served with a rich homemade gravy. This comforting dish brings all the flavors of Thanksgiving to your table any time of year, with less fuss than roasting a whole bird.
- Prep Time: 15 minutes
- Cook Time: 2 hours
- Total Time: 2 hours 15 minutes
- Servings: 4-6 servings
- Difficulty: Easy
- Cuisine: American
- Course: Dinner
Ingredients
- 4 turkey thighs (about 4–5 lb total)
- 3 tbsp olive oil
- 3 tbsp unsalted butter
- 2 large onions, sliced
- 6 garlic cloves, minced
- 2 cups chicken or turkey broth
- 1 tbsp fresh rosemary, chopped
- 1 tbsp fresh thyme, chopped
- 1 tbsp fresh sage, chopped
- 1 tsp smoked paprika
- 1½ tsp kosher salt
- 1 tsp black pepper
- 2 tbsp all-purpose flour
- 1 tbsp Worcestershire sauce
Instructions
- Preheat the oven to 325°F (165°C). Pat the turkey thighs completely dry with paper towels and season generously on all sides with kosher salt, black pepper, and smoked paprika.
- Heat olive oil and butter in a large oven-safe roasting pan or Dutch oven over medium-high heat. Once hot, place the turkey thighs skin-side down and sear for 4–5 minutes until golden brown. Flip and brown the other side for 3-4 minutes. Transfer the thighs to a plate.
- Reduce heat to medium. Add the sliced onions to the same pan and sauté for 5 minutes, stirring occasionally, until softened and beginning to turn translucent.
- Stir in the minced garlic, rosemary, thyme, sage, and Worcestershire sauce. Cook for 1 minute, stirring constantly, until fragrant.
- Pour in the chicken or turkey broth and use a wooden spoon to scrape up any browned bits from the bottom of the pan. Bring to a simmer.
- Return the turkey thighs to the pan, arranging them skin-side up on top of the onion mixture. Cover loosely with aluminum foil.
- Roast in the preheated oven for 1½–2½ hours, depending on the size of the thighs. Remove the foil during the final 20–30 minutes to allow the skin to crisp.
- Cook until the internal temperature reaches at least 165°F (74°C) in the thickest part of the thigh. For more tender dark meat, cook to 175–185°F.
- Transfer the turkey thighs to a serving platter and tent loosely with foil to keep warm.
- Place the roasting pan on the stovetop over medium heat. Whisk the flour into a small amount of cooled pan liquid to create a smooth slurry, then stir this back into the pan. Simmer for 3-5 minutes, whisking frequently, until the gravy thickens to your desired consistency. Taste and adjust seasoning as needed.
- Serve the turkey thighs with the onion herb gravy spooned over the top.
Recipe Notes
- Turkey thigh sizes can vary significantly. Adjust cooking time based on the actual size of your thighs, always using a meat thermometer to check for doneness.
- For extra crispy skin, finish the turkey under the broiler for 2-3 minutes after roasting, watching carefully to prevent burning.
- The gravy can be made thicker or thinner by adjusting the amount of flour or by simmering longer to reduce, or by adding more broth to thin.
- Fresh herbs are strongly recommended for this recipe, as they provide significantly more flavor than dried herbs.
- If you don’t have an oven-safe pan, sear the turkey in a skillet and transfer to a roasting pan, making sure to deglaze the skillet with some broth to capture the flavorful bits.
Estimated Nutrition (Per Serving)
Based on 6 servings. Nutritional values are approximate and will vary based on exact ingredients used.
- Calories: 485 kcal
- Carbohydrates: 9g
- Protein: 52g
- Fat: 26g
- Saturated Fat: 8g
- Fiber: 1g
- Sugar: 3g
- Sodium: 720mg
