
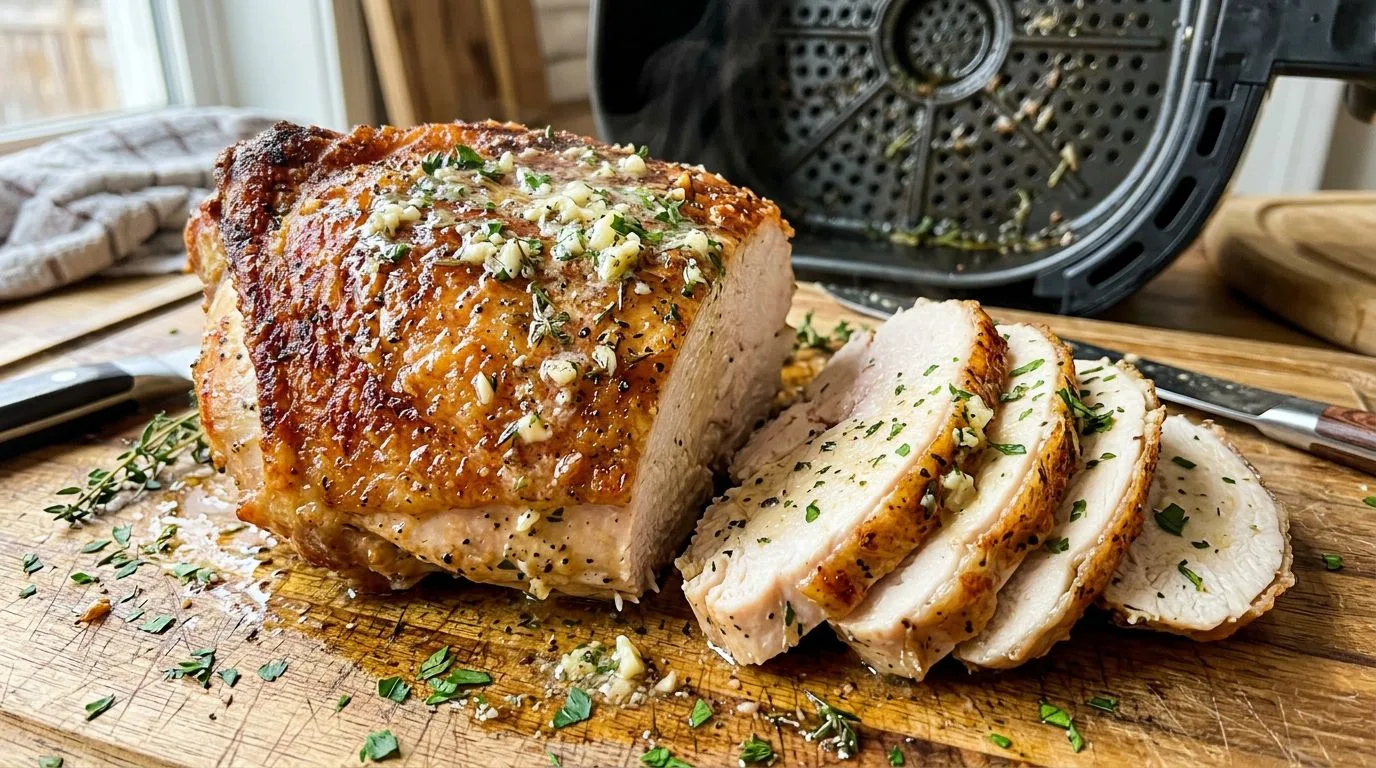
If you’re looking for a way to prepare turkey that delivers perfectly crispy skin and incredibly juicy meat without heating up your entire kitchen, this Air Fryer Turkey Breast with Garlic Herb Butter is exactly what you need. I love how the air fryer creates a beautifully golden, crispy exterior while keeping the inside tender and moist—all in a fraction of the time it takes to roast a whole turkey in the oven.
This recipe is ideal for smaller gatherings, weeknight dinners, or anyone who wants to enjoy turkey without committing to a full bird. The garlic herb butter adds incredible flavor that seeps into every bite, while the lemon zest brightens everything up. Whether you’re planning a scaled-down holiday meal or simply craving turkey dinner any time of year, this air fryer method makes it remarkably simple and foolproof.
I find that cooking turkey breast in the air fryer is one of the most efficient ways to achieve restaurant-quality results at home. The circulating hot air ensures even cooking, and you’ll have a show-stopping main dish ready in about an hour.
Why You’ll Love This Air Fryer Turkey Breast Recipe
This recipe has become one of my go-to methods for preparing turkey, and for good reason. The air fryer delivers results that rival traditional oven roasting but in significantly less time. You’ll get that coveted crispy, golden skin that everyone fights over, while the meat stays incredibly moist and flavorful thanks to the garlic herb butter.
I love how versatile this recipe is—it works beautifully for both bone-in and boneless turkey breasts, making it adaptable to whatever you find at the store. The herb butter mixture creates a fragrant, savory coating that infuses the meat with flavor from the inside out. When you loosen the skin and spread the butter underneath, you’re essentially basting the turkey as it cooks.
Another reason this recipe shines is its convenience. If you’re hosting a small Thanksgiving dinner for two or a small group, you don’t need to wrestle with a massive bird. This turkey breast cooks in 40 to 65 minutes depending on size, freeing up your oven for side dishes. Plus, cleanup is minimal compared to traditional roasting methods.
The combination of fresh herbs—rosemary, thyme, and parsley—creates a classic flavor profile that pairs perfectly with traditional turkey accompaniments. The addition of lemon zest adds a subtle brightness that cuts through the richness of the butter, making every bite balanced and delicious.
Ingredients and Substitutions
Let me walk you through what you’ll need for this recipe and some helpful alternatives if you need to make substitutions.
Turkey Breast: You’ll need a 2 to 3-pound turkey breast, either bone-in or boneless. I recommend bone-in if you want maximum flavor and juiciness, but boneless works wonderfully and cooks a bit faster. Make sure the turkey breast fits comfortably in your air fryer basket with room for air circulation.
Unsalted Butter: Softened unsalted butter is the base of our herb mixture. I prefer unsalted so I can control the salt level in the recipe. If you only have salted butter, reduce the added kosher salt to about half a teaspoon.
Fresh Garlic: Minced garlic cloves add robust, savory flavor. Fresh garlic is best here, but in a pinch, you can use 1 teaspoon of garlic powder mixed into the butter.
Fresh Herbs: Rosemary, thyme, and parsley create the classic herb profile. Fresh herbs are ideal for the best flavor, but you can substitute with dried herbs using about one-third the amount (1 teaspoon each of dried rosemary, thyme, and parsley).
Kosher Salt and Black Pepper: These season the turkey and enhance all the other flavors. Kosher salt has a clean taste, but you can use sea salt or table salt (reduce quantity slightly for table salt as it’s more concentrated).
Paprika: This adds a subtle warmth and helps with browning. You can use sweet paprika, smoked paprika for a deeper flavor, or even a pinch of cayenne if you like a little heat.
Olive Oil: A light coating of olive oil helps crisp the skin. You can substitute with avocado oil or melted butter.
Lemon Zest: The zest adds brightness without adding moisture. If you don’t have fresh lemon, you can omit it, though I recommend keeping it for the best flavor.
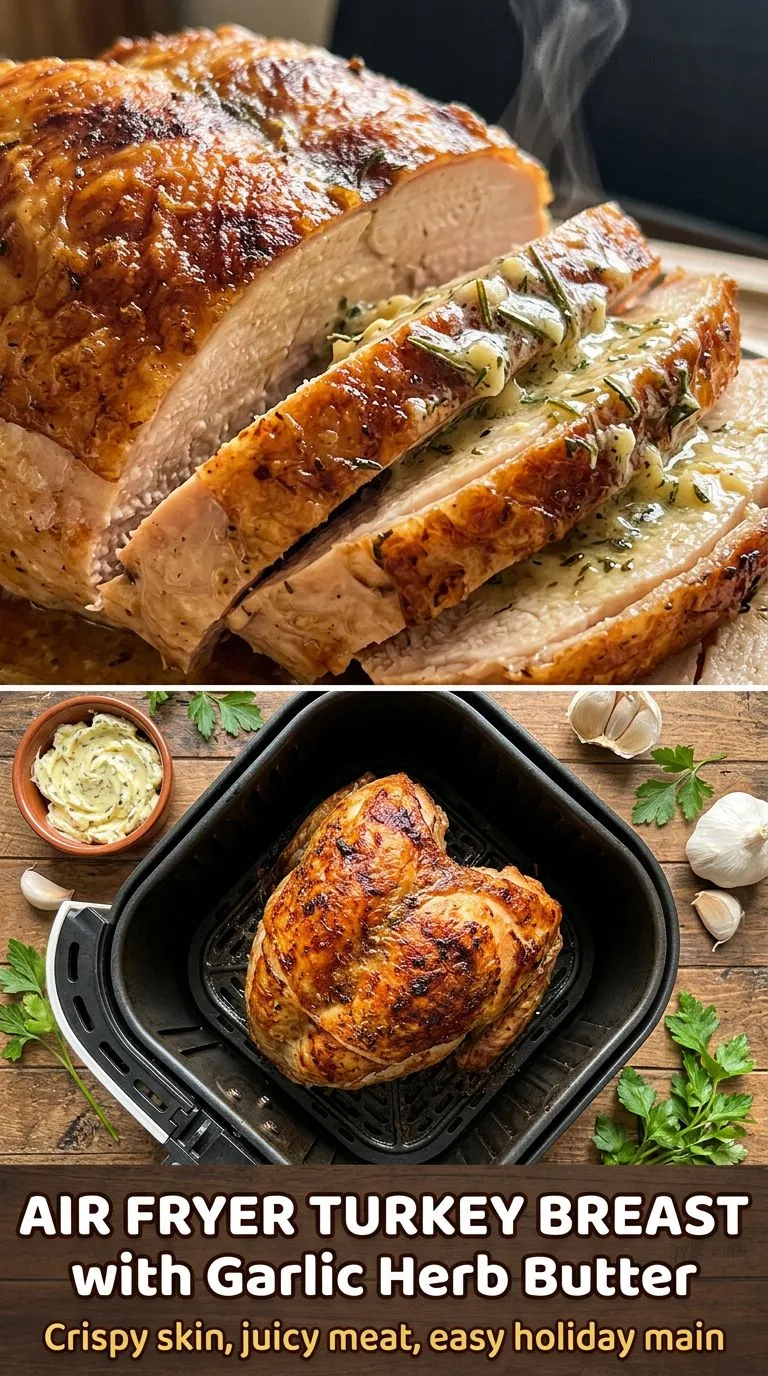
How to Make Air Fryer Turkey Breast
Making this turkey breast is straightforward, but I’ll walk you through each step to ensure perfect results.
Preheat Your Air Fryer: Start by preheating your air fryer to 350°F (175°C). This is an important step that ensures even cooking from the start. While it’s preheating, check that your turkey breast will fit comfortably in the basket with space around it for proper air circulation.
Prepare the Turkey: Pat the turkey breast completely dry with paper towels. This step is crucial for achieving crispy skin. Any moisture on the surface will steam rather than crisp, so take your time and make sure it’s thoroughly dry.
Make the Garlic Herb Butter: In a medium bowl, combine the softened butter with minced garlic, chopped rosemary, thyme, parsley, lemon zest, kosher salt, black pepper, and paprika. Mix everything together until well combined and the herbs are evenly distributed throughout the butter.
Apply the Butter: This is where the magic happens. If your turkey breast has skin, carefully use your fingers to loosen it from the meat, creating a pocket. Spread about half of the garlic herb butter underneath the skin, directly on the meat. Then spread the remaining butter all over the outside of the turkey breast. Finally, rub the entire surface with olive oil to promote crisping.
Air Fry the Turkey: Place the turkey breast in the air fryer basket, skin-side up if applicable. Make sure it’s not touching the sides of the basket. Air fry for approximately 40 to 65 minutes. The exact time depends on whether your breast is boneless (closer to 40-50 minutes) or bone-in (50-65 minutes), as well as its thickness and your specific air fryer model.
Monitor and Adjust: After about 30 minutes, check the turkey. If the top is browning too quickly, you can loosely tent it with aluminum foil (if your air fryer manufacturer allows foil use). Continue cooking until the internal temperature reaches 165°F (74°C) in the thickest part of the breast.
Rest and Serve: This step is just as important as the cooking itself. Transfer the turkey to a cutting board and let it rest for 10 to 15 minutes. This allows the juices to redistribute throughout the meat, ensuring every slice is moist and flavorful. After resting, slice and serve.
Expert Tips for Best Results
I’ve learned a few tricks over time that make a significant difference in the final result.
Use a Meat Thermometer: I cannot stress this enough—a reliable instant-read meat thermometer is essential. Turkey is done at 165°F, and checking the temperature is the only way to know for certain. Insert the thermometer into the thickest part of the breast, avoiding any bones.
Don’t Skip Drying the Turkey: Moisture is the enemy of crispy skin. Take the extra minute to thoroughly pat the turkey dry before applying the butter and oil.
Room Temperature Turkey: If possible, let your turkey breast sit at room temperature for about 20 to 30 minutes before cooking. This helps it cook more evenly. However, never leave raw poultry out for more than 30 minutes for food safety reasons.
Check Your Air Fryer Capacity: Air fryers vary significantly in size. Make sure your turkey breast fits with at least an inch of space around it for proper air circulation. If your turkey is too large, consider cutting it in half and cooking in batches.
Baste if Desired: If you want extra flavor and moisture, you can pause the air fryer halfway through cooking and baste the turkey with any accumulated juices or melted butter from the bottom of the basket.
Let It Rest: I know it’s tempting to slice into the turkey immediately, but resting is crucial. Those 10 to 15 minutes make the difference between dry, juice-leaking turkey and perfectly moist slices.
Serving Suggestions
This garlic herb turkey breast pairs beautifully with classic side dishes and makes an impressive centerpiece for any meal.
I love serving this turkey with traditional Thanksgiving sides like creamy mashed potatoes, roasted Brussels sprouts, green bean casserole, and cranberry sauce. The garlic herb flavors complement these classic accompaniments perfectly.
For a lighter meal, I recommend pairing the turkey with a fresh arugula salad dressed with lemon vinaigrette, roasted root vegetables, or a quinoa pilaf. The herbs in the turkey work wonderfully with earthy vegetables and grains.
Don’t forget about gravy! You can make a simple pan gravy using the drippings from the air fryer basket. Just pour them into a small saucepan, whisk in a tablespoon of flour, and add chicken or turkey stock until you reach your desired consistency.
For sandwiches the next day, slice the leftover turkey thinly and serve on crusty bread with mayonnaise, lettuce, tomato, and a smear of cranberry sauce. It’s one of my favorite ways to enjoy leftovers.
Variations and Substitutions
This recipe is wonderfully adaptable to different flavor profiles and dietary needs.
Different Herb Combinations: While I love the classic rosemary, thyme, and parsley combination, you can experiment with sage, oregano, or tarragon. Sage is particularly traditional with turkey and pairs beautifully with the garlic butter.
Spicy Version: Add a teaspoon of red pepper flakes or a pinch of cayenne pepper to the herb butter for a kick of heat. You can also use smoked paprika instead of regular paprika for a deeper, smokier flavor.
Citrus Variations: Instead of lemon zest, try orange zest for a sweeter, more aromatic profile. You can also add a tablespoon of fresh orange juice to the butter mixture.
Dairy-Free Option: Replace the butter with dairy-free butter or use additional olive oil mixed with the herbs and garlic. The flavor will be slightly different but still delicious.
Low-Sodium Version: Reduce or omit the added salt and use a salt-free herb blend. Turkey naturally contains some sodium, so the dish will still have flavor.
Maple Glaze: For a sweet and savory variation, brush the turkey with a mixture of maple syrup, Dijon mustard, and a touch of butter during the last 10 minutes of cooking.
Storage, Freezing, and Reheating
Proper storage ensures you can enjoy this turkey for several days after cooking.
Refrigerator Storage: Allow the turkey to cool completely, then transfer it to an airtight container or wrap tightly in aluminum foil or plastic wrap. Properly stored, cooked turkey breast will keep in the refrigerator for 3 to 4 days.
Freezing: Turkey breast freezes beautifully. I recommend slicing it first, then wrapping individual portions in plastic wrap and placing them in a freezer-safe bag or container. Frozen turkey will maintain best quality for 2 to 3 months. Label the container with the date so you can keep track.
Thawing: When you’re ready to use frozen turkey, thaw it overnight in the refrigerator. Never thaw turkey at room temperature, as this can promote bacterial growth.
Reheating: For best results, reheat turkey gently to avoid drying it out. You can reheat slices in the microwave covered with a damp paper towel, in a covered dish in a 325°F oven with a splash of broth, or even back in the air fryer at 300°F for a few minutes. Add a little chicken broth or gravy to keep the meat moist during reheating.
Using Leftovers: Leftover turkey is incredibly versatile. Use it in sandwiches, salads, soups, casseroles, or pot pies. Diced turkey works wonderfully in pasta dishes, quesadillas, or stirred into risotto.
Frequently Asked Questions
Do I need to thaw the turkey breast first?
Yes, you should always thaw turkey completely before cooking. Cooking from frozen will result in uneven cooking and potentially unsafe internal temperatures. Thaw turkey in the refrigerator, allowing about 24 hours for every 4 to 5 pounds.
Can I cook a larger turkey breast in the air fryer?
It depends on your air fryer size. Most standard air fryers can accommodate a 2 to 3-pound turkey breast comfortably. Larger breasts may not fit properly or may not cook evenly. If you have a larger breast, consider cutting it in half or using a larger air fryer model.
Why is my turkey skin not crispy?
The most common reasons are excess moisture on the turkey before cooking or overcrowding in the air fryer basket. Make sure to thoroughly dry the turkey and ensure proper air circulation around it. Also, don’t skip the olive oil rub, as it helps promote crisping.
Can I use a turkey breast with the bone removed?
Absolutely! Boneless turkey breast works wonderfully in this recipe and actually cooks a bit faster, usually in 40 to 50 minutes depending on thickness. Just be sure to check the internal temperature to confirm it reaches 165°F.
What if I don’t have fresh herbs?
You can substitute dried herbs, but use about one-third the amount since dried herbs are more concentrated. So instead of 1 tablespoon each of fresh herbs, use 1 teaspoon each of dried herbs.
Can I prepare the herb butter ahead of time?
Yes! You can make the garlic herb butter up to 2 days in advance and store it covered in the refrigerator. Just let it come to room temperature before applying it to the turkey so it spreads easily.
How do I know when the turkey is done?
The only reliable way is to use a meat thermometer. Insert it into the thickest part of the breast, and it should read 165°F. The juices should also run clear, not pink.
Can I stuff the turkey breast?
I don’t recommend stuffing turkey breast in the air fryer, as it can affect cooking time and make it difficult to achieve a safe internal temperature throughout. If you want stuffing, I suggest cooking it separately as a side dish.
Air Fryer Turkey Breast with Garlic Herb Butter
A tender and juicy turkey breast cooked in the air fryer with garlic herb butter. The skin becomes golden and crispy while the inside stays moist, making it perfect for a smaller Thanksgiving dinner or any special meal.
Prep Time: 15 minutes
Cook Time: 50 minutes
Resting Time: 15 minutes
Total Time: 1 hour 20 minutes
Servings: 6 servings
Difficulty: Easy
Cuisine: American
Course: Dinner
Ingredients
- 1 turkey breast (2–3 lb, bone-in or boneless)
- 4 tbsp unsalted butter (softened)
- 4 garlic cloves (minced)
- 1 tbsp fresh rosemary (chopped)
- 1 tbsp fresh thyme (chopped)
- 1 tbsp fresh parsley (chopped)
- 1 tsp kosher salt
- 1/2 tsp black pepper
- 1 tsp paprika
- 1 tbsp olive oil
- 1 lemon (zested)
Instructions
- Preheat the air fryer to 350°F (175°C), making sure the turkey breast fits with enough room for air circulation.
- Pat the turkey breast completely dry with paper towels. This is essential for crispy skin.
- In a bowl, combine softened butter, minced garlic, rosemary, thyme, parsley, lemon zest, kosher salt, black pepper, and paprika. Mix until well combined.
- Carefully loosen the turkey skin where present and spread about half of the garlic herb butter underneath the skin, directly on the meat. Spread the remaining butter over the entire breast. Rub the surface with olive oil.
- Place the turkey breast in the air fryer basket, skin-side up if applicable, without overcrowding.
- Air fry for approximately 40–65 minutes, depending on whether the breast is boneless (40-50 minutes) or bone-in (50-65 minutes), its thickness, and the air fryer model. Check after 30 minutes and loosely cover with foil if the surface browns too quickly, provided your appliance permits foil.
- Check the thickest part with a meat thermometer and continue cooking until it reaches 165°F (74°C).
- Transfer the turkey to a cutting board, rest for 10–15 minutes to allow juices to redistribute, then slice and serve.
Recipe Notes
- Cooking times vary based on turkey breast size and air fryer model. Always use a meat thermometer to ensure the turkey reaches 165°F internally.
- If your turkey breast is larger than 3 pounds, you may need to cook it in portions or use a larger air fryer.
- Don’t skip the resting period—it’s crucial for juicy, tender meat.
- Save any drippings from the air fryer basket to make gravy.
- For extra crispy skin, you can increase the temperature to 375°F for the last 5 minutes of cooking.
Estimated Nutrition (Per Serving)
Calories: 285 kcal
Carbohydrates: 2g
Protein: 38g
Fat: 13g
Saturated Fat: 6g
Fiber: 0g
Sugar: 0g
Sodium: 485mg
Nutrition information is estimated and will vary based on exact ingredients and portion sizes.
