
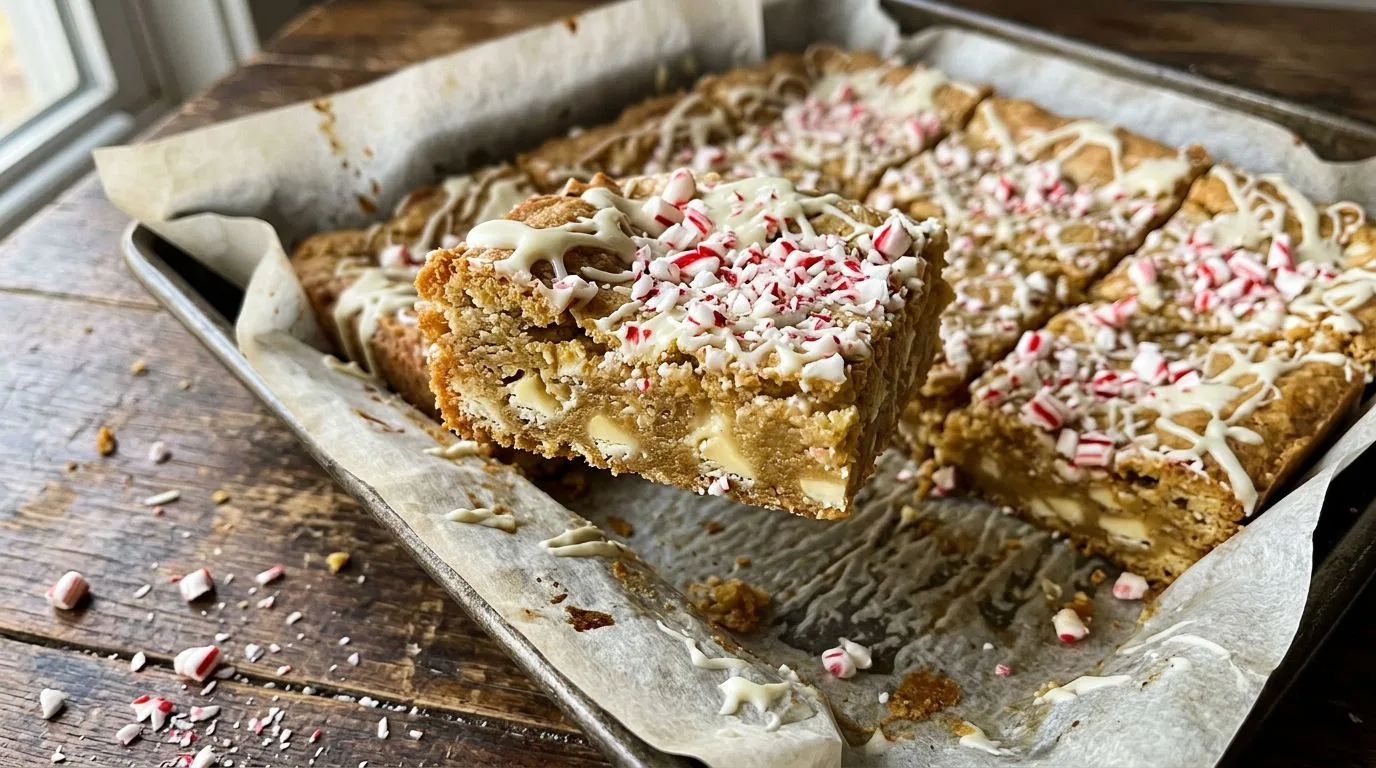
When the holiday season arrives, I find myself craving desserts that capture the festive spirit in every bite. These white chocolate peppermint blondies deliver exactly that—soft, chewy bars loaded with creamy white chocolate chips and refreshing peppermint flavor, all topped with crushed candy canes for a beautiful presentation. Unlike traditional brownies made with cocoa, blondies showcase the rich, buttery flavor of brown sugar, making them the perfect canvas for sweet white chocolate and cool peppermint.
I love how these blondies strike the perfect balance between indulgent and refreshing. The brown sugar base creates that signature chewy texture we all crave in a great blondie, while the white chocolate adds creamy sweetness and the peppermint extract brings a bright, festive note. The crushed candy canes aren’t just decorative—they add delightful pops of crunch and minty flavor throughout. Whether you’re baking for a holiday party, packaging treats for neighbors, or simply want something special for your dessert table, these white chocolate peppermint blondies are guaranteed to impress.
Why You’ll Love This Recipe
I recommend these white chocolate peppermint blondies for anyone looking for an easy yet impressive Christmas dessert. They come together in one bowl with no mixer required, making cleanup a breeze. The batter is incredibly forgiving, so even beginner bakers can achieve perfect results every time.
The flavor combination is what really makes these bars special. White chocolate and peppermint are classic holiday partners, and when you combine them with the rich, caramel-like notes of brown sugar, you get something truly magical. I find that the peppermint extract provides just enough minty flavor without being overwhelming—it’s refreshing rather than toothpaste-like.
Another reason I love this recipe is its versatility. You can dress these blondies up with the white chocolate drizzle and candy cane topping for a stunning presentation, or keep them simple for everyday enjoyment. They also travel well, making them ideal for cookie exchanges, bake sales, or shipping to loved ones. The chewy texture holds up beautifully, and they actually taste even better the next day once the flavors have had time to meld.
Ingredients and Substitutions
The ingredient list for these blondies is straightforward, with most items you likely already have in your pantry. Let me walk you through the key components and some helpful substitutions.
Unsalted butter forms the rich, buttery base of these blondies. I always use unsalted butter so I can control the salt level in the recipe. If you only have salted butter, reduce the added salt to 1/4 teaspoon. The butter should be melted and slightly cooled before mixing.
Brown sugar is essential for that signature blondie texture and flavor. I recommend using packed brown sugar as specified—this means you should firmly press it into the measuring cup. Light or dark brown sugar both work well, though dark brown sugar will give you a slightly deeper molasses flavor.
Eggs provide structure and help create that chewy texture. Make sure your eggs are at room temperature for better incorporation into the batter. I like to set them out about 30 minutes before baking.
Vanilla and peppermint extracts are the flavor powerhouses here. Don’t skip the vanilla—it enhances the overall sweetness and complements the peppermint beautifully. For the peppermint extract, use pure extract rather than imitation for the best flavor. If you only have peppermint oil, use just 1/4 teaspoon as it’s much more concentrated.
All-purpose flour, baking powder, and salt create the structure. I find that the small amount of baking powder gives these blondies a slight lift without making them cakey. Don’t substitute self-rising flour, as it contains different proportions of leavening.
White chocolate chips add creamy pockets of sweetness throughout. I recommend using quality white chocolate chips rather than white baking chips, as they melt better and have superior flavor. You can substitute chopped white chocolate bars for an even more luxurious result.
Crushed candy canes provide both flavor and festive appearance. I like to use traditional peppermint candy canes, but you can also use peppermint candies or even Andes mints crushed up. To crush them easily, place unwrapped candy canes in a sealed plastic bag and gently tap with a rolling pin or meat mallet.
White chocolate for drizzling adds a professional-looking finish. This is technically optional, but I highly recommend it for the beautiful presentation and extra white chocolate flavor.
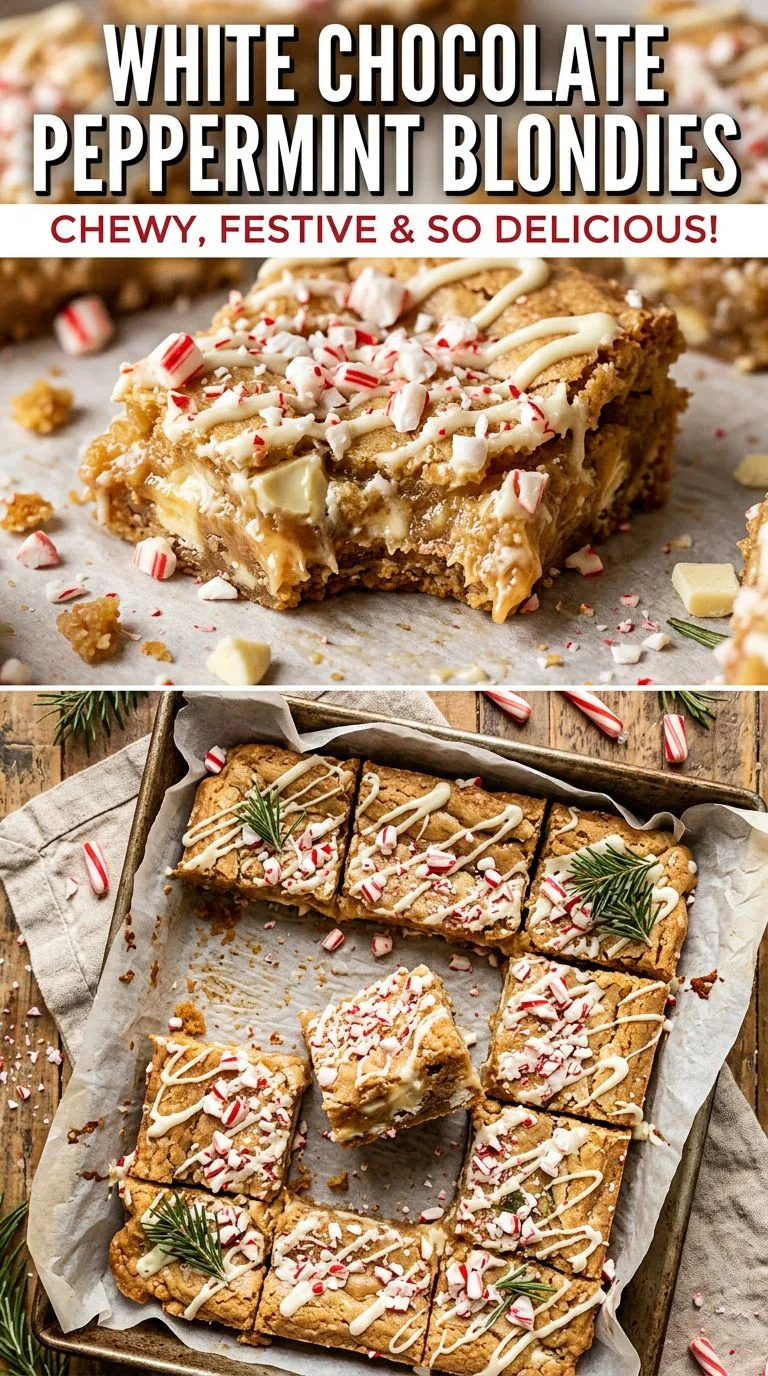
How to Make White Chocolate Peppermint Blondies
Making these blondies is wonderfully straightforward. The entire process happens in one bowl, and you don’t need any special equipment beyond a whisk and a spatula.
Start by preheating your oven to 350°F (175°C) and lining a 9×13-inch baking pan with parchment paper. I always recommend using parchment paper rather than just greasing the pan—it makes removing the blondies so much easier and ensures clean edges when you cut them into squares.
In a large mixing bowl, whisk together the melted butter and brown sugar until the mixture is smooth and well combined. You’ll notice the mixture becomes glossy and slightly lighter in color. This step is important for dissolving the sugar and creating that signature blondie texture.
Add the eggs, vanilla extract, and peppermint extract to the butter-sugar mixture. Whisk everything together until fully combined and smooth. The batter should look cohesive with no streaks of egg visible.
Now it’s time to add the dry ingredients. Stir in the flour, baking powder, and salt, mixing just until no dry streaks remain. I recommend using a sturdy spatula for this step and being careful not to overmix—you want to combine everything thoroughly, but overworking the batter can lead to tough blondies.
Fold in the white chocolate chips and half of the crushed candy canes. Reserve the other half of the candy canes for topping. The batter will be thick and somewhat sticky, which is exactly what you want.
Spread the batter evenly into your prepared baking pan. I like to use an offset spatula or the back of a spoon to smooth the top, ensuring even baking. The batter will be quite thick, so take your time spreading it to the edges.
Bake for 25 to 30 minutes, until the edges are golden brown and the center is just set. This is crucial: you want to avoid overbaking to maintain that chewy texture. The center should look slightly underdone when you remove the pan from the oven—it will continue cooking as it cools. A toothpick inserted in the center should come out with a few moist crumbs, not completely clean.
Allow the blondies to cool completely in the pan before adding the toppings. This usually takes about an hour at room temperature. Once cooled, drizzle the melted white chocolate over the top in a decorative pattern, then immediately sprinkle the remaining crushed candy canes over the chocolate. Let the chocolate set completely before cutting into squares.
Expert Tips for Best Results
I’ve made these blondies countless times, and I’ve learned a few tricks that ensure perfect results every time.
First, don’t overbake. This is the most common mistake with blondies. They should look slightly underdone in the center when you remove them from the oven. The residual heat will finish cooking them as they cool, and you’ll end up with perfectly chewy bars rather than dry, cakey ones.
When measuring brown sugar, pack it firmly into the measuring cup. The sugar should hold its shape when you turn it out. This ensures you’re using the correct amount for proper texture and sweetness.
I recommend letting your melted butter cool for about 5 minutes before adding it to the sugar. If it’s too hot, it can start cooking the eggs when you add them, which affects the texture.
For the cleanest cuts, I like to chill the blondies for about 30 minutes before slicing. Use a sharp knife and wipe it clean between cuts. This gives you those beautiful, bakery-style squares with clean edges.
When crushing candy canes, aim for a variety of sizes—some fine pieces and some larger chunks. This creates interesting texture and ensures you get peppermint flavor in every bite while also having some decorative larger pieces on top.
If your white chocolate for drizzling is too thick, you can thin it with a tiny bit of coconut oil or vegetable oil. Add just 1/2 teaspoon at a time until you reach a drizzle-able consistency.
Serving Suggestions
These white chocolate peppermint blondies are delicious on their own, but there are several ways to serve them that make them even more special.
My favorite way to serve these is slightly warm with a scoop of vanilla ice cream on top. The contrast between the warm, chewy blondie and cold, creamy ice cream is absolutely divine. A drizzle of chocolate sauce wouldn’t hurt either.
For holiday gatherings, I like to arrange these on a festive platter alongside other Christmas treats like cranberry bliss bars and Christmas sugar cookie bars. The variety of flavors and textures makes for an impressive dessert spread.
These blondies pair beautifully with hot beverages. I recommend serving them with peppermint hot chocolate, coffee, or even a chai latte. The warm drink complements the cool peppermint flavor perfectly.
For a more elegant presentation, you can cut the blondies into smaller, bite-sized pieces and serve them as petit fours at a holiday party. Arrange them on a tiered serving stand for a beautiful display.
Variations and Substitutions
While I love this recipe as written, there are several ways you can customize these blondies to suit your preferences or dietary needs.
For a dark chocolate version, substitute semi-sweet or dark chocolate chips for the white chocolate chips, and use dark chocolate for the drizzle. The combination of dark chocolate and peppermint is equally delicious.
If you want extra peppermint flavor, you can increase the peppermint extract to 3/4 teaspoon. Just be careful not to go overboard—too much can taste medicinal.
For gluten-free blondies, substitute a 1:1 gluten-free baking flour blend for the all-purpose flour. Make sure your baking powder is also gluten-free. I’ve had good results with this substitution, though the texture may be slightly different.
You can make these nut-free as written, or add 1/2 cup of chopped pecans or walnuts if you enjoy nuts in your blondies. Toast the nuts first for extra flavor.
For a less sweet version, reduce the brown sugar to 1 1/4 cups and use dark chocolate chips instead of white chocolate. This creates a more sophisticated flavor profile.
If you don’t have peppermint extract, you can make plain white chocolate blondies by omitting it and the candy canes. Increase the vanilla extract to 1 tablespoon for extra flavor.
Storage, Freezing, and Reheating
One of the great things about these blondies is how well they keep, making them perfect for advance preparation during the busy holiday season.
Store the blondies in an airtight container at room temperature for up to 5 days. I like to place parchment paper between layers to prevent them from sticking together. They actually taste even better on day two, once the flavors have had time to develop.
For longer storage, these blondies freeze beautifully. Wrap individual squares tightly in plastic wrap, then place them in a freezer-safe container or zip-top bag. They’ll keep in the freezer for up to 3 months. To thaw, simply leave them at room temperature for about an hour, or microwave individual pieces for 15-20 seconds.
You can also freeze the blondies before adding the white chocolate drizzle and candy cane topping. This allows you to add the decorative elements right before serving for the freshest appearance.
If you want to serve these warm, I recommend reheating individual pieces in the microwave for 10-15 seconds. Don’t overheat them, or the white chocolate will melt completely. Alternatively, you can warm them in a 300°F oven for about 5 minutes.
Frequently Asked Questions
Can I make these in a different size pan?
Yes, but you’ll need to adjust the baking time. An 8×8-inch pan will give you thicker blondies that need about 35-40 minutes of baking time. A larger pan will create thinner blondies that bake faster, around 20-25 minutes. Always check for doneness by looking for golden edges and a just-set center.
Why are my blondies cakey instead of chewy?
This usually happens from overbaking or using too much flour. Make sure you’re measuring flour correctly by spooning it into the measuring cup and leveling it off, rather than scooping directly from the bag. Also, remove the blondies from the oven when the center still looks slightly underdone.
Can I use peppermint oil instead of extract?
Yes, but peppermint oil is much more concentrated than extract. Use only 1/4 teaspoon of peppermint oil, or the flavor will be too strong.
My white chocolate seized when I melted it. What happened?
White chocolate is sensitive to heat and moisture. Make sure your bowl and utensils are completely dry, and melt the chocolate gently using short bursts in the microwave or a double boiler. If it does seize, you can sometimes save it by stirring in a small amount of vegetable oil.
Can I make these ahead for a party?
Absolutely! These blondies are perfect for making ahead. Bake them up to 2 days in advance and store them in an airtight container. Add the white chocolate drizzle and candy cane topping on the day of serving for the best appearance.
Do I have to use candy canes?
No, you can substitute other peppermint candies, or omit them entirely for plain white chocolate blondies. The candy canes add festive appearance and extra peppermint flavor, but they’re not essential to the recipe.
White Chocolate Peppermint Blondies
Soft, chewy blondies loaded with creamy white chocolate chips and refreshing peppermint flavor, topped with crushed candy canes for a festive Christmas dessert that’s perfect for holiday gatherings and cookie exchanges.
- Prep Time: 15 minutes
- Cook Time: 28 minutes
- Cooling Time: 60 minutes
- Total Time: 1 hour 43 minutes
- Servings: 24 blondies
- Difficulty: Easy
- Cuisine: American
- Course: Dessert
Ingredients
- 1 cup unsalted butter, melted
- 1 1/2 cups packed brown sugar
- 2 large eggs
- 2 tsp vanilla extract
- 1/2 tsp peppermint extract
- 2 cups all-purpose flour
- 1 tsp baking powder
- 1/2 tsp salt
- 1 cup white chocolate chips
- 1/2 cup crushed candy canes, divided
- 4 oz white chocolate, melted (for drizzling)
Instructions
- Preheat oven to 350°F (175°C) and line a 9×13-inch baking pan with parchment paper, leaving an overhang on the sides for easy removal.
- In a large bowl, whisk together the melted butter and brown sugar until smooth and well combined, about 1 minute.
- Add the eggs, vanilla extract, and peppermint extract to the butter mixture. Whisk until fully combined and smooth with no streaks remaining.
- Add the flour, baking powder, and salt to the wet ingredients. Stir with a spatula until no dry streaks remain, being careful not to overmix.
- Fold in the white chocolate chips and half of the crushed candy canes (about 1/4 cup), reserving the remaining candy canes for topping.
- Spread the batter evenly into the prepared baking pan, smoothing the top with a spatula.
- Bake for 25 to 30 minutes, until the edges are golden brown and the center is just set. The center should still look slightly underdone. Avoid overbaking to maintain a chewy texture.
- Remove from the oven and allow to cool completely in the pan, about 1 hour.
- Once cooled, drizzle the melted white chocolate over the top in a decorative pattern.
- Immediately sprinkle the remaining crushed candy canes over the white chocolate drizzle.
- Allow the white chocolate to set completely, about 15-20 minutes, before cutting into 24 squares.
Recipe Notes
- For the cleanest cuts, chill the blondies for 30 minutes before slicing and wipe your knife clean between cuts.
- The blondies will look slightly underdone in the center when you remove them from the oven. They will continue to set as they cool.
- To crush candy canes easily, place unwrapped candy canes in a sealed plastic bag and tap gently with a rolling pin.
- If your white chocolate for drizzling is too thick, add 1/2 teaspoon of coconut oil or vegetable oil to thin it.
- Store in an airtight container at room temperature for up to 5 days, or freeze for up to 3 months.
- These blondies taste even better the next day once the flavors have melded together.
Nutrition Information (Per Serving)
Estimated values based on one of 24 servings:
- Calories: 215
- Carbohydrates: 28g
- Protein: 2g
- Fat: 11g
- Saturated Fat: 7g
- Fiber: 0g
- Sugar: 20g
- Sodium: 95mg
