
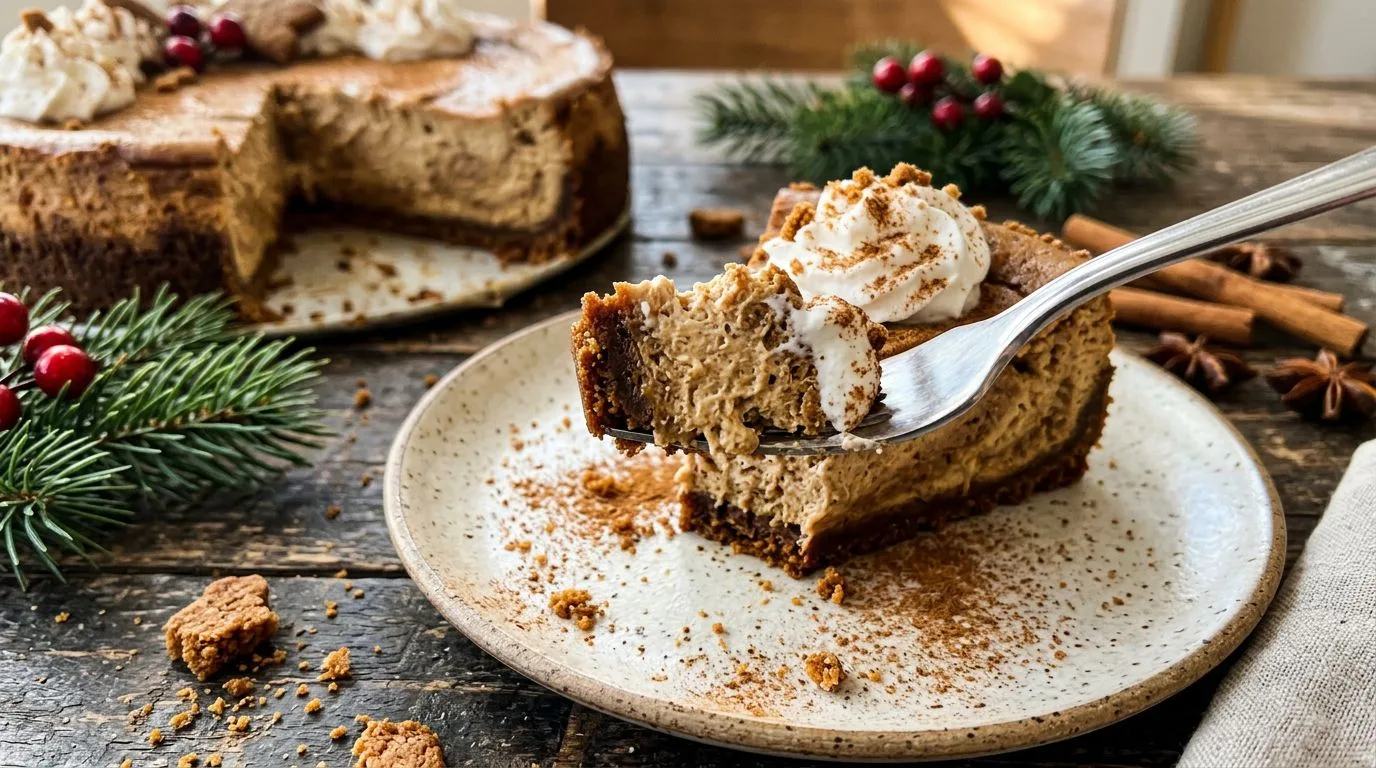
There’s something magical about combining two beloved holiday traditions into one spectacular dessert. This gingerbread cheesecake brings together the warm, spiced flavors of classic gingerbread with the rich, creamy texture of New York-style cheesecake. The result is a show-stopping dessert that captures the essence of the holiday season in every bite.
I love how this cheesecake balances the deep molasses flavor with warming spices like ginger, cinnamon, cloves, and nutmeg. The buttery gingersnap crust adds the perfect crunchy contrast to the silky filling, while the brown sugar creates a beautiful caramel undertone that makes this dessert truly irresistible. Whether you’re planning your Christmas menu or looking for a special dessert to bring to a holiday gathering, this gingerbread cheesecake delivers both impressive presentation and unforgettable flavor.
What I find most appealing about this recipe is that it’s easier than it looks. While cheesecakes have a reputation for being finicky, following a few simple techniques ensures perfect results every time. The water bath method keeps the texture creamy and prevents cracking, while the gradual cooling process helps the cheesecake set beautifully without sinking in the center.
Why You’ll Love This Gingerbread Cheesecake
This dessert combines the best of both worlds—the nostalgic warmth of gingerbread and the luxurious creaminess of cheesecake. I recommend this recipe for anyone who wants to elevate their holiday dessert table with something that looks bakery-quality but is completely achievable at home.
The flavor profile is perfectly balanced. The molasses provides a deep, slightly bitter sweetness that’s characteristic of traditional gingerbread, while the cream cheese adds richness and tang. The spice blend isn’t overwhelming—it’s warm and inviting, with just enough kick from the ginger to remind you of freshly baked gingerbread cookies.
Another reason I love this recipe is its make-ahead convenience. Cheesecakes actually improve after a night in the refrigerator, which means you can prepare this dessert a day or two before your event. This frees up your oven and your time on the day of your gathering, reducing stress and allowing you to focus on other dishes.
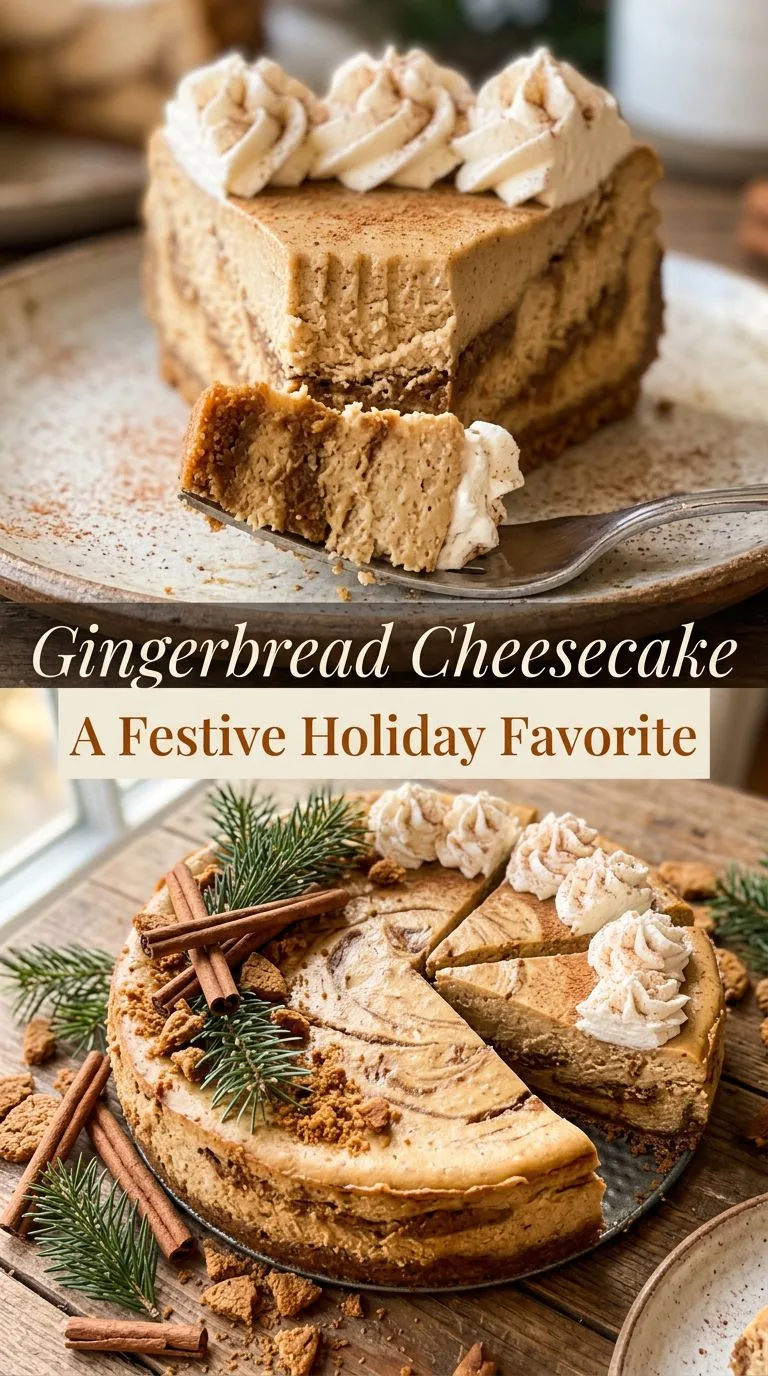
The presentation is stunning. The deep amber color of the filling contrasts beautifully with dollops of white whipped cream, and you can garnish it with crushed gingersnaps, candied ginger, or even a dusting of cinnamon for an extra festive touch.
Ingredients and Substitutions
The foundation of this cheesecake starts with gingersnap cookie crumbs. I find that store-bought gingersnaps work perfectly—just pulse them in a food processor until you have fine crumbs. If you can’t find gingersnaps, graham crackers mixed with a teaspoon of ground ginger make an acceptable substitute, though you’ll lose some of that authentic gingerbread flavor.
Cream cheese is the star of the filling, and it’s essential to use full-fat, brick-style cream cheese for the best texture. Make sure it’s fully softened to room temperature before you begin—this prevents lumps and ensures a smooth, creamy filling. I recommend leaving it out on the counter for at least two hours before starting.
Brown sugar adds moisture and a subtle molasses flavor that complements the added molasses beautifully. You can use either light or dark brown sugar, though dark brown sugar will give you a deeper, more robust flavor. If you only have white granulated sugar, you can use it, but you’ll lose some of that characteristic gingerbread depth.
Molasses is what gives this cheesecake its distinctive gingerbread character. I like to use regular (not blackstrap) molasses for a balanced sweetness. Blackstrap molasses can be too bitter for most palates in a dessert application.
The spice blend of ground ginger, cinnamon, cloves, and nutmeg creates that classic gingerbread warmth. Fresh spices make a noticeable difference, so if your spice cabinet hasn’t been refreshed in a while, this is a good time to replace them. You can adjust the spice levels slightly to your preference, but I find these proportions create a well-balanced flavor.
Sour cream adds tanginess and helps create an ultra-creamy texture. Greek yogurt can substitute in a pinch, though the flavor will be slightly different. For the best results, stick with full-fat sour cream.
If you’re looking for more delicious holiday desserts, you might also enjoy this soft gingerbread cookies recipe or this impressive pecan pie cheesecake.
How to Make Gingerbread Cheesecake
The process begins with preparing your springform pan. I always grease the pan well, even if it’s nonstick, to ensure easy release. Wrapping the outside of the pan with heavy-duty aluminum foil is crucial for the water bath method—you want to create a watertight seal to prevent water from seeping into your cheesecake.
Making the crust is straightforward. Combine the gingersnap crumbs with melted butter until the mixture resembles wet sand. Press this firmly into the bottom of your prepared pan, using the bottom of a measuring cup or glass to create an even, compact layer. The pre-baking step is important—it sets the crust and prevents it from becoming soggy once you add the filling.
For the filling, start by beating the softened cream cheese and brown sugar together until completely smooth. This step is critical for achieving a lump-free cheesecake. I recommend using a stand mixer or hand mixer on medium speed, and don’t rush this process. Scrape down the sides of the bowl frequently to ensure everything is well incorporated.
Once the cream cheese mixture is smooth, add the molasses, sour cream, vanilla, and all the spices. Mix until just combined—you don’t want to incorporate too much air at this stage. Then add the eggs one at a time, mixing on low speed after each addition. Overmixing after adding the eggs can create too much air in the batter, which can lead to cracking.
Pour the filling over your cooled crust and smooth the top with a spatula. Place the wrapped springform pan in a larger roasting pan and carefully pour hot water into the roasting pan until it comes about halfway up the sides of the springform pan. This water bath creates a gentle, humid heat that helps the cheesecake bake evenly and prevents the top from cracking.
The baking time can vary depending on your oven, but you’re looking for edges that are set while the center still has a slight jiggle—about the size of a quarter. The cheesecake will continue to set as it cools. Overbaking is the most common mistake, resulting in a dry, cracked cheesecake.
The cooling process is just as important as the baking. Turning off the oven and letting the cheesecake cool gradually with the door cracked prevents sudden temperature changes that can cause cracking. After an hour in the oven, transfer it to the refrigerator for at least six hours, though overnight is ideal.
Expert Tips for Best Results
Temperature is everything when making cheesecake. I cannot stress enough how important it is to have all your ingredients at room temperature before you begin. Cold cream cheese will create lumps, and cold eggs can cause the batter to seize up. Plan ahead and leave everything out for at least two hours.
When wrapping your springform pan for the water bath, use heavy-duty aluminum foil and wrap it in two layers if necessary. Even a small leak can ruin your cheesecake. Some bakers prefer to place the springform pan inside a slightly larger cake pan as an extra precaution.
Don’t skip the water bath. While some recipes claim you can bake cheesecake without one, the water bath creates a humid environment that prevents the top from drying out and cracking. It also promotes even baking from edge to center.
Resist the urge to open the oven door frequently during baking. Each time you open the door, you release heat and humidity, which can affect the final texture. Check on your cheesecake only once or twice during the baking time.
The jiggle test is your best friend. When you gently shake the pan, the center should wobble like Jell-O, but the edges should be set. If the entire cheesecake is liquid, it needs more time. If nothing jiggles, you’ve likely overbaked it.
For the smoothest possible texture, run your mixer on the lowest speed once you add the eggs. High-speed mixing incorporates air bubbles that can create a less creamy texture and potentially cause cracking.
If you do end up with a crack or two, don’t worry—whipped cream topping covers a multitude of imperfections. You can also make a simple sour cream topping or cream cheese frosting to spread over the top.
Serving Suggestions
This gingerbread cheesecake is stunning on its own, but I love to dress it up for special occasions. A generous dollop of freshly whipped cream is classic and allows the gingerbread flavor to shine through. For extra flair, add a pinch of cinnamon or ginger to your whipped cream.
Crushed gingersnap cookies sprinkled over the whipped cream add a delightful textural contrast and reinforce the gingerbread theme. You can also use candied ginger pieces for a sophisticated touch and an extra burst of spicy-sweet flavor.
A drizzle of caramel sauce complements the molasses beautifully and adds visual appeal. For a more decadent presentation, try a salted caramel sauce—the salt balances the sweetness perfectly.
I recommend serving this cheesecake slightly chilled but not ice-cold. Remove it from the refrigerator about 20-30 minutes before serving to allow the flavors to fully develop. The texture is also creamier when it’s not straight from the fridge.
For holiday gatherings, garnish each slice with a small gingerbread cookie or a cinnamon stick. A light dusting of powdered sugar or cocoa powder can also create an elegant finish.
This cheesecake pairs wonderfully with coffee, hot chocolate, or spiced chai tea. For adult gatherings, a glass of dessert wine or Irish cream liqueur makes an excellent accompaniment.
Variations and Substitutions
While this recipe is delicious as written, there are several ways to customize it to your preferences. For a chocolate twist, add 1/4 cup of cocoa powder to the filling and reduce the flour by the same amount if your recipe includes it. The combination of chocolate and gingerbread is absolutely divine.
You can make mini gingerbread cheesecakes by using a muffin tin lined with cupcake liners. Reduce the baking time to about 20-25 minutes. These individual portions are perfect for parties and eliminate the need for slicing.
For a lighter version, you can substitute one package of cream cheese with an equal amount of mascarpone cheese. This creates a slightly less dense texture while maintaining creaminess. However, I don’t recommend using low-fat cream cheese, as it significantly affects both texture and flavor.
Add-ins can take this cheesecake in new directions. Fold in 1/2 cup of mini chocolate chips, chopped crystallized ginger, or even small pieces of soft gingerbread cookies into the batter before baking for extra texture and flavor pockets.
If you’re not a fan of gingersnaps, you can make the crust with graham crackers, vanilla wafers, or even chocolate cookies. Just add 1/2 teaspoon of ground ginger to the crust mixture to maintain some of that gingerbread character.
For a boozy version, add 2 tablespoons of bourbon or dark rum to the filling. The alcohol will mostly bake off, leaving behind a subtle depth of flavor that complements the spices beautifully.
Storage, Freezing, and Reheating
Proper storage is essential for maintaining the quality of your gingerbread cheesecake. Once completely cooled and set, cover the cheesecake tightly with plastic wrap or aluminum foil. It will keep in the refrigerator for up to 5 days, though it’s best within the first 3 days.
I find that cheesecake actually tastes better after it’s had time to chill thoroughly—the flavors meld together and the texture becomes even creamier. This makes it an ideal make-ahead dessert for holiday entertaining.
For freezing, this cheesecake freezes exceptionally well. I recommend freezing it without any toppings—add the whipped cream and garnishes after thawing. Wrap the cooled cheesecake (still in the springform pan or removed) tightly in plastic wrap, then wrap again in aluminum foil. It will keep frozen for up to 2 months.
To thaw, transfer the wrapped cheesecake to the refrigerator and let it thaw slowly overnight. Never thaw at room temperature, as this can affect the texture and food safety. Once thawed, the cheesecake should taste just as fresh as the day you made it.
You can also freeze individual slices for convenient single servings. Wrap each slice tightly in plastic wrap and place in a freezer bag. Thaw individual slices in the refrigerator for several hours before serving.
Cheesecake is best served cold, so there’s no need for reheating. If you prefer a less chilled texture, simply let it sit at room temperature for 20-30 minutes before serving.
Frequently Asked Questions
Why did my cheesecake crack?
Cracking usually occurs due to overbaking, sudden temperature changes, or too much air incorporated into the batter. Using a water bath, avoiding overmixing, and cooling the cheesecake gradually all help prevent cracks. Remember, a few small cracks don’t affect the taste and can easily be covered with toppings.
Can I make this without a water bath?
While a water bath is highly recommended for the best texture and to prevent cracking, you can bake without one. Place a pan of water on the rack below the cheesecake to create humidity in the oven. The results may not be quite as creamy, and you’re more likely to see some cracking.
How do I know when the cheesecake is done?
The edges should be set and slightly puffed, while the center should still jiggle slightly when you gently shake the pan. The internal temperature should reach about 150°F in the center. The cheesecake will continue to set as it cools, so don’t wait for it to be completely firm in the oven.
Can I use a different type of pan?
A springform pan is really the best choice for cheesecake because it allows you to remove the sides without disturbing the delicate dessert. If you don’t have one, you can use a regular cake pan, but you’ll need to serve the cheesecake directly from the pan or carefully invert it onto a plate.
Why is my cheesecake grainy?
Graininess usually results from not fully softening the cream cheese before mixing or from overbaking. Make sure your cream cheese is truly at room temperature—it should be soft enough to easily press your finger into it. Beat it thoroughly with the sugar before adding other ingredients.
Can I make this cheesecake ahead of time?
Absolutely! In fact, I recommend making it at least one day ahead. Cheesecake needs time to chill and set properly, and the flavors develop beautifully overnight. You can make it up to 3 days in advance and store it covered in the refrigerator.
What’s the best way to cut clean slices?
Use a sharp knife dipped in hot water and wiped clean between each cut. This melts through the cheesecake cleanly rather than dragging and creating messy edges. A thin-bladed knife works better than a thick one.
Gingerbread Cheesecake Recipe
This gingerbread cheesecake features a creamy spiced filling infused with molasses and warm holiday spices, all nestled in a buttery gingersnap crust. It’s the perfect show-stopping dessert for Christmas gatherings and holiday celebrations.
Cook Time: 75 minutes
Cooling Time: 7 hours (includes 1 hour in oven and 6 hours refrigeration)
Total Time: 8 hours 40 minutes
Servings: 12 slices
Difficulty: Medium
Cuisine: American
Course: Dessert
Ingredients
- 2 cups gingersnap cookie crumbs
- 5 tablespoons melted butter
- 24 oz cream cheese, softened to room temperature
- 1 cup brown sugar, packed
- 3 large eggs, room temperature
- 1/3 cup molasses
- 1/2 cup sour cream, room temperature
- 1 teaspoon vanilla extract
- 2 teaspoons ground ginger
- 1 teaspoon ground cinnamon
- 1/4 teaspoon ground cloves
- 1/4 teaspoon ground nutmeg
- 1/4 teaspoon salt
- Whipped cream for topping
Instructions
- Preheat your oven to 325°F (165°C). Grease a 9-inch springform pan and wrap the outside securely with heavy-duty aluminum foil to create a watertight seal.
- In a medium bowl, combine the gingersnap cookie crumbs with the melted butter, stirring until the mixture resembles wet sand. Press the mixture firmly and evenly into the bottom of the prepared springform pan.
- Bake the crust for 10 minutes, then remove from the oven and allow to cool while you prepare the filling.
- In a large mixing bowl or stand mixer, beat the softened cream cheese and brown sugar together on medium speed until completely smooth and creamy, about 3-4 minutes. Scrape down the sides of the bowl as needed.
- Add the molasses, sour cream, vanilla extract, ground ginger, cinnamon, cloves, nutmeg, and salt to the cream cheese mixture. Beat on medium speed until well combined and smooth.
- Reduce the mixer speed to low and add the eggs one at a time, mixing just until each egg is incorporated before adding the next. Do not overmix. Scrape down the sides of the bowl to ensure everything is evenly combined.
- Pour the filling over the cooled crust and smooth the top with a spatula.
- Place the wrapped springform pan in a large roasting pan. Carefully pour hot water into the roasting pan until it reaches about halfway up the sides of the springform pan.
- Bake for 60-75 minutes, until the edges are set and the center still has a slight jiggle (about the size of a quarter). The internal temperature should reach approximately 150°F in the center.
- Turn off the oven and crack the oven door open slightly. Allow the cheesecake to cool in the oven for 1 hour to prevent sudden temperature changes.
- Remove the cheesecake from the water bath and remove the foil. Allow to cool to room temperature, then cover and refrigerate for at least 6 hours or overnight until completely set.
- Before serving, run a knife around the edges of the pan and carefully release the springform sides. Top with whipped cream and optional garnishes such as crushed gingersnaps, candied ginger, or a dusting of cinnamon.
Recipe Notes
- All ingredients must be at room temperature for the smoothest texture. Remove cream cheese, eggs, and sour cream from the refrigerator at least 2 hours before starting.
- Don’t skip the water bath—it’s essential for preventing cracks and ensuring a creamy texture.
- The cheesecake is done when the edges are set but the center still jiggles slightly. It will continue to set as it cools.
- For the cleanest slices, dip your knife in hot water and wipe it clean between each cut.
- This cheesecake can be made up to 3 days in advance and stored covered in the refrigerator.
- If small cracks appear, don’t worry—they can easily be covered with whipped cream or other toppings.
Nutrition Information (per serving, estimated)
Calories: 425
Carbohydrates: 42g
Protein: 7g
Fat: 26g
Saturated Fat: 15g
Fiber: 1g
Sugar: 32g
Sodium: 340mg
Nutrition information is estimated and may vary based on specific ingredients used.
