
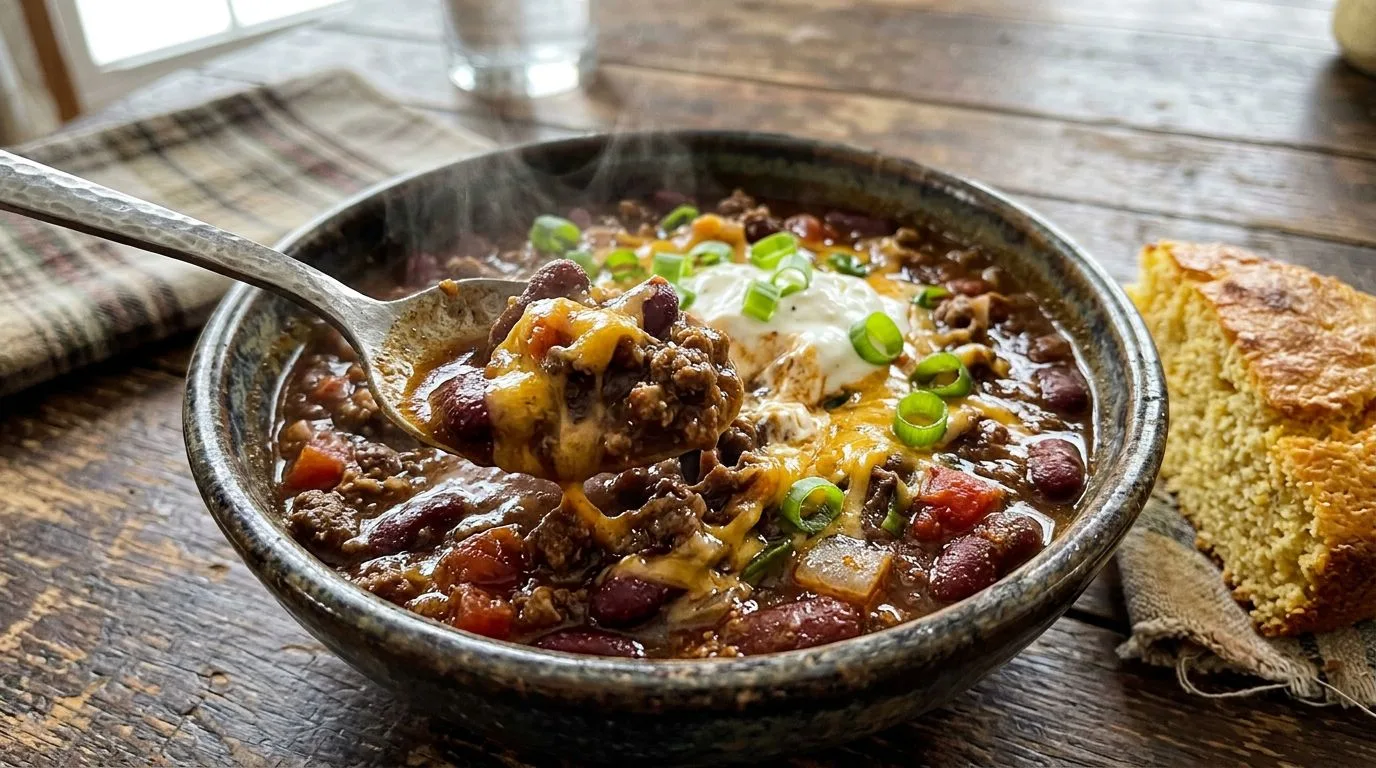
There’s something incredibly satisfying about a bowl of rich, hearty chili on a cold evening, and when you make it with lean, flavorful venison, it becomes something truly special. I love how ground venison brings a deeper, slightly gamey flavor to chili while keeping it lighter than traditional beef versions. This Venison Chili Recipe combines tender deer meat with smoky spices, kidney beans, and tomatoes to create a comforting dish that’s perfect for feeding a crowd or meal prepping for the week ahead.
Whether you’re a hunter with fresh venison in your freezer or you’ve picked up ground deer meat from a local butcher or farmers market, this recipe is an excellent way to showcase wild game. I find that venison’s lean profile pairs beautifully with bold chili spices, and the long simmer time allows all those flavors to meld together into something truly delicious. Plus, with higher protein and lower fat than beef, this chili is a nutritious choice that doesn’t sacrifice any of the rich, warming comfort you expect from a great bowl of chili.
This recipe is straightforward enough for weeknight cooking but impressive enough to serve at game day gatherings or casual dinner parties. I recommend making a big batch—it tastes even better the next day, and it freezes beautifully for quick future meals.
Why You’ll Love This Venison Chili Recipe
This venison chili stands out for several compelling reasons. First, the lean nature of ground venison means you get all the hearty satisfaction of chili without the excess grease that sometimes comes with fattier ground beef. I love that you can enjoy a generous bowl without feeling weighed down afterward.
The flavor profile is robust and complex, thanks to the combination of chili powder, cumin, smoked paprika, and a touch of cayenne pepper. These spices complement the natural richness of venison beautifully, creating layers of warmth and depth. The addition of crushed tomatoes and tomato paste provides a rich base, while the beef broth adds body and helps tenderize the meat during the long simmer.
Another reason I recommend this recipe is its versatility. You can easily adjust the heat level to suit your preferences, add extra vegetables, or swap out the beans based on what you have on hand. It’s also an excellent way to introduce people to wild game if they’re hesitant—the familiar chili format makes venison approachable and delicious.
Finally, this recipe is practical. It makes a large batch that serves a crowd, reheats beautifully, and freezes well. Whether you’re cooking for a family dinner or preparing meals for the week, this venison chili delivers convenience alongside great taste.
Ingredients and Substitutions
Let me walk you through the key ingredients that make this venison chili so flavorful and discuss some practical substitutions you can make based on what’s available in your kitchen.
Ground Venison: This is the star of the recipe. I use 2 pounds of ground venison, which provides plenty of lean protein. If you don’t have venison, you can substitute ground elk, bison, or even lean ground beef. Keep in mind that venison is leaner than beef, so if you use beef, you may want to drain excess fat after browning.
Olive Oil: Since venison is so lean, a tablespoon of olive oil helps prevent sticking and adds a touch of richness. You can use vegetable oil or avocado oil if you prefer.
Aromatics: The combination of diced onion, minced garlic, and red bell pepper creates a flavorful foundation. I like red bell pepper for its sweetness, but green bell pepper works well too. If you want extra heat, consider adding a diced jalapeño along with the bell pepper.
Kidney Beans: Two 15-ounce cans of drained kidney beans add heartiness and fiber. You can substitute pinto beans, black beans, or a combination of your favorites. For a Texas-style chili, you can omit the beans entirely, though I personally enjoy the texture they add.
Tomatoes: A 28-ounce can of crushed tomatoes plus 2 tablespoons of tomato paste creates a rich, thick base. If you only have diced tomatoes, you can use those instead—just expect a slightly chunkier texture.
Beef Broth: Two cups of beef broth add depth and help create the right consistency. Chicken broth or vegetable broth will work in a pinch, though beef broth complements the venison particularly well.
Spices: The spice blend is what gives this chili its character. Chili powder, cumin, smoked paprika, and cayenne pepper work together to create warmth and complexity. Adjust the cayenne based on your heat preference—I find ½ teaspoon gives a gentle kick without overwhelming the other flavors.
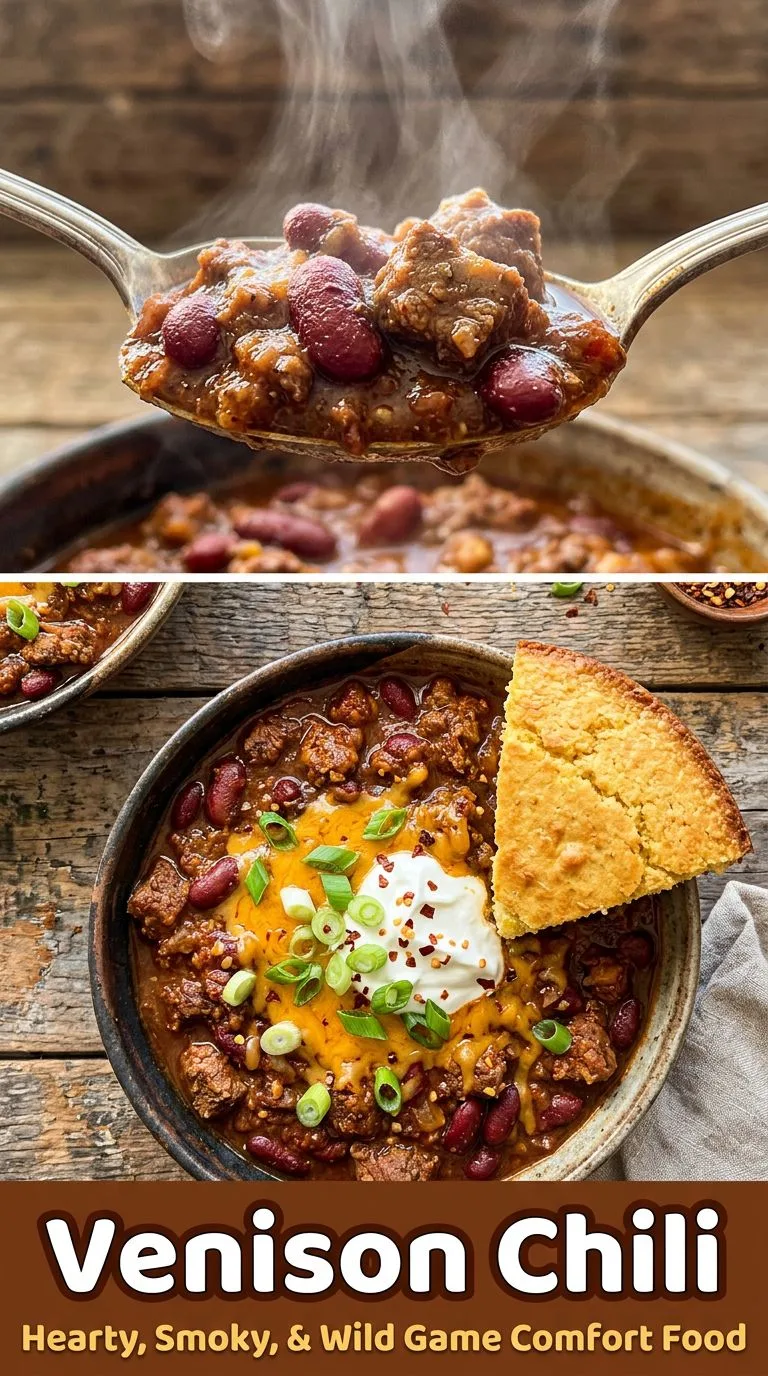
How to Make This Venison Chili Recipe
Making this venison chili is straightforward, but I’ll walk you through each step to ensure the best results. The process involves browning the meat, building flavor with aromatics and spices, then simmering everything together until rich and tender.
Step 1: Brown the Venison
Heat your olive oil in a large Dutch oven over medium-high heat. Once the oil is shimmering, add the ground venison. Cook for 6–8 minutes, breaking it apart with a wooden spoon or spatula as it browns. Because venison is so lean, it won’t release much fat, so the oil helps prevent sticking. You want the meat nicely browned with some caramelization for maximum flavor.
Step 2: Cook the Vegetables
Once the venison is browned, stir in the diced onion and red bell pepper. Cook for about 5 minutes, stirring occasionally, until the vegetables have softened and the onion becomes translucent. This step builds the aromatic base of your chili.
Step 3: Add Garlic and Spices
Add the minced garlic and cook for another minute until fragrant. Then mix in your chili powder, cumin, smoked paprika, and cayenne pepper. Stir constantly for about 30 seconds. This brief toasting of the spices in the hot pot releases their essential oils and intensifies their flavors—it’s a small step that makes a big difference.
Step 4: Build the Chili Base
Stir in the tomato paste first, coating the meat and vegetables. Then add the crushed tomatoes, drained kidney beans, and beef broth. Stir everything together until well combined.
Step 5: Simmer
Bring the mixture to a boil, then reduce the heat to low and let it simmer uncovered for 45–60 minutes. I recommend stirring occasionally to prevent sticking and to ensure even cooking. The longer simmer time allows the flavors to meld and the chili to thicken to the perfect consistency. If it gets too thick, you can add a splash more broth; if it’s too thin, continue simmering until it reaches your desired thickness.
Step 6: Season and Serve
After simmering, taste your chili and season with salt and black pepper as needed. Venison can vary in flavor depending on the animal’s diet and age, so adjust the seasoning to your preference. Serve hot with your favorite toppings.
Expert Tips for Best Results
Over time, I’ve learned a few tricks that elevate this venison chili from good to exceptional. Here are my top tips for success:
Don’t Skip Browning: Properly browning the venison creates fond (those flavorful brown bits) on the bottom of the pot, which adds depth to the final dish. Take your time with this step and resist the urge to stir too frequently—let the meat develop some color.
Toast Your Spices: That brief 30-second toast of the spices in the hot pot makes a noticeable difference in flavor. It wakes up the spices and creates a more complex, aromatic chili.
Simmer Low and Slow: I find that the full 60-minute simmer produces the best results. The extended cooking time allows the venison to become tender and the flavors to fully develop. If you’re short on time, 45 minutes will work, but longer is better.
Adjust Consistency: Chili should be thick but not dry. If yours becomes too thick during simmering, add beef broth or water a quarter cup at a time. If it’s too thin, continue simmering uncovered or add a bit more tomato paste.
Taste and Adjust: Always taste before serving and adjust the seasoning. Venison can have varying levels of gaminess, so you might want to add a pinch of sugar to balance acidity, extra salt to enhance flavors, or more cayenne for heat.
Let It Rest: If time allows, let the chili rest for 10–15 minutes before serving. This allows the flavors to settle and the chili to thicken slightly. Even better, make it a day ahead—chili almost always tastes better the next day.
Serving Suggestions
One of my favorite things about chili is how versatile it is when it comes to serving. This venison chili is delicious on its own, but the right accompaniments can take it to the next level.
Classic Toppings: I love serving this chili with shredded cheddar cheese, a dollop of sour cream, sliced green onions, and fresh cilantro. The cool, creamy toppings provide a nice contrast to the warm, spicy chili. Diced avocado or guacamole also adds a wonderful richness.
With Cornbread: A slice of warm, buttery cornbread alongside a bowl of venison chili is pure comfort food. The slightly sweet cornbread balances the savory, spicy chili perfectly.
Over Rice or Pasta: For a heartier meal, serve the chili over white rice, brown rice, or even pasta. This stretches the recipe further and adds satisfying bulk.
Chili Dogs or Fries: Use this venison chili as a topping for hot dogs to make chili dogs, or pour it over crispy French fries for loaded chili fries. Both are crowd-pleasers at casual gatherings.
With Tortilla Chips: Serve the chili with sturdy tortilla chips for scooping, or crush some chips on top for added crunch. You can also use the chili as a base for nachos.
Alongside a Salad: Balance the richness of the chili with a crisp green salad dressed with a light vinaigrette. The fresh, acidic salad cuts through the hearty chili nicely.
For more chili inspiration, check out this Texas No-Bean Chili Recipe or this Award-Winning Chili Recipe for different takes on this classic comfort food.
Variations and Substitutions
This venison chili recipe is wonderfully adaptable. Here are some variations I recommend based on your preferences or what you have available:
White Venison Chili: For a completely different take, make a white chili by using white beans (cannellini or great northern), chicken broth instead of beef broth, and adding green chilies and cumin. Omit the tomatoes and use sour cream to create a creamy base.
Extra Vegetables: Boost the nutrition by adding diced zucchini, corn kernels, or diced carrots along with the bell pepper. These vegetables add texture and make the chili even more filling.
Bean-Free Version: If you prefer a bean-free chili, simply omit the kidney beans and perhaps add an extra half pound of venison. You may need to reduce the liquid slightly or simmer longer to achieve the right consistency.
Spicier Version: Increase the cayenne pepper to 1 teaspoon, add diced jalapeños or serrano peppers with the bell pepper, or stir in a tablespoon of hot sauce at the end.
Slow Cooker Method: After browning the venison and sautéing the vegetables and spices on the stovetop, transfer everything to a slow cooker. Cook on low for 6–8 hours or on high for 3–4 hours.
Instant Pot Method: Use the sauté function to brown the meat and cook the vegetables, then add the remaining ingredients and pressure cook on high for 20 minutes with a natural release.
Different Beans: Experiment with black beans, pinto beans, or a three-bean blend for variety in texture and flavor.
Storage, Freezing, and Reheating
This venison chili stores exceptionally well, making it perfect for meal prep or batch cooking.
Refrigerator Storage: Allow the chili to cool completely, then transfer it to airtight containers. It will keep in the refrigerator for up to 4–5 days. I find that the flavors actually improve after a day or two in the fridge as the spices continue to meld.
Freezing: This chili freezes beautifully for up to 3 months. Let it cool completely, then portion it into freezer-safe containers or heavy-duty freezer bags. I like to freeze it in individual or family-sized portions for easy thawing. Leave a little headspace in containers as the chili will expand slightly when frozen. Label with the date and contents.
Thawing: The best way to thaw frozen venison chili is to transfer it to the refrigerator the night before you plan to eat it. For faster thawing, you can place the sealed container in a bowl of cold water, changing the water every 30 minutes.
Reheating: Reheat chili on the stovetop over medium-low heat, stirring occasionally, until heated through. You may need to add a splash of broth or water to loosen it up, as it tends to thicken when stored. You can also reheat individual portions in the microwave in 1-minute intervals, stirring between each interval. For frozen chili, you can reheat it directly from frozen on the stovetop over low heat, stirring frequently, though it will take longer.
Frequently Asked Questions
Does venison chili taste gamey?
Venison does have a slightly gamey flavor compared to beef, but the bold spices in this chili complement it beautifully. The long simmer time, tomatoes, and aromatic vegetables help mellow any strong flavors. If you’re concerned about gaminess, make sure your venison was properly processed and trimmed of fat and silver skin, as that’s where most of the strong flavor comes from.
Can I use venison stew meat instead of ground venison?
Yes, but you’ll need to adjust the cooking time. Cut the stew meat into small cubes and brown it well, then simmer the chili for 2–3 hours until the meat is fork-tender. You may also need to add more liquid during the extended cooking time.
How can I make this chili thicker?
If your chili is too thin, continue simmering it uncovered to allow excess liquid to evaporate. You can also mash some of the beans against the side of the pot to release their starches, which will naturally thicken the chili. Another option is to stir in a tablespoon or two of masa harina (corn flour) or a cornstarch slurry.
Can I make this in advance?
Absolutely! In fact, I recommend it. Chili tastes even better the next day after the flavors have had time to meld. Make it up to 2 days in advance and store it in the refrigerator, then reheat when ready to serve.
What’s the best way to reduce the gamey flavor of venison?
Soaking ground venison in milk for 1–2 hours before cooking can help reduce gamey flavors. Drain and pat dry before using. Also, ensure all fat and silver skin were removed during processing, as these contribute to stronger flavors.
Can I double this recipe?
Yes, this recipe doubles well. Just make sure you have a large enough pot—you’ll need at least an 8-quart Dutch oven or stockpot. The cooking time should remain about the same, though you may need to stir more frequently to ensure even cooking.
Is venison chili healthy?
Venison is an excellent lean protein source, much lower in fat than beef. This chili is also high in fiber from the beans and packed with vitamins from the tomatoes and vegetables. It’s a nutritious, satisfying meal that fits well into most balanced diets.
Venison Chili Recipe
This hearty Venison Chili combines lean ground deer meat with kidney beans, tomatoes, and a blend of smoky spices for a rich, comforting meal that’s perfect for cold evenings. The long simmer time creates deep, complex flavors that make this wild game chili truly exceptional.
Cook Time: 60 minutes
Total Time: 1 hour 15 minutes
Servings: 8 servings
Difficulty: Easy
Cuisine: American
Course: Dinner
Ingredients
- 2 lbs ground venison
- 1 tbsp olive oil
- 1 large onion, diced
- 4 garlic cloves, minced
- 1 red bell pepper, diced
- 2 cans (15 oz each) kidney beans, drained
- 1 can (28 oz) crushed tomatoes
- 2 tbsp tomato paste
- 2 cups beef broth
- 2 tbsp chili powder
- 1 tsp ground cumin
- 1 tsp smoked paprika
- ½ tsp cayenne pepper
- Salt and black pepper to taste
Instructions
- Heat olive oil in a large Dutch oven over medium-high heat.
- Add the ground venison and cook for 6–8 minutes, breaking it apart with a wooden spoon until browned.
- Stir in the diced onion and red bell pepper, cooking for 5 minutes until softened.
- Add minced garlic and cook for another minute until fragrant.
- Mix in chili powder, cumin, smoked paprika, and cayenne pepper, stirring constantly for 30 seconds to toast the spices.
- Add tomato paste and stir to coat the meat and vegetables, then add crushed tomatoes, drained kidney beans, and beef broth.
- Bring the mixture to a boil, then reduce heat to low and simmer uncovered for 45–60 minutes, stirring occasionally.
- Season with salt and black pepper to taste, then serve hot with your favorite toppings such as shredded cheese, sour cream, or sliced green onions.
Recipe Notes
- Venison is very lean, so the olive oil helps prevent sticking during browning.
- For a milder chili, reduce the cayenne pepper to ¼ teaspoon or omit it entirely.
- This chili tastes even better the next day after the flavors have melded together.
- If the chili becomes too thick during simmering, add additional beef broth or water as needed.
- For a thicker chili, simmer longer uncovered or mash some of the beans against the side of the pot.
- Store leftovers in airtight containers in the refrigerator for up to 5 days or freeze for up to 3 months.
Nutrition Information (Per Serving, Estimated)
Calories: 320
Carbohydrates: 28g
Protein: 35g
Fat: 7g
Saturated Fat: 2g
Fiber: 8g
Sugar: 6g
Sodium: 580mg
Nutrition information is estimated based on standard ingredient measurements and may vary based on specific products used and portion sizes.
