
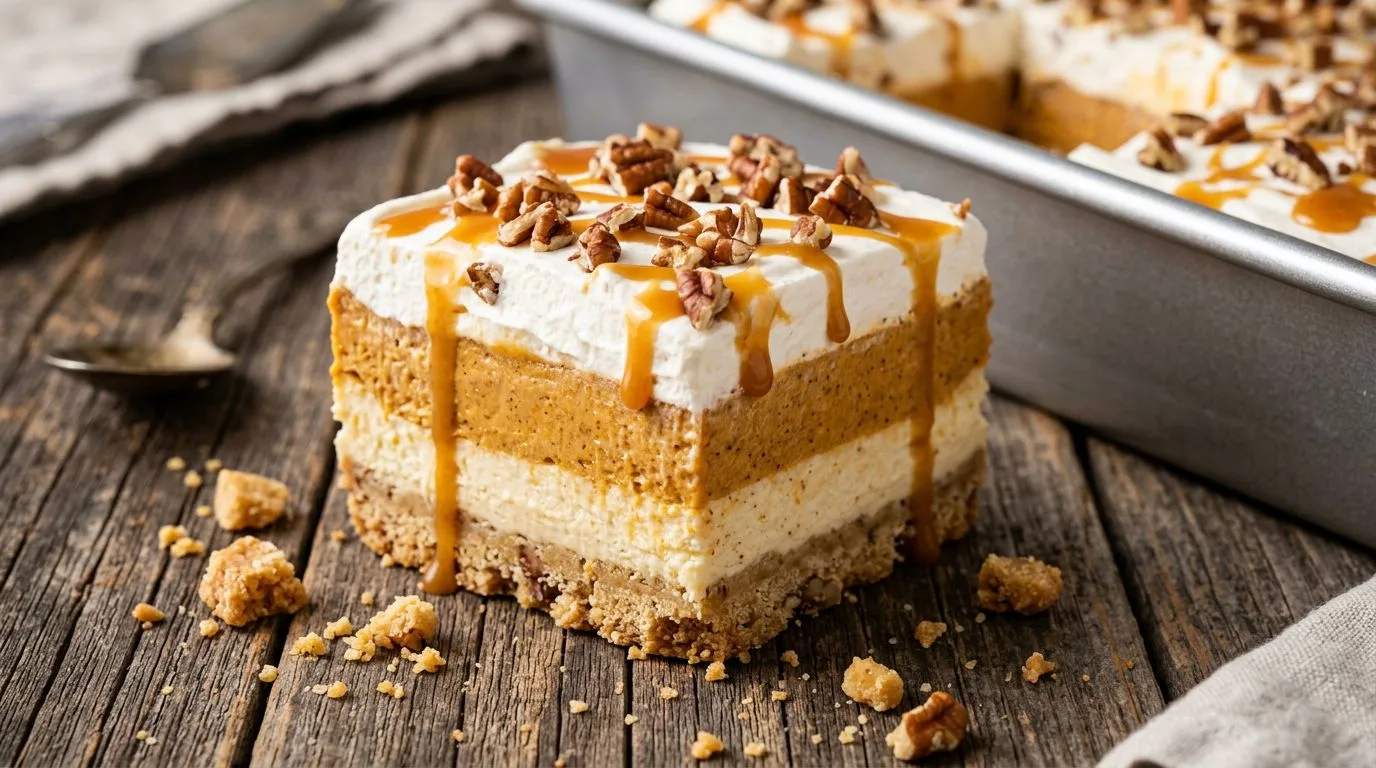
When fall arrives and pumpkin season is in full swing, I find myself reaching for desserts that celebrate those warm, cozy flavors without requiring hours in the kitchen. Pumpkin lush, also known as pumpkin delight, is one of those perfect make-ahead desserts that delivers impressive layers of flavor and texture with surprisingly simple preparation. This no-bake layered dessert starts with a buttery pecan crust that gets baked until golden, then builds upward with a sweetened cream cheese layer, a spiced pumpkin pudding layer, and finally a cloud of whipped topping. Each bite offers a delightful contrast between the crunchy base and the creamy, dreamy layers above.
I love serving pumpkin lush for Thanksgiving gatherings because it can be made a day or two ahead, freeing up valuable oven space and reducing last-minute stress. The dessert sits beautifully in the refrigerator, allowing the flavors to meld together while the layers set to perfect slicing consistency. Unlike traditional pumpkin pie, this dessert offers more textural variety and a lighter, fluffier finish that appeals to guests who might find dense pies too heavy after a big meal. The combination of cream cheese tang, pumpkin spice warmth, and toasted pecans creates a dessert that feels both familiar and special.
Whether you call it pumpkin lush or pumpkin delight, this layered dessert has earned its place as a fall and winter favorite across American kitchens. I recommend making it whenever you want a crowd-pleasing dessert that looks as good as it tastes, requires minimal active cooking time, and can be prepared well in advance. The recipe is forgiving, adaptable, and consistently delivers that perfect balance of sweet, spiced, and creamy that makes pumpkin desserts so beloved.
Why You’ll Love This Pumpkin Lush Recipe
This pumpkin lush dessert checks all the boxes for what I look for in a holiday dessert. First, it’s a genuine make-ahead recipe, meaning you can prepare it completely one or two days before serving, which is invaluable during busy holiday cooking schedules. The dessert actually improves with time in the refrigerator as the layers settle and the flavors develop, so advance preparation isn’t just convenient—it’s beneficial.
The layered presentation makes this dessert visually stunning when you cut into it and serve slices on dessert plates. Guests always appreciate seeing those distinct layers of golden crust, white cream cheese, orange pumpkin pudding, and fluffy topping. I find that the textural contrast keeps every bite interesting, from the crunchy pecan crust to the smooth, creamy filling layers and the light whipped topping.
Another reason I love this recipe is its flexibility. While the classic version is absolutely delicious, you can easily adapt it to suit dietary preferences or ingredient availability. The recipe serves a crowd beautifully in a 9×13-inch pan, making it ideal for potlucks, family gatherings, and holiday celebrations. Unlike individual desserts that require assembly of multiple portions, you simply make one pan and slice as needed.
The flavor profile hits that perfect autumn sweet spot with pumpkin pie spice, real pumpkin purée, and toasted pecans creating a dessert that tastes unmistakably seasonal without being overly sweet or heavy. I appreciate that the cream cheese layer adds a slight tang that balances the sweetness of the pudding and whipped topping, preventing the dessert from becoming cloying.
Ingredients and Substitutions
The beauty of pumpkin lush lies in its straightforward ingredient list organized into four distinct layers. For the crust, you’ll need all-purpose flour, softened unsalted butter, and chopped pecans. This combination creates a shortbread-like base with nutty crunch. If you prefer, you can substitute walnuts for pecans, or omit the nuts entirely if allergies are a concern—though I find the nuts add important textural contrast and flavor depth.
The cream cheese layer requires softened cream cheese, powdered sugar, and whipped topping. I recommend using full-fat cream cheese for the best texture and flavor, though reduced-fat cream cheese can work in a pinch. The powdered sugar dissolves smoothly into the cream cheese without graininess, which is why I prefer it over granulated sugar for this layer. For the whipped topping, you can use store-bought frozen whipped topping like Cool Whip, or make your own stabilized whipped cream if you prefer a more natural option.
The pumpkin layer combines canned pumpkin purée, instant vanilla pudding mix, cold milk, and pumpkin pie spice. Make sure you’re using pure pumpkin purée, not pumpkin pie filling, which already contains sugar and spices. The instant pudding mix is essential here—it provides the thickening power that gives this layer its structure. I use vanilla pudding because it allows the pumpkin flavor to shine, but some cooks prefer using instant butterscotch or even cheesecake-flavored pudding for variation. The cold milk should be whole or 2% for best results, though you can use dairy-free milk alternatives if needed.
For the pumpkin pie spice, you can substitute a homemade blend of cinnamon, ginger, nutmeg, and cloves if you don’t have the pre-mixed spice on hand. I typically use about 1½ teaspoons cinnamon, ¼ teaspoon ginger, ¼ teaspoon nutmeg, and a pinch of cloves to replace the 2 teaspoons called for in the recipe.
The final topping layer uses additional whipped topping and chopped pecans for garnish. This creates a finished look and adds one more layer of texture. If you’re making this dessert for a special occasion, you might also consider adding a light dusting of cinnamon or a drizzle of caramel sauce just before serving.
How to Make Pumpkin Lush
Making pumpkin lush is a straightforward process that builds layers one at a time, allowing each to set before adding the next. I find the methodical approach relaxing, and the steps are simple enough that even novice bakers can achieve excellent results.
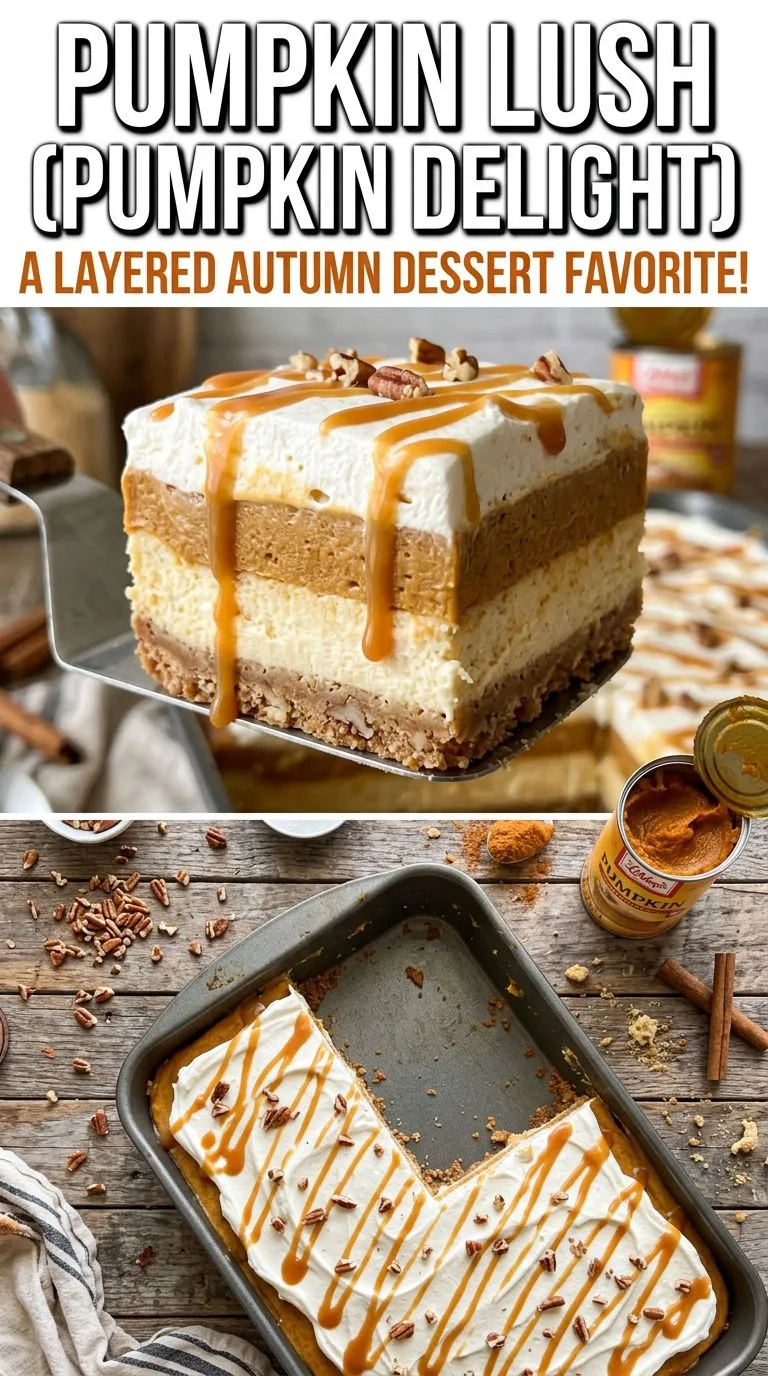
Start by preheating your oven to 350°F and greasing a 9×13-inch baking dish. For the crust, combine the flour, softened butter, and chopped pecans in a medium bowl. I like to use a fork or pastry cutter to work the butter into the flour until the mixture resembles coarse crumbs with the pecans distributed throughout. Press this mixture evenly into the bottom of your prepared baking dish, making sure to reach the corners and create a uniform layer. Bake for 18 to 22 minutes, watching for the crust to turn lightly golden brown. The crust should be firm but not dark. Remove it from the oven and allow it to cool completely before adding the next layer—this is crucial because a warm crust will melt the cream cheese layer.
While the crust cools, prepare the cream cheese layer. Using an electric mixer, beat the softened cream cheese and powdered sugar together until the mixture is smooth and fluffy with no lumps remaining. This usually takes about 2 to 3 minutes on medium speed. Gently fold in 1 cup of the whipped topping using a spatula, being careful not to deflate the mixture too much. Once the crust has cooled completely, spread the cream cheese mixture evenly over it, reaching all the way to the edges. I find using an offset spatula makes this step easier and creates a smooth, even layer.
For the pumpkin layer, whisk together the two packages of instant vanilla pudding mix with the cold milk in a large bowl. Whisk vigorously for about 2 minutes until the mixture thickens noticeably. Immediately whisk in the pumpkin purée and pumpkin pie spice, combining until the mixture is smooth and uniformly colored. Work relatively quickly here, as the pudding will continue to set. Spread the pumpkin mixture over the cream cheese layer, again using a spatula to create an even surface.
Finally, spread the remaining 2 cups of whipped topping over the pumpkin layer, creating the final fluffy white layer. You can spread it smooth for a clean look, or create decorative swirls if you prefer. Sprinkle the top with the remaining ¼ cup of chopped pecans for garnish and added crunch.
Cover the pan with plastic wrap or aluminum foil and refrigerate for at least 4 hours, though I strongly recommend overnight chilling if your schedule allows. This extended refrigeration time allows all the layers to set properly and makes slicing much cleaner and easier. When you’re ready to serve, use a sharp knife dipped in hot water and wiped clean between cuts for the neatest slices.
Expert Tips for Best Results
I’ve made pumpkin lush many times over the years, and I’ve learned several tricks that ensure the best possible results every time. First, patience with cooling and chilling times makes a significant difference. Don’t rush adding the cream cheese layer to a warm crust, as this will cause the cream cheese to soften and potentially slide around. Similarly, the full refrigeration time is essential—cutting into the dessert too early results in messy, unstable slices that don’t hold their layered structure.
When working with the instant pudding, use cold milk and whisk immediately and vigorously. The pudding begins setting quickly, so you want to incorporate the pumpkin purée while the mixture is still fluid enough to spread smoothly. If your pudding mixture seems too thick to spread easily, you can add an extra tablespoon or two of milk to thin it slightly, though be careful not to add so much that it won’t set properly.
For the cleanest slices, I recommend wiping your knife clean between each cut and occasionally dipping it in hot water. This prevents the layers from dragging and mixing as you slice. A thin, sharp knife works better than a wide cake server for the initial cuts.
If you’re making your own whipped cream instead of using store-bought whipped topping, I suggest stabilizing it with a small amount of powdered sugar and a teaspoon of unflavored gelatin or cornstarch. This helps the whipped cream hold its structure over the extended refrigeration time without weeping or deflating.
Consider toasting your pecans before adding them to the crust and using them as garnish. Toasting intensifies their flavor and adds an extra dimension to the dessert. Simply spread them on a baking sheet and toast at 350°F for about 5 to 7 minutes, watching carefully to prevent burning.
Serving Suggestions
Pumpkin lush is a versatile dessert that fits beautifully into various serving contexts. I most often serve it as part of a Thanksgiving dessert spread, where it complements traditional pumpkin pie while offering something a bit different. The make-ahead nature means you can prepare it before the holiday rush, and it sits happily in the refrigerator while you focus on other dishes.
For serving, I like to cut the dessert into squares or rectangles and plate them individually with a dessert fork. The layered appearance is part of the appeal, so I make sure each slice shows off all four distinct layers. A small dollop of additional whipped cream on the side and a light sprinkle of cinnamon or a few extra pecan pieces make an attractive garnish.
This dessert pairs wonderfully with hot coffee or spiced tea, and I find it’s substantial enough to serve as a standalone dessert course without needing accompaniments. However, if you want to dress it up further, a drizzle of caramel sauce or a small scoop of vanilla ice cream on the side elevates the presentation for special occasions.
Pumpkin lush works well for potlucks and church suppers because it travels easily in its baking dish and can be served directly from the pan. I typically bring a serving spatula and small dessert plates, though sturdy paper plates work fine for casual gatherings. The dessert holds up well at room temperature for an hour or two during serving time, though I prefer to keep it refrigerated until just before serving when possible.
For a beautiful presentation at holiday gatherings, consider serving pumpkin lush alongside other fall favorites like no-bake pumpkin pie cups or pumpkin cheesecake bars to give guests variety while staying within the seasonal theme.
Variations and Substitutions
While the classic pumpkin lush recipe is delicious as written, I enjoy experimenting with variations that put new spins on this layered dessert. One popular variation uses a graham cracker crust instead of the flour-butter-pecan crust. Simply combine 2 cups of graham cracker crumbs with ½ cup melted butter and press into the pan—no baking required. This creates a no-bake version that’s even easier to prepare.
For a chocolate twist, you can add 2 tablespoons of cocoa powder to the crust mixture, or use chocolate graham crackers for a chocolate crust base. Some cooks even add mini chocolate chips to the cream cheese layer for pockets of chocolate throughout the dessert.
If you want to reduce the sweetness slightly, you can decrease the powdered sugar in the cream cheese layer to ¾ cup, or use sugar-free instant pudding mix in the pumpkin layer. I find these adjustments still provide plenty of sweetness while allowing the pumpkin and spice flavors to come through more prominently.
For a more intense pumpkin spice flavor, increase the pumpkin pie spice to 1 tablespoon, or add ½ teaspoon of vanilla extract to the pumpkin layer. You can also fold ½ cup of mini marshmallows into the whipped topping layer for added texture and a fun surprise.
Nut-free versions work well by simply omitting the pecans from both the crust and the topping. The crust will be slightly less crunchy but still delicious. You might consider adding a tablespoon of sugar to the crust mixture to compensate for the missing pecans’ natural sweetness.
For individual servings, you can layer the components in clear glasses or mason jars, creating parfait-style presentations that are perfect for dinner parties. This approach also makes portion control easier and creates an elegant presentation.
Storage, Freezing, and Reheating
Proper storage keeps pumpkin lush fresh and delicious for several days, making it an excellent make-ahead option. I store the dessert covered tightly with plastic wrap or aluminum foil in the refrigerator, where it will keep well for up to 4 days. The layers maintain their structure throughout this time, and many people find the flavors actually improve after a day or two as everything melds together.
Because this is a chilled dessert, there’s no reheating involved—it’s always served cold directly from the refrigerator. I recommend removing it from the refrigerator just 5 to 10 minutes before slicing to make cutting slightly easier, but it should still be quite cold when served.
Pumpkin lush can be frozen, though I find the texture of the whipped topping layer changes slightly upon thawing, becoming a bit less fluffy. If you do want to freeze it, I recommend doing so before adding the final whipped topping layer. Wrap the pan tightly in plastic wrap and then aluminum foil, and freeze for up to 2 months. Thaw overnight in the refrigerator, then add the fresh whipped topping layer and pecan garnish before serving.
Individual slices can also be frozen wrapped tightly in plastic wrap and placed in freezer bags. This allows you to thaw only what you need. Thaw frozen slices in the refrigerator for several hours or overnight before serving.
If you have leftovers, they keep well covered in the refrigerator. I find that the dessert maintains its quality best when kept in the original baking dish rather than transferred to another container, as this minimizes handling and potential layer disruption.
Frequently Asked Questions
Can I use homemade whipped cream instead of store-bought whipped topping?
Yes, you can substitute homemade whipped cream for the store-bought whipped topping. I recommend stabilizing the whipped cream with a bit of powdered sugar and gelatin or cornstarch so it holds up well during the extended refrigeration time. Use about 2 cups of heavy cream whipped to stiff peaks to replace each 2-cup portion of whipped topping called for in the recipe.
Why is my pumpkin layer runny?
A runny pumpkin layer usually results from not whisking the pudding mixture long enough, using warm milk instead of cold milk, or not allowing sufficient refrigeration time. Make sure to whisk the pudding vigorously for a full 2 minutes with cold milk, and allow at least 4 hours (preferably overnight) for the dessert to set completely in the refrigerator.
Can I make this dessert gluten-free?
Yes, you can make a gluten-free version by using a gluten-free flour blend in place of the all-purpose flour in the crust, or by substituting a gluten-free graham cracker crust. Make sure your instant pudding mix is also gluten-free, as some brands contain gluten-containing ingredients.
Do I have to bake the crust?
The traditional recipe calls for baking the flour-butter-pecan crust, but you can make a no-bake version using graham cracker crumbs mixed with melted butter instead. This creates a different texture but eliminates the baking step entirely, making it a true no-bake dessert.
How far in advance can I make pumpkin lush?
I recommend making pumpkin lush 1 to 2 days before serving for the best results. The dessert needs at least 4 hours to set properly, but it keeps well in the refrigerator for up to 4 days total. Making it a day ahead allows the flavors to develop fully and makes holiday meal preparation much easier.
Can I use fresh pumpkin instead of canned?
While you can use fresh pumpkin purée, I find that canned pumpkin purée provides more consistent results with better texture and moisture content. If you do use fresh pumpkin, make sure it’s cooked until very soft, puréed until completely smooth, and drained of excess moisture to prevent a watery pumpkin layer.
What size pan should I use?
This recipe is designed for a 9×13-inch baking dish, which serves 12 to 15 people depending on portion size. You can halve the recipe and use an 8×8-inch or 9×9-inch pan for smaller gatherings, adjusting the baking time for the crust to about 15 to 18 minutes.
Pumpkin Lush (Pumpkin Delight)
This layered pumpkin lush dessert features a buttery pecan crust, sweetened cream cheese layer, spiced pumpkin pudding, and fluffy whipped topping. Perfect for Thanksgiving and fall gatherings, this make-ahead dessert serves a crowd and can be prepared 1-2 days in advance.
- Prep Time: 25 minutes
- Cook Time: 20 minutes
- Chilling Time: 4 hours (or overnight)
- Total Time: 4 hours 45 minutes
- Servings: 12-15 servings
- Difficulty: Easy
- Cuisine: American
- Course: Dessert
Ingredients
For the Crust:
- 1 cup all-purpose flour
- ½ cup unsalted butter, softened
- ½ cup chopped pecans
For the Cream Cheese Layer:
- 8 oz cream cheese, softened
- 1 cup powdered sugar
- 1 cup thawed whipped topping
For the Pumpkin Layer:
- 1 can (15 oz) pumpkin purée
- 2 packages (3.4 oz each) instant vanilla pudding mix
- 1 cup cold milk
- 2 teaspoons pumpkin pie spice
For the Topping:
- 2 cups thawed whipped topping
- ¼ cup chopped pecans
Instructions
- Preheat the oven to 350°F (175°C). Grease a 9×13-inch baking dish with butter or non-stick cooking spray.
- In a medium bowl, combine the flour, softened butter, and ½ cup chopped pecans. Mix with a fork or pastry cutter until the mixture resembles coarse crumbs. Press the mixture evenly into the bottom of the prepared baking dish, making sure to reach all corners.
- Bake the crust for 18 to 22 minutes, or until lightly golden brown. Remove from the oven and allow to cool completely on a wire rack before adding the next layer.
- While the crust cools, prepare the cream cheese layer. In a large bowl, beat the softened cream cheese and powdered sugar together with an electric mixer on medium speed until smooth and fluffy, about 2 to 3 minutes. Gently fold in 1 cup of whipped topping using a spatula until well combined.
- Once the crust has cooled completely, spread the cream cheese mixture evenly over the crust, reaching all the way to the edges. Use an offset spatula for the smoothest results.
- For the pumpkin layer, whisk together the instant vanilla pudding mix and cold milk in a large bowl. Whisk vigorously for about 2 minutes until the mixture thickens. Immediately whisk in the pumpkin purée and pumpkin pie spice until smooth and well combined.
- Spread the pumpkin mixture evenly over the cream cheese layer, smoothing the top with a spatula.
- Spread the remaining 2 cups of whipped topping over the pumpkin layer, creating an even final layer. Sprinkle the top with the remaining ¼ cup of chopped pecans.
- Cover the pan with plastic wrap or aluminum foil and refrigerate for at least 4 hours, preferably overnight, to allow all layers to set properly.
- When ready to serve, use a sharp knife dipped in hot water and wiped clean between cuts to slice the dessert into squares or rectangles. Serve cold.
Recipe Notes
- Make sure the crust is completely cool before adding the cream cheese layer to prevent melting.
- Use cold milk when preparing the instant pudding for proper thickening.
- For cleanest slices, refrigerate overnight and use a hot, clean knife for cutting.
- Store covered in the refrigerator for up to 4 days.
- You can substitute walnuts for pecans, or omit nuts entirely for nut-free version.
- For a no-bake version, use a graham cracker crust instead of the baked flour crust.
- This dessert can be frozen without the final whipped topping layer for up to 2 months.
Estimated Nutrition (Per Serving)
Based on 12 servings. Nutritional values are approximate.
- Calories: 285
- Carbohydrates: 32g
- Protein: 3g
- Fat: 16g
- Saturated Fat: 8g
- Fiber: 2g
- Sugar: 22g
- Sodium: 280mg
