
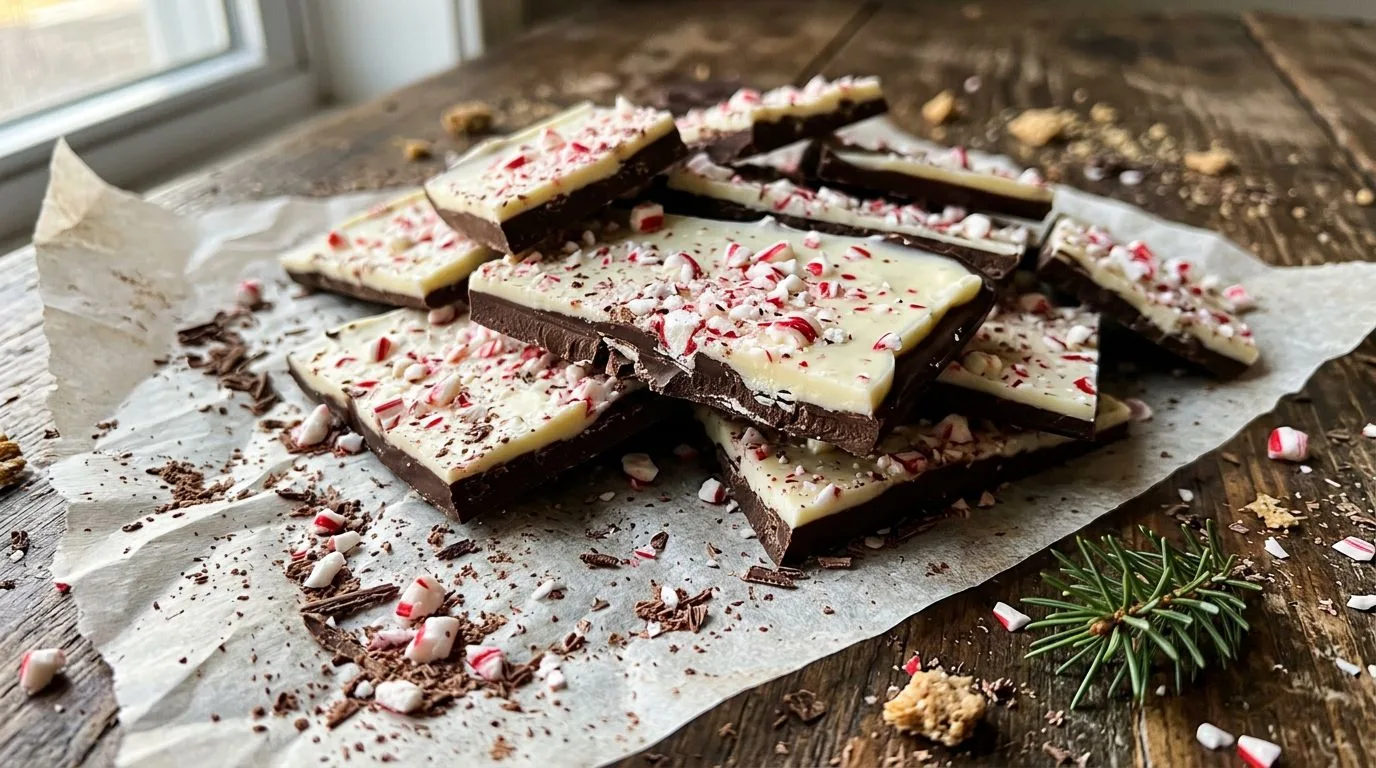
There’s something magical about the combination of rich chocolate and refreshing peppermint, especially during the holiday season. Peppermint bark has become a Christmas tradition in many households, and I love how this simple two-layer confection delivers such impressive results with minimal effort. The contrast between smooth dark chocolate and creamy white chocolate, topped with crunchy candy cane pieces, creates a perfect balance of flavors and textures that makes this treat absolutely irresistible.
What makes homemade peppermint bark so special is that you can control the quality of ingredients and customize it to your preferences. Store-bought versions often use lower-quality chocolate, but when you make it yourself, you can choose premium chocolate that melts beautifully and tastes incredible. I find that making peppermint bark at home is not only more economical but also allows you to create a fresher, more flavorful candy that friends and family will truly appreciate.
This recipe is wonderfully forgiving and requires no special equipment or candy-making skills. Whether you’re an experienced baker or just starting out in the kitchen, you’ll find this peppermint bark easy to master. It’s perfect for holiday gift-giving, cookie exchanges, or simply keeping on hand for when those chocolate-peppermint cravings strike during the festive season.
Why You’ll Love This Peppermint Bark Recipe
This homemade peppermint bark stands out for several compelling reasons. First, it requires only five simple ingredients that you can easily find at any grocery store during the holiday season. There’s no complicated tempering process, no candy thermometer needed, and no precise temperature monitoring required. I love how accessible this recipe is for cooks of all skill levels.
The no-bake nature of this dessert makes it ideal for busy holiday schedules. You can prepare a batch in less than 15 minutes of active work, then let the refrigerator do the rest. This efficiency is invaluable when you’re juggling multiple holiday preparations and need treats that don’t monopolize your oven time.
Another reason I recommend this recipe is its versatility as a gift. Peppermint bark looks beautiful when packaged in clear cellophane bags tied with festive ribbon, stacked in decorative tins, or arranged in gift boxes. It travels well, stays fresh for weeks, and always receives enthusiastic responses from recipients. The professional appearance belies how simple it actually is to make.
The flavor profile is perfectly balanced—not too sweet, with just the right amount of peppermint to complement rather than overwhelm the chocolate. The dark chocolate base provides a sophisticated bittersweet foundation that prevents the treat from becoming cloying, while the white chocolate layer adds creamy sweetness and visual appeal.
Ingredients and Substitutions
Let me walk you through each ingredient and explain why it matters, along with suitable alternatives if you need to make substitutions.
Dark Chocolate: I recommend using good-quality dark chocolate with 60-70% cacao content. You can use chocolate chips, chocolate bars, or baking chocolate. Higher-quality chocolate melts more smoothly and tastes significantly better. If you prefer a sweeter base layer, you can substitute semisweet chocolate instead of dark chocolate. Avoid using chocolate with added ingredients like caramel or nuts, as these can interfere with the melting process.
White Chocolate: Quality matters tremendously here. Look for real white chocolate that contains cocoa butter, not white coating or almond bark. Real white chocolate has a superior flavor and texture. White chocolate chips work well, though bar chocolate often melts more smoothly. If someone in your household doesn’t enjoy white chocolate, you could create a double dark chocolate bark instead, though you’ll lose the classic two-tone appearance.
Peppermint Extract: Pure peppermint extract delivers the best flavor. A little goes a long way—too much can make the bark taste medicinal. If you only have peppermint oil, use it sparingly as it’s more concentrated than extract. In a pinch, you could omit the extract entirely and rely solely on the crushed candy canes for peppermint flavor, though I find the extract enhances the overall taste.
Crushed Candy Canes: Traditional red-and-white striped candy canes are classic, but you can experiment with different colors or flavors of peppermint candies. I like to use a mix of sizes in my crush—some fine pieces and some slightly larger chunks for varied texture. You can crush candy canes by placing them in a sealed plastic bag and tapping with a rolling pin or the bottom of a heavy pan.
Coconut Oil: This optional ingredient helps thin the chocolate slightly for easier spreading and adds a subtle sheen to the finished bark. You can substitute with a neutral vegetable oil or simply omit it if you prefer. The chocolate will still work perfectly well without it.
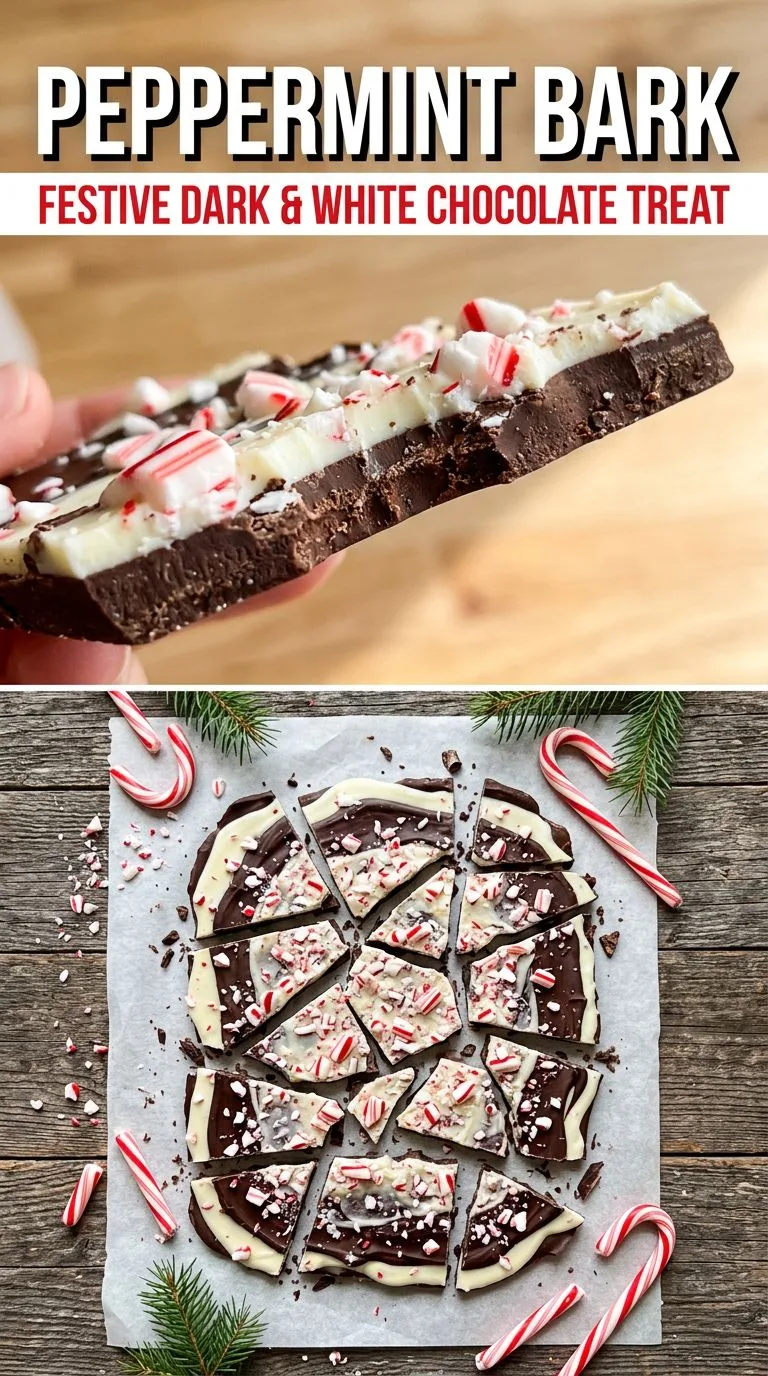
How to Make Peppermint Bark
The process of making peppermint bark is straightforward, but attention to a few details will ensure perfect results every time.
Start by preparing your workspace. Line a baking sheet with parchment paper, making sure it lies flat without wrinkles. The size of your baking sheet will determine the thickness of your bark—I typically use a standard half-sheet pan (approximately 13×18 inches) for bark that’s about 1/4 inch thick. If you prefer thicker bark, use a smaller pan or a square baking dish.
For the dark chocolate layer, place your chopped dark chocolate in a microwave-safe bowl. Microwave in 30-second intervals, stirring thoroughly between each interval. This prevents overheating and ensures even melting. The chocolate is ready when it’s completely smooth with no lumps remaining. If you’re using the optional coconut oil, stir it in at this point.
Pour the melted dark chocolate onto your prepared baking sheet and use an offset spatula or the back of a spoon to spread it into an even layer. Aim for consistent thickness throughout—this ensures the bark breaks evenly later. Don’t worry about making it perfectly rectangular; irregular edges add to the homemade charm.
Refrigerate the dark chocolate layer for about 10 minutes. You want it mostly set but still slightly tacky to the touch. This tackiness is crucial—it helps the white chocolate layer adhere properly. If the dark chocolate sets completely hard, the two layers may separate when you break the bark into pieces.
While the dark chocolate chills, prepare your white chocolate. Melt it using the same gentle method—30-second microwave intervals with stirring in between. White chocolate is more delicate than dark chocolate and can seize or scorch more easily, so watch it carefully. Once melted and smooth, stir in the peppermint extract thoroughly.
Let the white chocolate cool for 2-3 minutes before spreading. If it’s too hot, it can melt the dark chocolate layer underneath. Pour the white chocolate over the dark chocolate layer and spread it evenly to cover completely. Work relatively quickly, as the white chocolate will begin to set.
Immediately sprinkle the crushed candy canes over the white chocolate layer while it’s still wet. Press them gently into the surface so they adhere well. I like to use the back of a spoon or my clean hand to press them down lightly—this prevents them from falling off later.
Return the baking sheet to the refrigerator and chill for at least 30 minutes, or until the bark is completely firm throughout. Once set, remove it from the refrigerator and let it sit at room temperature for a few minutes to make breaking easier. Use your hands to break the bark into irregular pieces of varying sizes. The rustic, broken appearance is part of peppermint bark’s charm.
Expert Tips for Best Results
After making countless batches of peppermint bark, I’ve learned several tricks that ensure success every time.
Don’t Rush the Melting: Patience is key when melting chocolate. Short intervals with thorough stirring prevent scorching and result in smoother chocolate. If you notice any lumps, continue stirring—the residual heat often melts them without additional microwaving.
Timing the Layers: The sweet spot for adding the white chocolate layer is when the dark chocolate is set but still slightly tacky. If you’re unsure, touch the surface lightly with your finger—it should feel firm but not completely hard. This ensures proper adhesion between layers.
Candy Cane Crushing: For the best texture, I recommend a mix of fine powder and small chunks. Place unwrapped candy canes in a heavy-duty zip-top bag, seal it completely (removing excess air), and wrap it in a kitchen towel. Use a rolling pin or meat mallet to crush them. The towel prevents the bag from tearing and contains any escapees.
Prevent Candy Cane Melting: Add crushed candy canes immediately after spreading the white chocolate, but make sure the white chocolate has cooled slightly first. If the white chocolate is too hot, the candy canes can begin to melt and bleed color into the white chocolate.
Storage Temperature: Peppermint bark is sensitive to temperature. Store it in a cool, dry place, but not necessarily the refrigerator for long-term storage. Refrigeration can cause condensation when you remove it, which can make the candy canes sticky. A cool pantry or basement works perfectly.
Clean Breaks: For the neatest breaks, score the bark lightly with a knife before it’s completely set, then break along those lines once fully chilled. Alternatively, embrace the rustic look of completely irregular pieces—both approaches work beautifully.
Serving Suggestions
Peppermint bark is delicious on its own, but there are numerous creative ways to serve and enjoy it.
For holiday gatherings, I like to arrange peppermint bark pieces on a festive platter alongside other Christmas treats like cranberry orange shortbread cookies and Christmas sugar cookie bars. The variety of textures and flavors creates an impressive dessert spread.
Consider using peppermint bark as a topping for other desserts. Chop it into small pieces and sprinkle over vanilla ice cream, hot chocolate, or chocolate mousse. The peppermint flavor complements these desserts beautifully while adding a satisfying crunch.
For an elegant presentation at dinner parties, serve small pieces of peppermint bark alongside after-dinner coffee or espresso. The combination of chocolate, peppermint, and coffee is sophisticated and palate-cleansing.
Create a peppermint bark sundae bar by offering chopped bark as a topping option alongside other mix-ins like whipped cream, chocolate sauce, and crushed cookies. This interactive dessert is especially popular with children and teenagers.
Package peppermint bark in decorative containers for teacher gifts, neighbor treats, or hostess presents. Stack pieces in clear cellophane bags tied with ribbon, arrange them in festive tins, or layer them in mason jars with holiday fabric covers. The visual appeal makes it a gift that’s as beautiful as it is delicious.
Variations and Substitutions
While classic peppermint bark is wonderful, there are many ways to customize this recipe to suit different preferences or dietary needs.
Milk Chocolate Version: Replace the dark chocolate with milk chocolate for a sweeter, more kid-friendly bark. This version is less intense and appeals to those who find dark chocolate too bitter.
Triple Layer Bark: Create an extra-impressive version by adding a middle layer of milk chocolate between the dark and white chocolate layers. This requires additional chilling time but creates a stunning visual effect when broken.
Flavored Variations: Experiment with different extracts in the white chocolate layer. Try vanilla, almond, or even orange extract for unique flavor combinations. You can also add a small amount of espresso powder to the dark chocolate for a mocha-peppermint version.
Nut Addition: Sprinkle chopped toasted almonds, pecans, or pistachios over the white chocolate layer along with the candy canes for added crunch and sophistication.
Sea Salt Bark: Add a light sprinkling of flaky sea salt over the white chocolate layer before adding candy canes. The salt enhances the chocolate flavor and creates a sweet-salty contrast.
Vegan Peppermint Bark: Use dairy-free dark chocolate and vegan white chocolate to create a plant-based version. Ensure your candy canes are also vegan, as some contain gelatin.
Sugar-Free Option: Use sugar-free chocolate and sugar-free peppermint candies for a lower-sugar version. Keep in mind that the texture and melting properties may differ slightly from traditional chocolate.
Swirled Bark: Instead of distinct layers, pour both chocolates onto the pan simultaneously and swirl them together with a knife for a marbled effect. This creates a more casual, artistic appearance.
Storage, Freezing, and Reheating
Proper storage ensures your peppermint bark stays fresh and maintains its appealing texture for weeks.
Room Temperature Storage: Store peppermint bark in an airtight container at cool room temperature (65-70°F) for up to 3 weeks. Layer pieces between sheets of parchment paper to prevent sticking. Keep the container away from heat sources, direct sunlight, and humidity, all of which can cause the chocolate to bloom or become soft.
Refrigerator Storage: While not necessary for short-term storage, you can refrigerate peppermint bark in an airtight container for up to 6 weeks. Allow it to come to room temperature before serving for the best texture and flavor. Be aware that condensation can form when removing cold bark from the refrigerator, potentially making the candy canes sticky.
Freezing: Peppermint bark freezes exceptionally well for up to 3 months. Place pieces in a single layer on a baking sheet and freeze until solid, then transfer to a freezer-safe container or bag, layering with parchment paper. This prevents pieces from sticking together. Thaw in the refrigerator or at room temperature before serving. The texture and flavor remain virtually unchanged after freezing.
Preventing Candy Cane Stickiness: The candy cane topping can become sticky in humid conditions or if exposed to temperature fluctuations. Store bark in the coolest, driest place available, and avoid opening the container frequently, which introduces moisture.
Gift Packaging Storage: If you’re packaging bark as gifts in advance, store the filled containers in a cool, dry place until delivery. Avoid packaging too far in advance in very warm climates, as the chocolate may soften.
Note that peppermint bark doesn’t require reheating—it’s meant to be enjoyed at cool room temperature or slightly chilled. The chocolate should be firm but not rock-hard, and the candy canes should provide a satisfying crunch.
Frequently Asked Questions
Why did my chocolate seize or become grainy?
Chocolate can seize if even a small amount of water gets into it while melting. Make sure all bowls and utensils are completely dry. Chocolate can also become grainy if overheated. Use short microwave intervals and stir thoroughly between each one. If your chocolate does seize, try stirring in a small amount of coconut oil or vegetable shortening to smooth it out.
Can I use chocolate chips instead of bar chocolate?
Yes, chocolate chips work well for peppermint bark. They contain stabilizers that help them hold their shape, which can actually make them slightly more forgiving when melting. However, bar chocolate often melts more smoothly and has a slightly better flavor. Either option produces delicious results.
Why won’t my white chocolate layer stick to the dark chocolate?
This usually happens when the dark chocolate layer has set completely hard before adding the white chocolate. The dark chocolate should still be slightly tacky when you add the white layer. If your dark chocolate has hardened completely, you can very gently warm the surface with a hair dryer on low heat for just a few seconds to make it slightly tacky again.
How can I prevent the candy canes from getting sticky?
Candy canes are hygroscopic, meaning they absorb moisture from the air. Store your bark in an airtight container in a cool, dry place. Avoid refrigerating unless absolutely necessary, as temperature changes can cause condensation. If your candy canes do become sticky, you can try placing the bark in a cool, dry area with a silica gel packet in the container.
Can I make peppermint bark without peppermint extract?
Yes, the crushed candy canes provide peppermint flavor on their own. The extract enhances and deepens the peppermint taste throughout the white chocolate layer, but it’s not essential. If you omit it, consider using slightly more crushed candy canes on top.
What’s the best way to crush candy canes?
Place unwrapped candy canes in a heavy-duty zip-top bag, seal it completely, and wrap it in a kitchen towel. Use a rolling pin, meat mallet, or the bottom of a heavy pan to crush them. The towel prevents the bag from tearing. For very fine pieces, you can pulse them briefly in a food processor.
Why is my peppermint bark too thick or too thin?
The thickness depends on the size of your pan. A larger pan creates thinner bark, while a smaller pan makes thicker bark. For traditional thickness (about 1/4 inch), use a half-sheet pan (13×18 inches) with the quantities in this recipe. Adjust your pan size based on your preference.
Can I add food coloring to the white chocolate?
Yes, you can tint the white chocolate with oil-based or powder food coloring. Avoid water-based food coloring, as it can cause the chocolate to seize. Add coloring after the chocolate is melted and mix thoroughly. Pastel colors work beautifully for themed variations.
Peppermint Bark Recipe
Classic peppermint bark made with layers of rich dark chocolate and creamy white chocolate, topped with crushed candy canes. This festive, easy Christmas candy requires no special equipment and makes a perfect holiday gift or party treat.
Chilling Time: 40 minutes
Total Time: 55 minutes
Servings: 24 pieces
Difficulty: Easy
Cuisine: American
Course: Dessert
Ingredients
- 12 oz dark chocolate, chopped
- 12 oz white chocolate, chopped
- 1/2 teaspoon peppermint extract
- 1/2 cup crushed candy canes
- 1 teaspoon coconut oil (optional)
Instructions
- Line a baking sheet (approximately 13×18 inches) with parchment paper, ensuring it lies flat without wrinkles.
- Place the chopped dark chocolate in a microwave-safe bowl. Microwave in 30-second intervals, stirring thoroughly between each interval, until completely melted and smooth. If using coconut oil, stir it in now.
- Pour the melted dark chocolate onto the prepared baking sheet and spread into an even layer about 1/4 inch thick using an offset spatula or the back of a spoon.
- Refrigerate the dark chocolate layer for 10 minutes, until mostly set but still slightly tacky to the touch.
- While the dark chocolate chills, melt the white chocolate in a separate microwave-safe bowl using the same method—30-second intervals with stirring between each. White chocolate is delicate, so watch carefully to avoid scorching.
- Once the white chocolate is melted and smooth, stir in the peppermint extract thoroughly. Allow the white chocolate to cool for 2-3 minutes.
- Remove the baking sheet from the refrigerator. Pour the white chocolate over the dark chocolate layer and spread evenly to cover completely.
- Immediately sprinkle the crushed candy canes evenly over the white chocolate layer. Gently press them into the surface with the back of a spoon or your clean hand.
- Refrigerate for 30 minutes, or until the bark is completely firm throughout.
- Remove from the refrigerator and let sit at room temperature for 2-3 minutes. Break the bark into irregular pieces of varying sizes using your hands.
- Store in an airtight container in a cool, dry place.
Recipe Notes
- Quality chocolate makes a significant difference in the final result. Choose good-quality chocolate bars or chips for the best flavor and texture.
- The dark chocolate layer should be slightly tacky when you add the white chocolate to ensure proper adhesion between layers.
- Don’t overheat white chocolate—it’s more delicate than dark chocolate and can scorch easily.
- For the best texture in your candy cane topping, aim for a mix of fine pieces and small chunks.
- If the candy canes begin to melt or bleed color, your white chocolate was too hot. Let it cool a bit longer next time before spreading.
- Store bark away from heat, humidity, and direct sunlight to prevent the chocolate from blooming or softening.
- This recipe can easily be doubled for larger batches—simply use two baking sheets or make in successive batches.
Nutrition Information (Per Piece, Estimated)
Calories: 145
Carbohydrates: 18g
Protein: 2g
Fat: 8g
Saturated Fat: 5g
Fiber: 1g
Sugar: 16g
Sodium: 15mg
Nutrition information is estimated based on standard ingredient values and may vary based on specific products used.
