
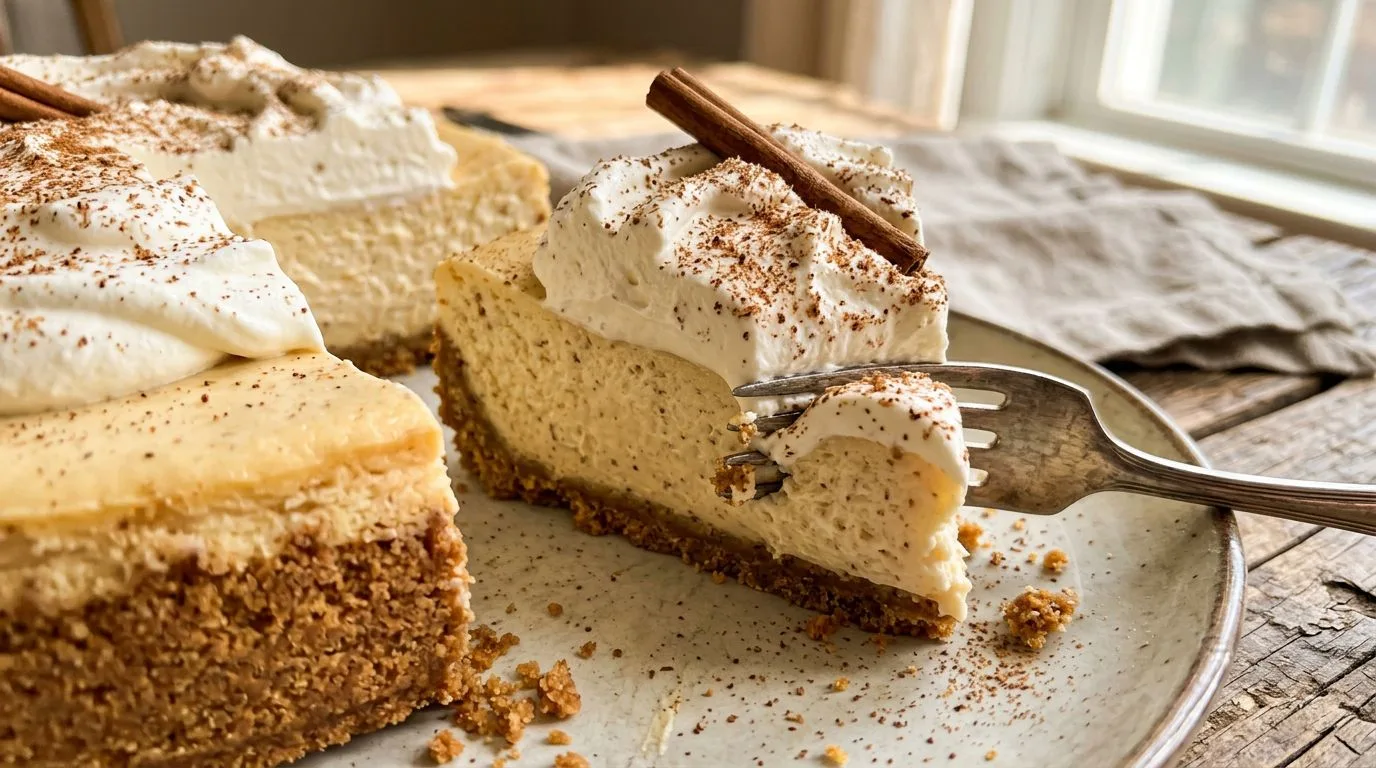
There’s something magical about combining two beloved holiday traditions into one spectacular dessert. Eggnog cheesecake brings together the rich, creamy texture of classic cheesecake with the warm, spiced flavors of traditional eggnog. I love how this dessert captures the essence of the holiday season in every velvety bite, with hints of nutmeg and cinnamon dancing alongside smooth cream cheese and festive eggnog.
This baked eggnog cheesecake sits on a buttery graham cracker crust and delivers that perfect balance of dense yet creamy texture that makes cheesecake so irresistible. Whether you’re planning your Christmas dessert menu or looking for a show-stopping treat to bring to a holiday gathering, this recipe delivers impressive results without requiring advanced baking skills. I find that the water bath method ensures even baking and prevents those dreaded cracks, giving you a beautiful presentation every time.
The best part? While this cheesecake does require some patience with chilling time, the actual hands-on preparation is straightforward and rewarding. The aroma of nutmeg and vanilla filling your kitchen as it bakes is just a preview of the delicious dessert waiting for you.
Why You’ll Love This Eggnog Cheesecake
This eggnog cheesecake stands out from other holiday desserts for several compelling reasons. First, it’s a perfect make-ahead dessert that actually improves as it chills, making your holiday entertaining much easier. I recommend preparing it the day before your gathering so the flavors have time to meld and develop fully.
The flavor profile is distinctly festive without being overwhelming. The eggnog adds a subtle richness and those characteristic holiday spices, while the cream cheese base keeps everything balanced and smooth. Unlike some seasonal desserts that can feel one-dimensional, this cheesecake offers complexity in every layer—from the buttery graham cracker crust to the spiced filling to the light whipped cream topping.
Another reason I love this recipe is its versatility. While it’s undeniably a Christmas dessert, the techniques you’ll learn here apply to countless other cheesecake variations. Once you master the water bath method and understand how to achieve that perfect texture, you’ll have the confidence to experiment with other flavors throughout the year.
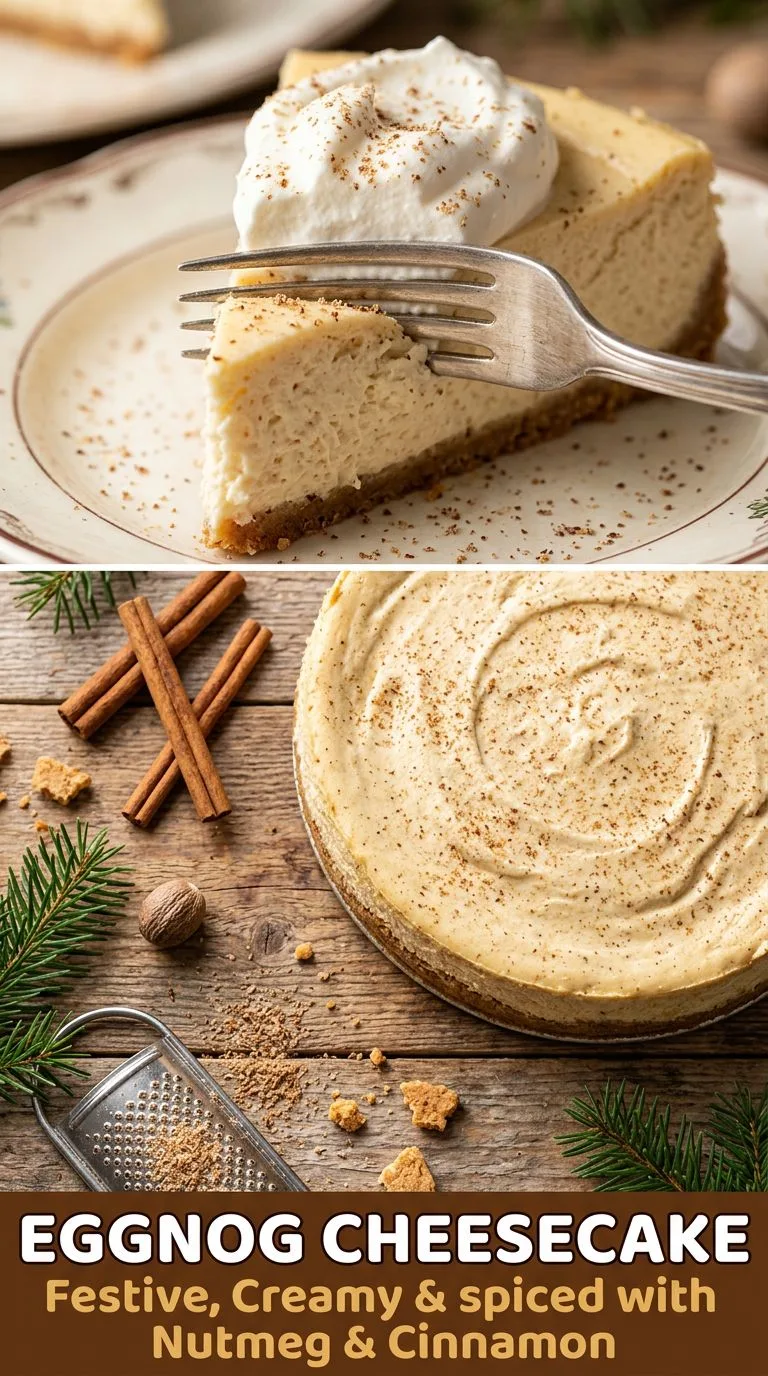
Finally, this dessert looks as impressive as it tastes. The smooth, crack-free surface topped with billowy whipped cream and a dusting of freshly grated nutmeg creates an elegant presentation that makes guests think you spent hours in the kitchen—even though the actual work is quite manageable.
Ingredients and Substitutions
Let me walk you through the key ingredients that make this eggnog cheesecake so special, along with some helpful substitution options if needed.
Graham Cracker Crust: The foundation of this cheesecake starts with 2 cups of graham cracker crumbs mixed with 6 tablespoons of melted butter. I find that graham crackers provide the perfect slightly sweet, slightly salty base that complements the rich filling. If you prefer, you can substitute gingersnap cookies for a spicier crust or vanilla wafers for a milder flavor. Just process them in a food processor until you have fine crumbs.
Cream Cheese: You’ll need 24 ounces (three 8-ounce packages) of cream cheese, and it’s crucial that it’s fully softened to room temperature. This ensures a smooth, lump-free filling. I always set my cream cheese out at least 2 hours before baking, or you can soften it in the microwave using short 10-second bursts on low power.
Eggnog: The star ingredient! You’ll use 3/4 cup of eggnog, which infuses the cheesecake with that distinctive holiday flavor. I recommend using store-bought eggnog for consistency, but homemade works beautifully too. If you can’t find eggnog or prefer to avoid it, you can substitute with heavy cream mixed with 1/4 teaspoon of rum extract and an extra pinch of nutmeg.
Sour Cream: The 1/2 cup of sour cream adds tanginess and contributes to the ultra-creamy texture. Greek yogurt can work as a substitute, though it will make the cheesecake slightly less rich.
Spices: Ground nutmeg and cinnamon are essential for that classic eggnog flavor. I like to use freshly grated nutmeg when possible—the flavor is noticeably brighter and more aromatic than pre-ground.
Sugar and Eggs: The 3/4 cup of granulated sugar provides just enough sweetness without making the cheesecake cloying, and the 3 large eggs give structure to the filling. Make sure your eggs are at room temperature too, as this helps them incorporate more smoothly into the batter.
How to Make Eggnog Cheesecake
Making this eggnog cheesecake involves several distinct steps, but none of them are particularly difficult. I’ll guide you through the entire process so you can achieve bakery-quality results at home.
Preparing the Crust
Start by preheating your oven to 325°F (165°C). In a medium bowl, combine the graham cracker crumbs with the melted butter, stirring until the mixture resembles wet sand and holds together when pressed. Pour this mixture into the bottom of a 9-inch springform pan and press it down firmly and evenly using the bottom of a measuring cup or your fingers. I find that creating a slight lip up the sides (about half an inch) helps contain the filling beautifully.
Bake the crust for 10 minutes, then remove it from the oven and let it cool while you prepare the filling. This pre-baking step ensures a crisp, sturdy base that won’t become soggy under the weight of the creamy filling.
Making the Filling
In a large mixing bowl, beat the softened cream cheese and sugar together using an electric mixer on medium speed. Beat for about 2-3 minutes until the mixture is completely smooth and fluffy with no lumps remaining. Scrape down the sides of the bowl periodically to ensure everything incorporates evenly.
Add the eggnog, sour cream, vanilla extract, ground nutmeg, and cinnamon to the cream cheese mixture. Beat on medium speed until everything is well combined and the mixture is silky smooth. The filling should be pale and creamy with visible flecks of spice throughout.
Now comes an important step: add the eggs one at a time, mixing on low speed after each addition. Mix only until each egg is just incorporated—overmixing at this stage can incorporate too much air, which may cause cracks during baking. I recommend using a spatula to give the batter a final gentle stir by hand, ensuring everything is combined without overworking it.
Assembling and Baking
Pour the filling over the cooled crust in the springform pan, smoothing the top with a spatula. Before placing it in the oven, you’ll need to prepare a water bath, which is crucial for even baking and preventing cracks.
Wrap the outside of your springform pan with heavy-duty aluminum foil, covering the bottom and coming up the sides. This protects against water seepage. Place the wrapped springform pan inside a larger roasting pan, then carefully pour hot water into the roasting pan until it comes about halfway up the sides of the springform pan.
Bake for 55-70 minutes. The cheesecake is done when the edges are set and slightly puffed, but the center still has a slight jiggle (about a 2-inch diameter circle in the middle). It will continue to set as it cools. I recommend checking at the 55-minute mark and then every 5 minutes after that.
Cooling and Chilling
When the baking time is complete, turn off the oven but leave the cheesecake inside with the door slightly ajar (prop it open with a wooden spoon). Let it sit for 1 hour—this gradual temperature change prevents the dramatic shrinking that causes cracks.
After the hour, remove the cheesecake from the water bath and the foil wrapping. Let it cool to room temperature on a wire rack, then cover it with plastic wrap and refrigerate for at least 6 hours, though overnight is even better. This chilling time is essential for the cheesecake to fully set and develop its flavors.
Expert Tips for Best Results
After making countless cheesecakes, I’ve learned several tricks that make a real difference in the final result. Here are my top tips for eggnog cheesecake success:
Room Temperature Ingredients: I cannot stress this enough—room temperature cream cheese and eggs are crucial. Cold cream cheese creates lumps that are nearly impossible to smooth out, and cold eggs don’t incorporate as evenly. Plan ahead and set everything out 2-3 hours before you start baking.
Don’t Overmix: Once you add the eggs, mix on low speed and only until just combined. Overmixing incorporates excess air, which expands during baking and then deflates as the cheesecake cools, often causing cracks and a less creamy texture.
Water Bath Success: The water bath (bain-marie) is your best defense against cracks and ensures even cooking. Make sure your foil wrap is secure, and use hot water from the tap or kettle. If you’re nervous about leaks, you can double-wrap with foil or place the springform pan inside a slightly larger cake pan before wrapping.
The Jiggle Test: Learning to recognize when a cheesecake is done takes practice. Gently shake the pan—the outer 2-3 inches should be set, while the center should jiggle like Jell-O. It will seem underdone, but it will continue to set as it cools. Overbaking leads to a dry, cracked cheesecake.
Patience with Cooling: Resist the urge to rush the cooling process. The gradual temperature change from the oven cooldown to room temperature to refrigerator prevents thermal shock that causes cracks and texture issues.
Clean Slices: For picture-perfect slices, dip your knife in hot water and wipe it clean between each cut. This prevents the creamy filling from sticking to the blade and dragging.
Serving Suggestions
This eggnog cheesecake is stunning on its own, but I love adding a few finishing touches that elevate the presentation and flavor even further.
The classic topping is freshly whipped cream, which I recommend making just before serving. Simply whip heavy cream with a tablespoon of powdered sugar and a splash of vanilla until soft peaks form. Pipe or dollop it around the edge of the cheesecake, then finish with a light dusting of freshly grated nutmeg or cinnamon.
For a more decadent presentation, drizzle caramel sauce over each slice. The sweet, buttery caramel complements the spiced eggnog flavor beautifully. You can also sprinkle crushed gingersnap cookies or toffee bits over the whipped cream for added texture and visual appeal.
I find that this cheesecake pairs wonderfully with a cup of coffee, hot chocolate, or even a small glass of dessert wine. If you’re serving it as part of a larger dessert spread, consider pairing it with lighter options like creamy no-bake cheesecake or fruit-based desserts to provide variety.
For holiday gatherings, I like to serve this cheesecake on a cake stand with some festive greenery or cinnamon sticks arranged around the base. The presentation makes it feel extra special and worthy of the celebration.
Variations and Substitutions
While this classic eggnog cheesecake is delicious as written, there are several ways you can customize it to suit your preferences or dietary needs.
Chocolate Eggnog Cheesecake: Add 4 ounces of melted and cooled dark chocolate to the filling along with the eggnog. The chocolate adds richness and creates a more decadent dessert that chocolate lovers will adore.
Bourbon Eggnog Cheesecake: For an adults-only version, add 2-3 tablespoons of bourbon to the filling. The bourbon enhances the eggnog flavor and adds a subtle warmth that’s perfect for winter gatherings.
Gingersnap Crust: Replace the graham crackers with gingersnap cookies for a spicier, more intensely flavored crust that complements the eggnog filling beautifully.
Mini Cheesecakes: Divide the crust and filling among lined muffin tins to create individual servings. Reduce the baking time to 20-25 minutes. These are perfect for parties and eliminate the need for slicing.
Lighter Version: Use reduced-fat cream cheese (not fat-free, which doesn’t work well in baked cheesecakes) and substitute Greek yogurt for the sour cream. The texture will be slightly less rich but still delicious.
Gluten-Free: Use gluten-free graham crackers or almond flour mixed with melted butter and a tablespoon of sugar for the crust. The filling is naturally gluten-free.
If you enjoy experimenting with cheesecake flavors, you might also like trying a no-bake pecan pie cheesecake for another festive holiday option.
Storage, Freezing, and Reheating
One of the great advantages of cheesecake is how well it stores, making it an ideal make-ahead dessert for busy holiday schedules.
Refrigerator Storage
Store your eggnog cheesecake covered in the refrigerator for up to 5 days. I recommend keeping it in the springform pan with the ring still attached, covered with plastic wrap or aluminum foil. If you’ve already removed it from the pan, place it on a serving plate and cover it with a cake dome or inverted large bowl to protect it from absorbing refrigerator odors.
The cheesecake actually tastes better after a day or two in the refrigerator, as the flavors continue to develop and meld together. Just add the whipped cream topping shortly before serving to keep it fresh and fluffy.
Freezing Instructions
Eggnog cheesecake freezes exceptionally well for up to 2 months. For best results, freeze it without the whipped cream topping. Once the cheesecake is completely chilled, wrap it tightly in plastic wrap, then in aluminum foil, or place it in an airtight freezer container.
You can freeze the whole cheesecake or individual slices. I find that freezing pre-cut slices is incredibly convenient—just wrap each slice individually so you can thaw only what you need.
To thaw, transfer the cheesecake to the refrigerator and let it thaw slowly overnight. Never thaw at room temperature, as this can create condensation and affect the texture. Once thawed, add fresh whipped cream and serve as usual.
Serving Temperature
While cheesecake is typically served chilled, I recommend removing it from the refrigerator about 20-30 minutes before serving. This slight warming allows the flavors to become more pronounced and the texture to soften just a bit, making each bite even more luxurious.
Frequently Asked Questions
Why did my cheesecake crack?
Cracks typically occur due to overbaking, rapid temperature changes, or overmixing. Using a water bath, avoiding overmixing after adding eggs, and allowing gradual cooling all help prevent cracks. If your cheesecake does crack, don’t worry—whipped cream topping covers imperfections beautifully!
Can I make this without a water bath?
While a water bath provides the most reliable results, you can bake without one. Place a pan of hot water on the rack below the cheesecake to create steam in the oven. The results may be slightly less consistent, and you’ll have a higher risk of cracks.
How do I know when the cheesecake is done?
The edges should be set and slightly puffed, while the center (about 2-3 inches in diameter) should still jiggle slightly when you gently shake the pan. An instant-read thermometer inserted in the center should read 150-155°F. The cheesecake will continue to set as it cools.
Can I use low-fat cream cheese?
You can use reduced-fat (Neufchâtel) cream cheese, though the texture will be slightly less rich. I don’t recommend fat-free cream cheese, as it contains stabilizers that don’t work well in baked cheesecakes and can result in a rubbery texture.
What if I don’t have a springform pan?
A springform pan makes removing the cheesecake much easier, but you can use a regular 9-inch cake pan lined with parchment paper with long overhangs that you can use as handles to lift out the cheesecake once it’s chilled and set.
Can I make this ahead?
Absolutely! This is an ideal make-ahead dessert. You can prepare it up to 3 days in advance and keep it refrigerated. Just add the whipped cream topping shortly before serving for the freshest presentation.
Why is my cheesecake grainy?
Graininess usually results from not fully softening the cream cheese before mixing or from overbaking. Make sure your cream cheese is truly at room temperature and beat it thoroughly with the sugar before adding other ingredients.
Eggnog Cheesecake Recipe
This smooth, creamy eggnog cheesecake features warm holiday spices, rich eggnog flavor, and a buttery graham cracker crust. It’s the perfect festive dessert for Christmas celebrations and holiday gatherings.
Cook Time: 70 minutes
Cooling Time: 1 hour
Chilling Time: 6 hours
Total Time: 7 hours 35 minutes
Servings: 12 slices
Difficulty: Medium
Cuisine: American
Course: Dessert
Ingredients
- 2 cups graham cracker crumbs
- 6 tablespoons melted butter
- 24 ounces cream cheese, softened
- 3/4 cup granulated sugar
- 3 large eggs, room temperature
- 3/4 cup eggnog
- 1/2 cup sour cream
- 1 teaspoon vanilla extract
- 1/2 teaspoon ground nutmeg
- 1/4 teaspoon cinnamon
- Whipped cream for topping
- Freshly grated nutmeg for garnish (optional)
Instructions
- Preheat your oven to 325°F (165°C). Prepare a 9-inch springform pan by wrapping the outside with heavy-duty aluminum foil to prevent water seepage during the water bath.
- In a medium bowl, combine the graham cracker crumbs and melted butter, stirring until the mixture resembles wet sand. Press this mixture firmly into the bottom of the springform pan, creating an even layer. Bake for 10 minutes, then remove from the oven and let cool while you prepare the filling.
- In a large mixing bowl, beat the softened cream cheese and granulated sugar together using an electric mixer on medium speed for 2-3 minutes until completely smooth and fluffy with no lumps.
- Add the eggnog, sour cream, vanilla extract, ground nutmeg, and cinnamon to the cream cheese mixture. Beat on medium speed until well combined and silky smooth, scraping down the sides of the bowl as needed.
- Add the eggs one at a time, mixing on low speed after each addition. Mix only until each egg is just incorporated—avoid overmixing. Use a spatula to give the batter a final gentle stir by hand.
- Pour the filling over the cooled graham cracker crust, smoothing the top with a spatula.
- Place the foil-wrapped springform pan inside a larger roasting pan. Carefully pour hot water into the roasting pan until it comes about halfway up the sides of the springform pan, creating a water bath.
- Bake for 55-70 minutes, until the edges are set and slightly puffed but the center still has a slight jiggle (about a 2-inch diameter circle). Check at 55 minutes and continue baking as needed.
- When done, turn off the oven and leave the cheesecake inside with the door slightly ajar (prop it open with a wooden spoon) for 1 hour.
- Remove the cheesecake from the water bath and remove the foil wrapping. Let it cool to room temperature on a wire rack, about 1-2 hours.
- Cover the cheesecake with plastic wrap and refrigerate for at least 6 hours or overnight until completely chilled and set.
- Before serving, carefully remove the springform pan ring. Top with freshly whipped cream and a light dusting of freshly grated nutmeg. Slice with a clean, hot knife for the best presentation.
Recipe Notes
- Make sure all dairy ingredients (cream cheese, eggs, sour cream, eggnog) are at room temperature before beginning for the smoothest texture.
- The water bath is crucial for even baking and preventing cracks. Ensure your foil wrap is secure to prevent leaks.
- Don’t skip the gradual cooling step—leaving the cheesecake in the turned-off oven prevents thermal shock that causes cracks.
- The cheesecake will seem slightly underdone in the center when you remove it from the oven, but it will continue to set as it cools and chills.
- For the cleanest slices, dip your knife in hot water and wipe it clean between each cut.
- This cheesecake can be made up to 3 days in advance. Store covered in the refrigerator and add whipped cream topping just before serving.
- Leftover cheesecake keeps well in the refrigerator for up to 5 days or can be frozen for up to 2 months.
Estimated Nutrition Per Serving
Based on 12 servings. Values are approximate.
- Calories: 385
- Carbohydrates: 28g
- Protein: 7g
- Fat: 28g
- Saturated Fat: 16g
- Fiber: 0.5g
- Sugar: 20g
- Sodium: 310mg
