
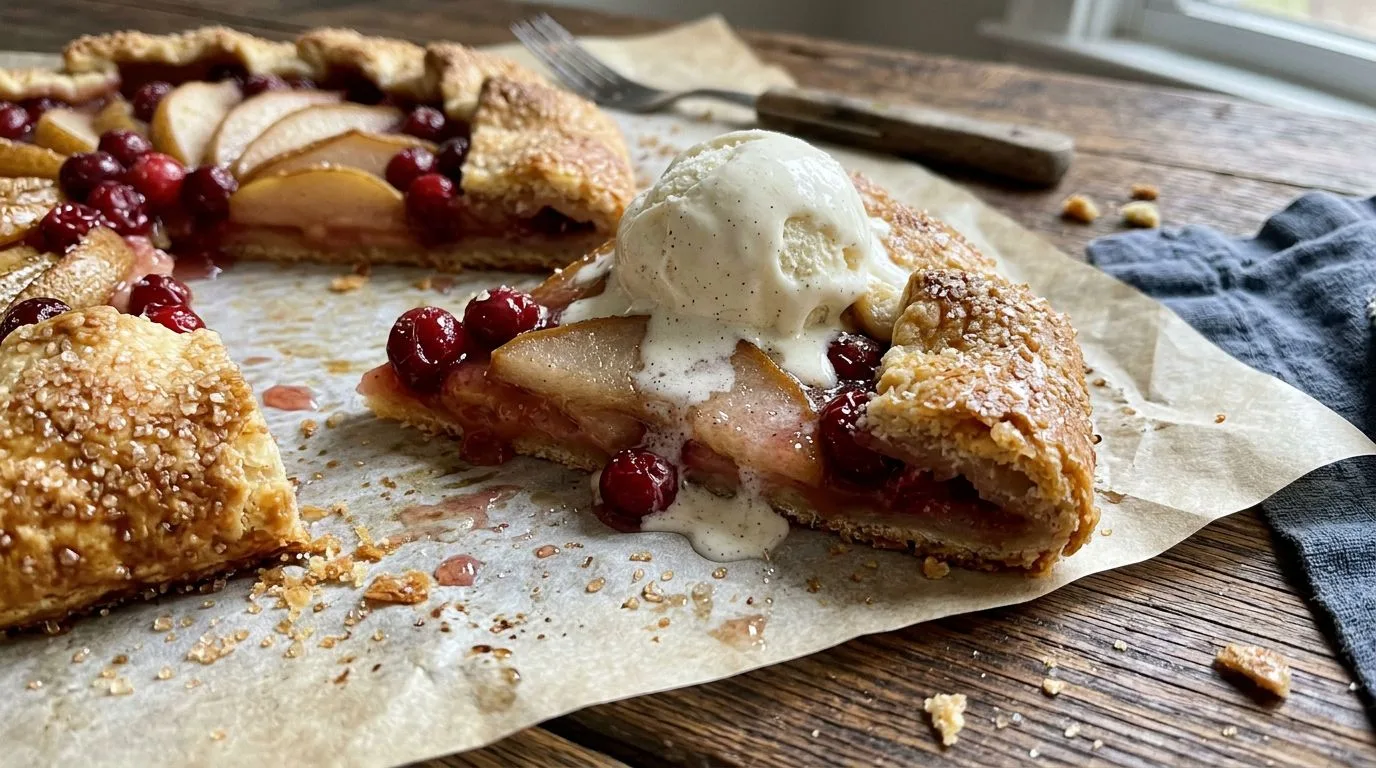
There’s something wonderfully inviting about a rustic galette—the way the pastry folds over the fruit in imperfect, golden waves, the way the filling bubbles and caramelizes at the edges. I love making this pear cranberry galette because it delivers all the elegance of a traditional fruit tart without any of the fuss. The combination of sweet, tender pears and tart, jewel-toned cranberries creates a beautiful balance of flavors that feels perfect for fall and winter gatherings.
This free-form tart is forgiving and approachable, making it ideal for both experienced bakers and those just starting their pastry journey. The flaky, buttery crust comes together quickly, and the fruit filling requires nothing more than a simple toss in a bowl. I find that the rustic presentation actually makes this dessert more appealing—it looks homemade in the best possible way, like something you’d find cooling on a farmhouse windowsill.
Whether you’re planning your Thanksgiving dessert table or simply want a cozy weekend baking project, this pear cranberry galette delivers impressive results with minimal effort. The aroma of cinnamon and orange zest filling your kitchen is just an added bonus.
Why You’ll Love This Pear Cranberry Galette
This rustic galette offers so much to love. First, the flavor combination is absolutely stunning—the natural sweetness of ripe pears plays beautifully against the bright tartness of fresh cranberries. The addition of orange zest and cinnamon adds warmth and depth without overwhelming the fruit.
I appreciate how forgiving this recipe is. Unlike a traditional pie that requires perfect crimping and a pristine appearance, a galette is meant to look rustic and handmade. The free-form folding technique means there’s no pie plate needed, and any imperfections in the pastry only add to its charm.
The homemade pastry crust is flaky, buttery, and surprisingly easy to make. It comes together in minutes and doesn’t require any special equipment—just a bowl, a pastry cutter or fork, and your hands. The result is infinitely better than store-bought dough, with a tender texture that shatters beautifully with each bite.
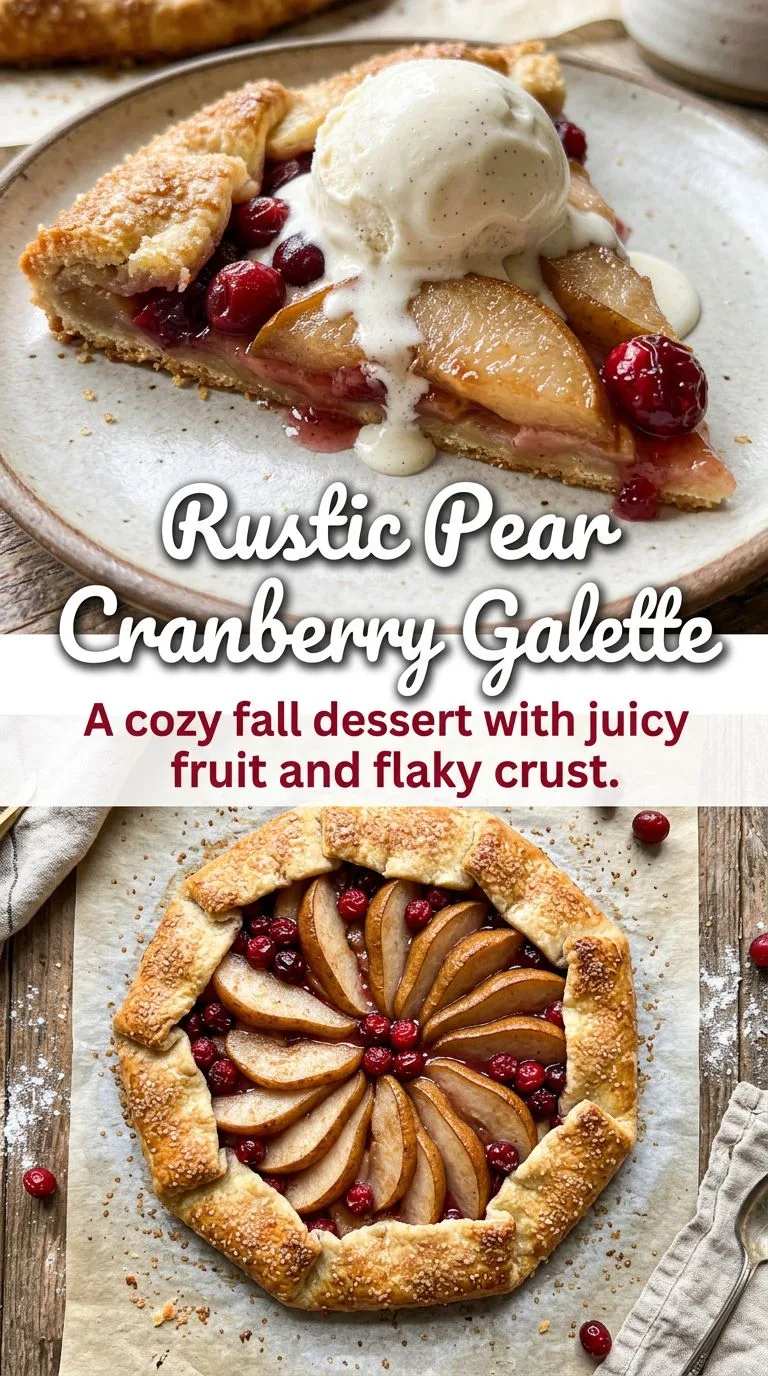
This dessert also looks absolutely gorgeous on the table. The crimson cranberries peek through the golden pastry, and the coarse sugar topping adds a delightful sparkle. It’s the kind of dessert that makes guests think you spent hours in the kitchen, when in reality, it’s quite straightforward to prepare.
Ingredients and Substitutions
Let me walk you through what you’ll need for this beautiful galette and offer some helpful substitutions if needed.
For the pastry: All-purpose flour forms the base of our flaky crust. I recommend using cold unsalted butter, cut into small cubes, which creates those desirable flaky layers. The granulated sugar adds just a touch of sweetness, while salt enhances all the flavors. Ice water brings the dough together—keep it truly cold for the best texture.
If you’re short on time, you can substitute store-bought pie dough, though I really encourage you to try the homemade version at least once. For a dairy-free option, use cold vegan butter or shortening in place of the butter.
For the filling: Firm-ripe pears are essential—I like Bosc or Anjou varieties because they hold their shape during baking. Bartlett pears work too, though they’re slightly softer. Fresh cranberries are ideal, but frozen cranberries work perfectly well; just don’t thaw them before using.
Light brown sugar adds sweetness with a hint of molasses flavor, though you could use granulated sugar if that’s what you have. Cornstarch thickens the fruit juices so your galette doesn’t become soggy. Fresh lemon juice brightens the flavors and prevents the pears from browning, while orange zest adds a lovely citrus note. Ground cinnamon provides warmth—you could also add a pinch of nutmeg or ginger if you like.
For finishing: The egg wash gives the crust a beautiful golden sheen, and coarse sugar (also called sanding sugar or turbinado sugar) adds a delightful crunch. If you don’t have coarse sugar, regular granulated sugar works fine, though the texture won’t be quite as interesting.
How to Make This Pear Cranberry Galette
Making this galette is a straightforward process that I’ve broken down into manageable steps. The key is keeping your pastry ingredients cold and not overworking the dough.
Prepare the pastry: Start by combining the flour, sugar, and salt in a large bowl. Add the cold, cubed butter and use a pastry cutter, two forks, or your fingertips to work it into the flour until the mixture resembles coarse crumbs with pea-sized pieces of butter still visible. These butter pieces are what create flaky layers, so don’t blend it too smoothly.
Gradually add the ice water, one tablespoon at a time, mixing gently with a fork after each addition. Stop adding water as soon as the dough begins to hold together when pressed. It should be slightly shaggy, not wet or sticky. Shape it into a disk, wrap it tightly in plastic wrap, and refrigerate for at least one hour. This resting time allows the gluten to relax and the butter to firm up, making the dough easier to roll and ensuring a flaky texture.
Prepare the filling: While the dough chills, prepare your fruit. Core and slice the pears into 1/4-inch thick slices—you don’t need to peel them unless you prefer to. In a large bowl, combine the pear slices, cranberries, brown sugar, cornstarch, lemon juice, orange zest, and cinnamon. Toss everything together gently until the fruit is evenly coated. Let this mixture sit while you roll out the dough; the sugar will begin to draw out the fruit juices.
Assemble the galette: Preheat your oven to 400°F and line a large baking sheet with parchment paper. On a lightly floured surface, roll the chilled dough into a rough 12-inch circle. Don’t worry about making it perfectly round—rustic is the goal here. Carefully transfer the dough to your prepared baking sheet.
Arrange the fruit mixture in the center of the dough, leaving a 2-inch border all around. This is important: leave the excess juices in the bowl rather than pouring them over the fruit. Too much liquid will make your galette soggy. Fold the border of pastry up and over the fruit, pleating it as you go around the circle. The pleats don’t need to be uniform—just overlap the dough as you fold it inward.
Finish and bake: Brush the exposed pastry with the egg wash (beaten egg mixed with water) and sprinkle generously with coarse sugar. This creates a beautiful golden, sparkly crust. Bake for 35 to 45 minutes, until the crust is deeply golden brown and the filling is bubbling vigorously in the center. I recommend checking at 35 minutes, but don’t be afraid to let it go longer if needed—a well-baked crust is essential.
Let the galette cool on the baking sheet for at least 20 minutes before slicing. This cooling time allows the filling to set up slightly, making it easier to cut clean slices.
Expert Tips for Best Results
I’ve learned a few tricks over the years that make a real difference in the final result.
Keep everything cold: Cold butter is the secret to flaky pastry. If your kitchen is warm, pop the flour mixture in the freezer for 10 minutes before adding the butter. You can even chill your mixing bowl. If the dough becomes too soft while rolling, refrigerate it for 15 minutes before continuing.
Don’t overwork the dough: Mix the pastry just until it comes together. Overworking develops gluten, which makes the crust tough rather than tender and flaky. It’s fine if the dough looks a bit shaggy—it will come together as it rests.
Use firm-ripe pears: Pears that are too soft will turn mushy during baking. You want fruit that’s ripe enough to be flavorful but still holds its shape when sliced. If you press gently near the stem and it gives just slightly, that’s perfect.
Don’t skip the cornstarch: This ingredient is crucial for thickening the fruit juices. Without it, you’ll end up with a soggy bottom crust. Make sure the cornstarch is evenly distributed over the fruit.
Leave excess juice behind: When transferring the fruit to the pastry, use a slotted spoon or your hands to leave the pooled liquid in the bowl. You want the fruit, not the juice bath.
Bake until truly golden: A pale crust means underbaked pastry, which will be doughy rather than crisp. Don’t be afraid to let it get deeply golden brown. The filling should be bubbling actively in the center, not just at the edges.
Cool before slicing: I know it’s tempting to dig in immediately, but letting the galette cool for at least 20 minutes helps the filling set. It will still be warm and delicious, just easier to slice neatly.
Serving Suggestions
This pear cranberry galette is stunning enough to serve on its own, but I love offering a few accompaniments that take it to the next level.
My favorite way to serve this galette is slightly warm with a generous scoop of vanilla ice cream melting over the top. The contrast between the warm, spiced fruit and cold, creamy ice cream is absolutely perfect. Whipped cream is another excellent choice—either plain or lightly sweetened with a touch of vanilla.
For a more elegant presentation, try serving it with crème fraîche or mascarpone cheese. The slight tanginess of these dairy products complements the sweet fruit beautifully. A drizzle of salted caramel sauce also pairs wonderfully with the pear and cranberry flavors.
This galette makes an impressive addition to any holiday dessert table, particularly Thanksgiving. It sits beautifully alongside other classics like apple cranberry crumble pie or a traditional classic apple pie. The rustic presentation and jewel-toned cranberries make it a real showstopper.
For a casual afternoon treat, I recommend serving slices with hot coffee or spiced tea. The warm spices in the galette pair particularly well with chai or Earl Grey tea.
Variations and Substitutions
While this recipe is delicious as written, there are several ways you can customize it to suit your preferences or what you have on hand.
Different fruits: This galette is quite versatile. Try using apples instead of pears, or a combination of both. Sliced peaches or plums work beautifully in summer. You could also replace the cranberries with fresh or frozen blueberries, blackberries, or raspberries.
Spice variations: While cinnamon is classic, you can experiment with other warm spices. Try adding 1/4 teaspoon of ground ginger, cardamom, or nutmeg. A pinch of ground cloves adds depth, though use it sparingly as it’s quite strong.
Citrus options: If you don’t have orange zest, lemon zest works perfectly well. You could also add a splash of orange juice along with the lemon juice for extra citrus flavor.
Sweetener adjustments: If your pears are very sweet, you can reduce the brown sugar to 1/4 cup. Conversely, if you prefer a sweeter dessert or your fruit is quite tart, increase it to 1/2 cup. You can also use maple syrup or honey in place of some of the brown sugar for a different flavor profile.
Nut additions: For extra texture and flavor, sprinkle 1/4 cup of chopped pecans, walnuts, or sliced almonds over the fruit before folding the pastry. The nuts toast beautifully during baking.
Make it vegan: Use vegan butter in the crust and brush the pastry with plant-based milk instead of egg wash. The crust won’t be quite as golden, but it will still taste delicious.
Storage, Freezing, and Reheating
This galette is best enjoyed the day it’s made, but it stores reasonably well if you have leftovers.
Room temperature storage: If you plan to eat the galette within a few hours of baking, you can leave it at room temperature, loosely covered with foil or a clean kitchen towel. This keeps the crust crisp.
Refrigerator storage: For longer storage, cover the cooled galette tightly with plastic wrap or aluminum foil and refrigerate for up to 3 days. Be aware that refrigeration will soften the crust somewhat. Before serving, you can crisp it up by reheating in a 350°F oven for 10-15 minutes.
Freezing baked galette: Once completely cooled, wrap the galette tightly in plastic wrap, then in aluminum foil. Freeze for up to 2 months. Thaw overnight in the refrigerator, then reheat in a 350°F oven for 15-20 minutes until warmed through and the crust crisps up again.
Freezing unbaked galette: You can also freeze the assembled but unbaked galette. Place it on the baking sheet in the freezer until solid, then wrap it well and freeze for up to 1 month. Bake directly from frozen, adding 10-15 minutes to the baking time.
Reheating tips: I recommend reheating individual slices in a 350°F oven for about 10 minutes rather than using the microwave, which will make the crust soggy. If you’re in a hurry, the microwave works for warming the filling, but the texture won’t be as good.
Frequently Asked Questions
Can I use store-bought pie crust?
Yes, absolutely. One standard refrigerated pie crust will work for this recipe. Just unroll it, let it come to room temperature slightly so it’s pliable, and proceed with the filling and folding instructions. The homemade crust is worth trying, but store-bought is a perfectly acceptable shortcut.
Do I need to peel the pears?
It’s not necessary. The peel softens during baking and adds a bit of texture and color. However, if you prefer a more refined texture or are using pears with particularly thick skin, feel free to peel them.
Can I use frozen cranberries?
Yes, frozen cranberries work perfectly. Use them straight from the freezer without thawing. They’ll release a bit more liquid than fresh, so be especially careful to leave excess juices in the bowl when transferring the fruit to the pastry.
Why is my galette crust soggy?
The most common cause is too much liquid in the filling. Make sure you’re leaving the excess juices in the bowl when you transfer the fruit to the pastry. Also, ensure you’re using enough cornstarch and that your oven is fully preheated. Baking on the lower rack can also help crisp the bottom.
Can I make the dough ahead?
Yes, the dough can be made up to 2 days in advance. Keep it wrapped tightly in the refrigerator. Let it sit at room temperature for about 10 minutes before rolling if it’s very firm.
What if my dough cracks when I fold it?
Don’t worry—this is easily fixed. If the dough is too cold and cracks, let it warm up for a few minutes. You can patch any cracks by pressing them together with your fingers or using small pieces of dough from the edges. Remember, rustic is the goal!
Can I double this recipe?
Yes, you can easily double the recipe to make two galettes. I recommend making two separate dough disks rather than one large batch, as it’s easier to work with. Bake them on separate baking sheets, or bake one after the other if you only have one sheet.
Rustic Pear Cranberry Galette
This rustic pear cranberry galette features juicy pears and tart cranberries wrapped in a flaky, buttery homemade pastry crust. The free-form tart is easier than pie and makes a stunning fall or winter dessert that’s perfect for Thanksgiving or any special occasion.
Prep Time: 20 minutes
Chilling Time: 1 hour
Cook Time: 40 minutes
Total Time: 2 hours
Servings: 8 slices
Difficulty: Medium
Cuisine: American
Course: Dessert
Ingredients
For the Pastry:
- 1 1/4 cups all-purpose flour
- 1 tablespoon granulated sugar
- 1/4 teaspoon salt
- 1/2 cup cold unsalted butter, cubed
- 3–4 tablespoons ice water
For the Filling:
- 3 medium firm-ripe pears, cored and sliced
- 1 cup fresh or frozen cranberries
- 1/3 cup packed light brown sugar
- 1 tablespoon cornstarch
- 1 tablespoon lemon juice
- 1 teaspoon orange zest
- 1/2 teaspoon ground cinnamon
For Finishing:
- 1 egg beaten with 1 tablespoon water
- 1 tablespoon coarse sugar
Instructions
- In a large bowl, mix together the flour, granulated sugar, and salt. Add the cold cubed butter and cut it into the flour using a pastry cutter, two forks, or your fingertips until the mixture resembles coarse crumbs with pea-sized pieces of butter remaining.
- Add the ice water gradually, 1 tablespoon at a time, mixing gently with a fork after each addition. Stop adding water as soon as the dough holds together when pressed. Shape the dough into a disk, wrap tightly in plastic wrap, and refrigerate for 1 hour.
- Preheat your oven to 400°F (200°C). Line a large baking sheet with parchment paper.
- In a large bowl, combine the sliced pears, cranberries, brown sugar, cornstarch, lemon juice, orange zest, and cinnamon. Toss gently until the fruit is evenly coated. Set aside.
- On a lightly floured surface, roll the chilled dough into a rough 12-inch circle. The shape doesn’t need to be perfect. Carefully transfer the dough to the prepared baking sheet.
- Arrange the fruit mixture in the center of the dough, leaving a 2-inch border all around the edge. Leave any excess juices in the bowl—do not pour them over the fruit.
- Fold the border of pastry up and over the fruit, pleating and overlapping the edges as you work your way around the circle. Brush the exposed pastry with the egg wash and sprinkle with coarse sugar.
- Bake for 35–45 minutes, until the crust is deeply golden brown and the filling is bubbling actively in the center. Cool on the baking sheet for at least 20 minutes before slicing and serving.
Recipe Notes
- Choose firm-ripe pears such as Bosc or Anjou that will hold their shape during baking.
- If using frozen cranberries, do not thaw them before using.
- The dough can be made up to 2 days ahead and refrigerated, or frozen for up to 1 month.
- For the flakiest crust, keep all ingredients cold and avoid overworking the dough.
- Leaving excess fruit juices in the bowl prevents a soggy bottom crust.
- Serve warm or at room temperature with vanilla ice cream, whipped cream, or crème fraîche.
Nutrition Information (per serving, estimated)
- Calories: 265
- Carbohydrates: 38g
- Protein: 3g
- Fat: 12g
- Saturated Fat: 7g
- Fiber: 3g
- Sugar: 18g
- Sodium: 95mg
Nutrition information is estimated based on standard ingredient measurements and may vary based on specific products used.
