
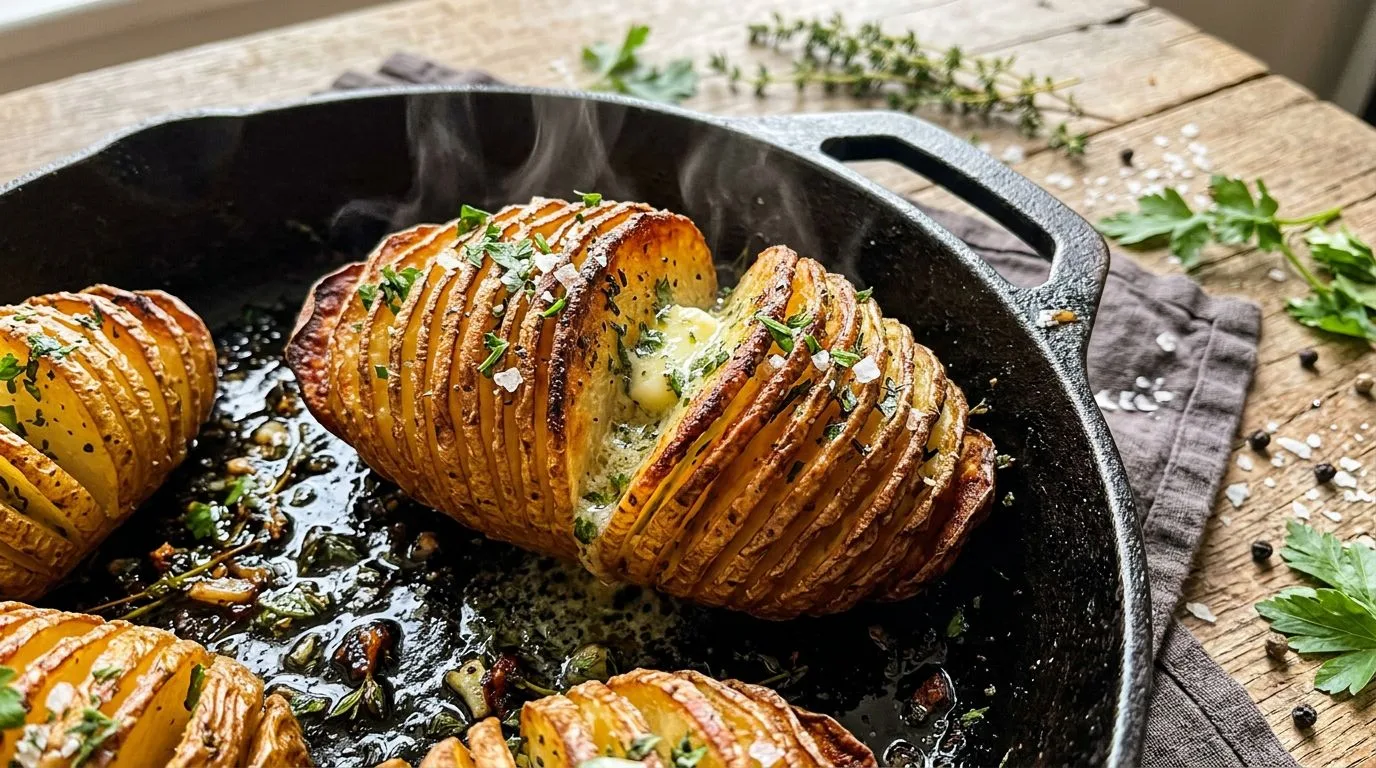
There’s something truly magical about crispy Hasselback potatoes. The way those thin slices fan out, creating dozens of golden, crispy edges while the center stays perfectly tender and fluffy—it’s a showstopper side dish that looks far more complicated than it actually is. I love serving these garlic herb butter Hasselback potatoes for holiday dinners and special occasions because they never fail to impress guests, yet they’re surprisingly simple to prepare.
What makes this recipe particularly special is the fragrant garlic herb butter that gets brushed between those delicate slices. As the potatoes roast, the butter seeps into every crevice, infusing each bite with aromatic rosemary, thyme, and garlic. The finishing touch of Parmesan cheese adds a savory, umami-rich crust that takes these potatoes from delicious to absolutely irresistible. Whether you’re planning your Thanksgiving menu or simply want to elevate a weeknight dinner, these crispy Hasselback potatoes deliver restaurant-quality results right from your home oven.
I find that Yukon Gold potatoes work beautifully for this recipe because they have the perfect balance of starch and moisture, creating that ideal contrast between crispy exterior and creamy interior. The technique might seem intimidating at first, but once you master the slicing method, you’ll want to make these potatoes again and again.
Why You’ll Love This Recipe
These crispy Hasselback potatoes check all the boxes for an exceptional side dish. First and foremost, they’re absolutely stunning on the plate. The accordion-like appearance creates visual drama that makes any meal feel more special, whether you’re hosting Thanksgiving dinner or serving a simple roasted chicken.
I love how versatile this recipe is. While the garlic herb butter combination is classic and crowd-pleasing, you can easily adapt the seasonings to complement whatever main dish you’re serving. The technique itself is forgiving—even if your slices aren’t perfectly uniform, the potatoes will still turn out delicious and beautiful.
Another reason I recommend this recipe is the incredible texture contrast. Each potato delivers multiple experiences in one bite: crispy, almost chip-like edges; tender, buttery layers in the middle; and a soft, fluffy center. The Parmesan cheese adds an extra dimension of flavor and creates even more crispy bits that everyone fights over.
These potatoes are also practical for entertaining. You can prep them a few hours ahead, keep them covered in the refrigerator, and then pop them in the oven when you’re ready to cook. They hold well if you need to keep them warm, making them ideal for holiday meals when oven timing is crucial.
Ingredients and Substitutions
Let me walk you through each ingredient and explain why it matters, along with some substitution options that work well.
Yukon Gold Potatoes: I prefer Yukon Golds for their naturally buttery flavor and creamy texture. They’re also the perfect size for individual servings. If you can’t find them, russet potatoes work well too, though they’ll be slightly fluffier and less creamy. Red potatoes are another option, though they tend to be smaller and have a firmer, waxier texture.
Butter: The melted butter is essential for that rich, indulgent flavor and helps create those crispy edges. I don’t recommend substituting all of it, but you could use half butter and half olive oil if you prefer a lighter version.
Olive Oil: This helps the butter coat the potatoes more evenly and adds its own subtle flavor. You can use avocado oil or vegetable oil as alternatives.
Garlic: Fresh minced garlic is best for the most aromatic flavor. In a pinch, you can use 3/4 teaspoon of garlic powder, though the flavor won’t be quite as vibrant.
Fresh Rosemary and Thyme: These herbs are classic with potatoes and create that irresistible aroma. If you only have dried herbs, use about 1/2 teaspoon of each, as dried herbs are more concentrated. You could also experiment with sage or oregano.
Parmesan Cheese: Freshly grated Parmesan melts beautifully and creates a golden crust. Pecorino Romano is a good substitute if you want a sharper flavor. For a dairy-free version, you can omit the cheese and add extra herbs instead.
Salt and Black Pepper: These basic seasonings are crucial for bringing out all the other flavors. I like to use sea salt or kosher salt for the best taste.
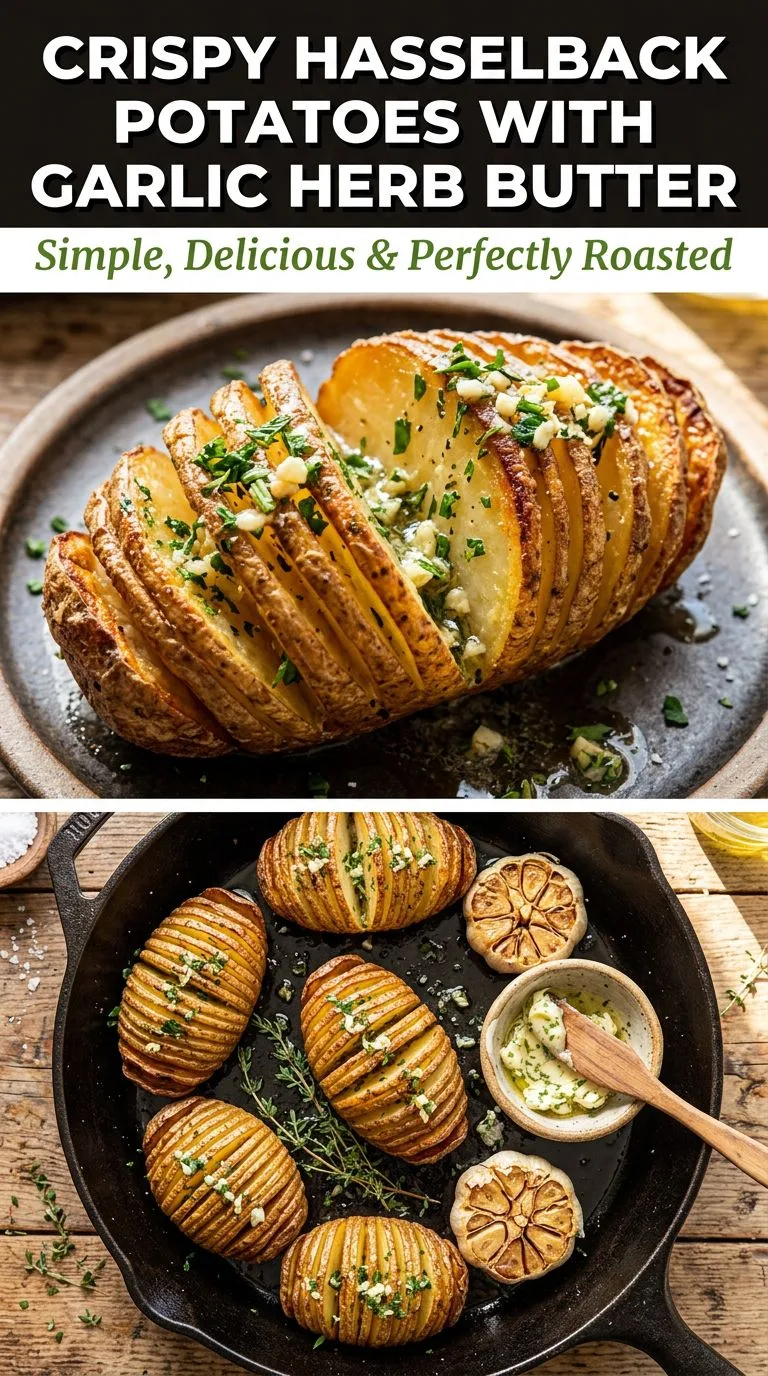
How to Make Crispy Hasselback Potatoes
The technique for making Hasselback potatoes is easier than it looks once you understand the basic method. Here’s how I approach each step to ensure perfect results every time.
Preparing the Potatoes: Start by preheating your oven to 425°F (220°C). Wash and thoroughly dry each potato—this is important because any moisture on the surface will prevent proper crisping. I like to scrub them gently with a vegetable brush to remove any dirt while keeping the nutritious skin intact.
The Slicing Technique: This is the most important step. Place a potato on your cutting board and position two chopsticks or wooden spoon handles parallel to each other on either side of the potato. Using a sharp knife, make thin slices (about 1/8 inch apart) across the entire potato, cutting down until your knife hits the chopsticks. The chopsticks act as a guide, preventing you from cutting all the way through. This keeps the potato intact while creating those beautiful fan-like slices. Repeat with all remaining potatoes.
Making the Garlic Herb Butter: In a small bowl, combine the melted butter, olive oil, minced garlic, fresh rosemary, fresh thyme, salt, and black pepper. Mix well so all the herbs and garlic are evenly distributed. This aromatic mixture is what transforms simple potatoes into something extraordinary.
First Roasting Phase: Arrange the sliced potatoes in a baking dish, leaving a bit of space between each one if possible. Using a pastry brush or spoon, generously brush the garlic herb butter over each potato, making sure to get some butter between the slices. Don’t worry about being too precise—just ensure each potato gets a good coating. Place the dish in the preheated oven and roast for 40 minutes, brushing the potatoes with the remaining butter every 15 minutes or so. This repeated basting helps develop those crispy edges and infuses flavor throughout.
Adding the Parmesan: After 40 minutes, carefully remove the baking dish from the oven. The potatoes should be starting to open up and turn golden. Using a fork or your fingers (carefully—they’re hot!), gently separate the slices a bit more to create more surface area. Sprinkle the grated Parmesan cheese over the top of each potato, making sure some falls between the slices.
Final Crisping: Return the potatoes to the oven and continue roasting for another 15-20 minutes. During this final phase, the edges will become beautifully crispy and golden brown, the Parmesan will melt and form a delicious crust, and the centers will become perfectly tender. You’ll know they’re done when you can easily insert a fork into the center and the edges look crispy and golden.
Expert Tips for Best Results
After making these potatoes many times, I’ve learned a few tricks that make a real difference in the final result.
Choose Similar-Sized Potatoes: I recommend selecting potatoes that are roughly the same size so they cook evenly. Medium potatoes (about 6-8 ounces each) are ideal for individual servings.
Don’t Skip the Chopstick Trick: This simple technique prevents the heartbreak of accidentally cutting through a potato. If you don’t have chopsticks, wooden spoon handles or even a metal ruler works just as well.
Make Thin, Even Slices: The thinner and more uniform your slices, the crispier your potatoes will be. Aim for slices about 1/8 inch apart. If some slices are thicker than others, that’s okay—they’ll still taste delicious.
Use Room Temperature Butter: While the recipe calls for melted butter, I find that butter that’s melted but not piping hot works best. If it’s too hot, it can cook the garlic prematurely and make it bitter.
Baste Generously: Don’t be shy with the garlic herb butter. The more you baste during cooking, the more flavorful and crispy your potatoes will become. Any butter that pools in the bottom of the pan will help crisp the bottoms beautifully.
Give Them Space: If possible, don’t crowd the potatoes in the baking dish. A little space between each one allows hot air to circulate, creating crispier results all around.
Adjust Cooking Time as Needed: Oven temperatures vary, and potato sizes differ. Start checking your potatoes at the 50-minute mark. They’re done when the edges are golden and crispy and a fork slides easily into the center.
Serving Suggestions
These crispy Hasselback potatoes are incredibly versatile and pair beautifully with a wide range of main dishes. My favorite way to serve them is alongside roasted meats—they’re particularly stunning with prime rib, roasted turkey, or herb-crusted pork loin for holiday dinners.
I love including these potatoes as part of a Thanksgiving spread. They complement traditional dishes like honey roasted carrots and green bean casserole perfectly, adding an elegant touch to the table. The individual presentation means each guest gets their own beautifully roasted potato, which feels special.
For a more casual dinner, these potatoes are excellent with grilled steaks, roasted chicken, or even pan-seared salmon. The garlic herb butter echoes flavors that work well with almost any protein. I also like serving them with a simple green salad for a lighter meal that still feels indulgent.
If you’re creating a potato-focused side dish spread, consider pairing these Hasselback potatoes with garlic Parmesan roasted potatoes to offer guests variety in texture and presentation.
For garnish, I recommend a sprinkle of fresh herbs (parsley, chives, or more thyme) right before serving. A dollop of sour cream or Greek yogurt on the side is also delicious, as is an extra drizzle of the garlic herb butter.
Variations and Substitutions
One of the things I love about this recipe is how easily you can customize it to suit different tastes and dietary needs.
Bacon Hasselback Potatoes: For an indulgent variation, tuck thin slices of bacon between some of the potato slices before the final roasting phase. The bacon will crisp up beautifully and add smoky flavor.
Spicy Version: Add 1/2 teaspoon of red pepper flakes or a pinch of cayenne pepper to the garlic herb butter for a kick of heat. You could also drizzle the finished potatoes with hot honey.
Cheesy Variation: Instead of just Parmesan, try a combination of Parmesan and sharp cheddar, or use Gruyère for a more sophisticated flavor. Add the cheese earlier in the cooking process if you want it more melted and integrated.
Herb Variations: Experiment with different herb combinations. Sage and brown butter is wonderful in fall, while basil and oregano give an Italian twist. Dill and lemon zest create a bright, fresh flavor.
Vegan Version: Replace the butter with vegan butter or additional olive oil, and omit the Parmesan cheese. Nutritional yeast can provide a cheesy flavor if desired.
Sweet Potato Hasselback: This technique works beautifully with sweet potatoes too. Try them with a mixture of butter, cinnamon, and a touch of maple syrup for a sweeter side dish.
Loaded Hasselback Potatoes: After roasting, top the potatoes with sour cream, shredded cheese, crispy bacon bits, and chopped green onions for a loaded baked potato experience with extra crispy edges.
Storage, Freezing, and Reheating
While these potatoes are absolutely best served fresh from the oven, I understand that sometimes you need to prepare components ahead or deal with leftovers.
Refrigerator Storage: Store leftover Hasselback potatoes in an airtight container in the refrigerator for up to 3 days. I recommend letting them cool completely before storing to prevent condensation, which can make them soggy.
Make-Ahead Tips: You can slice the potatoes and prepare the garlic herb butter up to 4 hours ahead. Keep the sliced potatoes in a bowl of cold water to prevent browning, then drain and pat them completely dry before brushing with butter and roasting. Alternatively, you can slice and butter the potatoes, cover them tightly with plastic wrap, and refrigerate for up to 2 hours before baking.
Reheating: The best way to reheat these potatoes is in a 375°F oven for about 10-15 minutes. This helps restore some of the crispiness. You can also reheat them in an air fryer at 350°F for 5-7 minutes for even crispier results. I don’t recommend microwaving, as it will make them soft and soggy rather than crispy.
Freezing: I generally don’t recommend freezing Hasselback potatoes, as the texture changes significantly when frozen and thawed. The delicate slices tend to become mushy, and you lose that wonderful crispy-tender contrast that makes them special. If you must freeze them, do so before adding the Parmesan cheese, and expect a softer texture when reheated.
Frequently Asked Questions
Why are they called Hasselback potatoes?
Hasselback potatoes originated at the Hasselbacken restaurant in Stockholm, Sweden, in the 1940s. The technique of thinly slicing potatoes while keeping them intact has since become popular worldwide.
Can I use russet potatoes instead of Yukon Gold?
Yes, russet potatoes work well for this recipe. They’ll be slightly fluffier and less creamy than Yukon Golds, but they’ll still develop beautiful crispy edges and taste delicious.
How do I prevent the potatoes from turning brown after slicing?
If you need to slice the potatoes ahead of time, keep them submerged in cold water until you’re ready to cook. Just make sure to drain and thoroughly pat them dry before applying the butter mixture.
My potatoes aren’t getting crispy enough. What am I doing wrong?
The most common issues are: not drying the potatoes thoroughly before roasting, overcrowding the baking dish, or not roasting at a high enough temperature. Make sure your oven is fully preheated to 425°F and that there’s space between the potatoes for air circulation.
Can I make these in an air fryer?
Yes! Air fryer Hasselback potatoes turn out wonderfully crispy. Cook at 375°F for about 30-35 minutes, brushing with butter every 10 minutes. Add the Parmesan in the last 5 minutes of cooking.
Do I have to use fresh herbs?
Fresh herbs provide the best flavor and aroma, but dried herbs work in a pinch. Use about half the amount of dried herbs since they’re more concentrated.
How thin should the slices be?
Aim for slices about 1/8 inch apart (roughly 3mm). Thinner slices create more crispy edges, while thicker slices will be softer and more substantial.
Can I prepare these ahead for a dinner party?
You can slice and butter the potatoes up to 2 hours ahead, then cover and refrigerate until ready to bake. You may need to add 5-10 minutes to the cooking time if starting from cold.
Crispy Hasselback Potatoes with Garlic Herb Butter
These stunning Hasselback potatoes feature thin slices that fan out beautifully, creating crispy golden edges while staying tender inside. Brushed with aromatic garlic herb butter and finished with Parmesan cheese, they’re an impressive side dish perfect for holidays or special dinners.
- Prep Time: 15 minutes
- Cook Time: 55-60 minutes
- Total Time: 1 hour 15 minutes
- Servings: 8 servings
- Difficulty: Medium
- Cuisine: Swedish-American
- Course: Side Dish
Ingredients
- 8 medium Yukon Gold potatoes
- 5 tablespoons melted butter
- 2 tablespoons olive oil
- 3 cloves garlic, minced
- 1 teaspoon fresh rosemary, finely chopped
- 1 teaspoon fresh thyme, finely chopped
- 1/2 teaspoon salt
- 1/2 teaspoon black pepper
- 1/4 cup grated Parmesan cheese
Instructions
- Preheat your oven to 425°F (220°C).
- Wash and thoroughly dry the potatoes. Place a potato between two chopsticks or wooden spoon handles on a cutting board. Using a sharp knife, make thin slices (about 1/8 inch apart) across the potato, cutting down until the knife hits the chopsticks. This prevents cutting all the way through. Repeat with all potatoes.
- In a small bowl, combine the melted butter, olive oil, minced garlic, rosemary, thyme, salt, and black pepper. Mix well.
- Place the sliced potatoes in a baking dish, leaving a bit of space between each one if possible. Generously brush each potato with the garlic herb butter mixture, making sure to get some between the slices.
- Roast for 40 minutes, brushing the potatoes with the remaining butter mixture every 15 minutes.
- Remove from the oven and gently separate the slices slightly using a fork. Sprinkle the grated Parmesan cheese over the top of each potato, allowing some to fall between the slices.
- Return to the oven and continue roasting for 15-20 minutes, until the edges are crispy and golden brown and the centers are tender when pierced with a fork.
- Serve hot, drizzled with any remaining garlic herb butter from the baking dish.
Recipe Notes
- The chopstick method is crucial for preventing cutting all the way through the potatoes. If you don’t have chopsticks, use wooden spoon handles or a metal ruler.
- For extra crispy potatoes, gently fan out the slices after the first 40 minutes of roasting before adding the Parmesan.
- Don’t skip the basting steps—this is what creates the flavorful, crispy edges.
- If your potatoes are larger or smaller than medium, adjust the cooking time accordingly. Test for doneness by inserting a fork into the center.
- Fresh herbs provide the best flavor, but you can substitute with 1/2 teaspoon each of dried rosemary and thyme if needed.
- Any leftover garlic herb butter in the pan is delicious drizzled over the finished potatoes or saved for spreading on bread.
Nutrition Information (Per Serving, Estimated)
- Calories: 245
- Carbohydrates: 32g
- Protein: 5g
- Fat: 11g
- Saturated Fat: 6g
- Fiber: 3g
- Sugar: 1g
- Sodium: 285mg
Nutrition information is estimated based on standard ingredient values and serving sizes. Actual nutritional content may vary based on specific brands used and portion sizes.
