
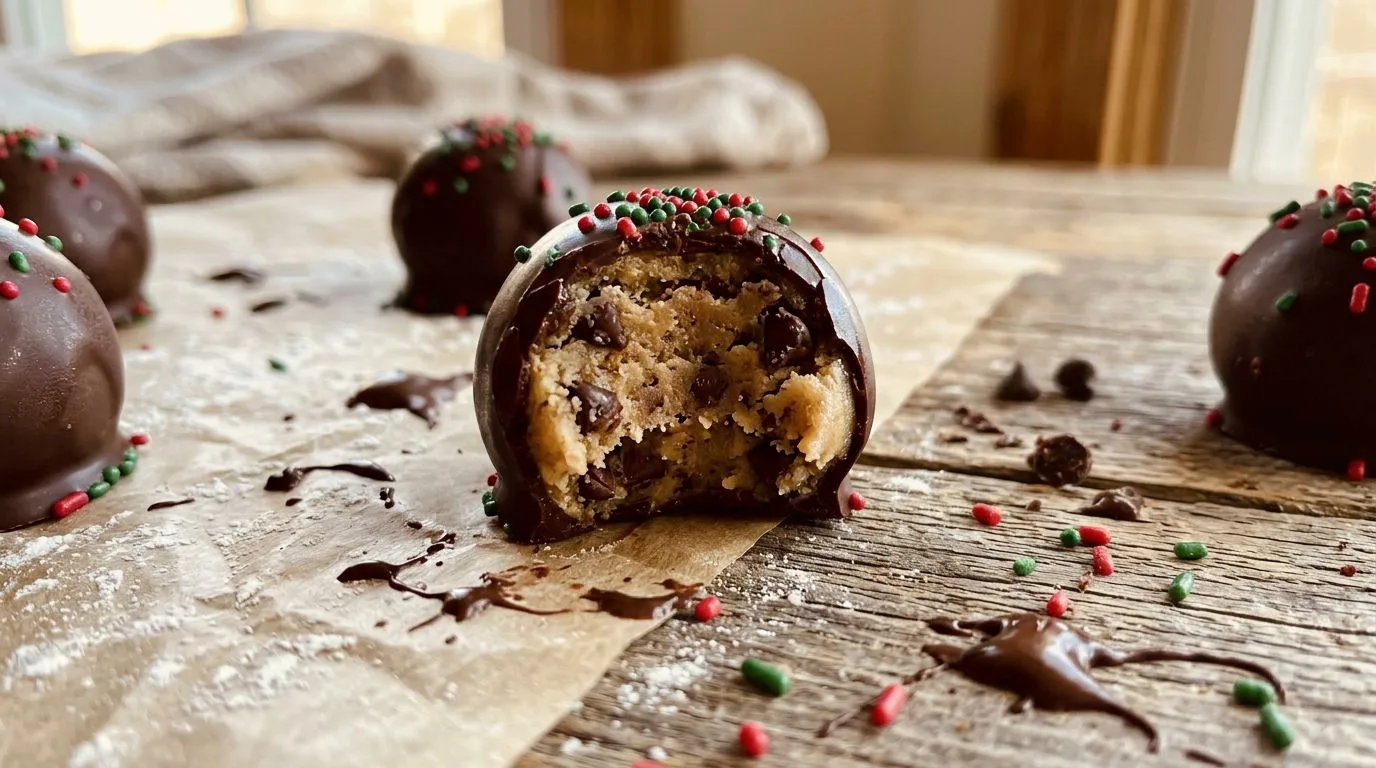
There’s something magical about cookie dough that doesn’t require baking—it’s pure indulgence in every bite. These Christmas cookie dough truffles combine the nostalgic flavor of chocolate chip cookie dough with a smooth chocolate coating and festive sprinkles, creating an irresistible holiday treat that’s completely safe to eat. I love making these during the Christmas season because they’re incredibly easy to prepare, require no oven time beyond heat-treating the flour, and look absolutely stunning on any dessert table.
What makes these truffles particularly special is their versatility. They’re perfect for holiday cookie exchanges, homemade gift boxes, or simply enjoying with family while watching Christmas movies. The combination of creamy edible cookie dough, rich chocolate coating, and cheerful sprinkles creates a treat that both kids and adults can’t resist. I find that these truffles disappear faster than traditional baked cookies at holiday gatherings, and they’re so much simpler to make in large batches.
The best part? You can customize these truffles with different sprinkle colors, chocolate coatings, or mix-ins to match any holiday theme. They stay fresh for weeks when stored properly, making them an ideal make-ahead dessert for busy holiday schedules.
Why You’ll Love This Recipe
These Christmas cookie dough truffles check all the boxes for an ideal holiday dessert. First and foremost, they’re completely safe to eat thanks to the heat-treated flour, which eliminates any food safety concerns associated with raw flour. This means everyone can enjoy them worry-free, making them perfect for parties where you want to serve something fun and festive.
I love how simple these truffles are to make—there’s no complicated baking technique, no worrying about oven temperatures, and no risk of overbaking. The process is straightforward: mix the dough, roll into balls, dip in chocolate, and decorate. Even beginner bakers can achieve professional-looking results with minimal effort.
The flavor is absolutely incredible. The rich, buttery cookie dough studded with mini chocolate chips gets an extra layer of decadence from the semisweet chocolate coating. The texture contrast between the soft, creamy interior and the crisp chocolate shell is simply perfect. I find that using mini chocolate chips in the dough creates a better distribution of chocolate throughout each truffle.
These truffles are also wonderfully customizable. You can adjust the sweetness, change the type of chocolate coating, or swap the Christmas sprinkles for other decorations depending on the occasion. They’re an excellent canvas for creativity while still being foolproof enough that they turn out beautifully every time.
Ingredients and Substitutions
Let me walk you through each ingredient and why it matters for creating the perfect Christmas cookie dough truffles. Understanding these components will help you make informed substitutions if needed.
Heat-treated all-purpose flour forms the base of the cookie dough. Heat-treating is essential for food safety, as it kills any potential bacteria in raw flour. I recommend using a food thermometer to ensure the flour reaches 165°F throughout. You can heat-treat a large batch and store it in an airtight container for future use. Avoid substituting with cake flour, as it will create a different texture.
Unsalted butter provides richness and helps bind the dough together. It must be softened to room temperature for proper creaming. I prefer unsalted butter because it allows better control over the salt content. If you only have salted butter, reduce or omit the added salt in the recipe.
Brown sugar and granulated sugar work together to create the classic cookie dough sweetness and texture. The brown sugar adds moisture and a subtle molasses flavor, while granulated sugar provides structure. You can use all brown sugar for a chewier, more caramel-like flavor, but I find the combination creates the most authentic cookie dough taste.
Milk adds moisture and helps achieve the perfect dough consistency. Whole milk works best, but you can use any milk you have on hand, including non-dairy alternatives like almond or oat milk. Start with the recommended amount and add more if needed to reach a scoopable consistency.
Vanilla extract is essential for that classic cookie dough flavor. I always use pure vanilla extract rather than imitation for the best taste. This is one ingredient where quality makes a noticeable difference.
Mini chocolate chips distribute more evenly throughout the small truffles than regular-sized chips. If you only have regular chocolate chips, you can chop them smaller or use them as-is, though you may get fewer chips per truffle.
Semisweet chocolate melting wafers create a smooth, easy-to-work-with coating that sets beautifully. These are specifically formulated for candy-making and don’t require tempering. You can substitute with chocolate chips melted with a tablespoon of coconut oil, but melting wafers provide the best results and easiest application.
Christmas sprinkles add festive flair and visual appeal. Choose sprinkles that won’t bleed color when they touch the chocolate. Jimmies work better than nonpareils for this application.
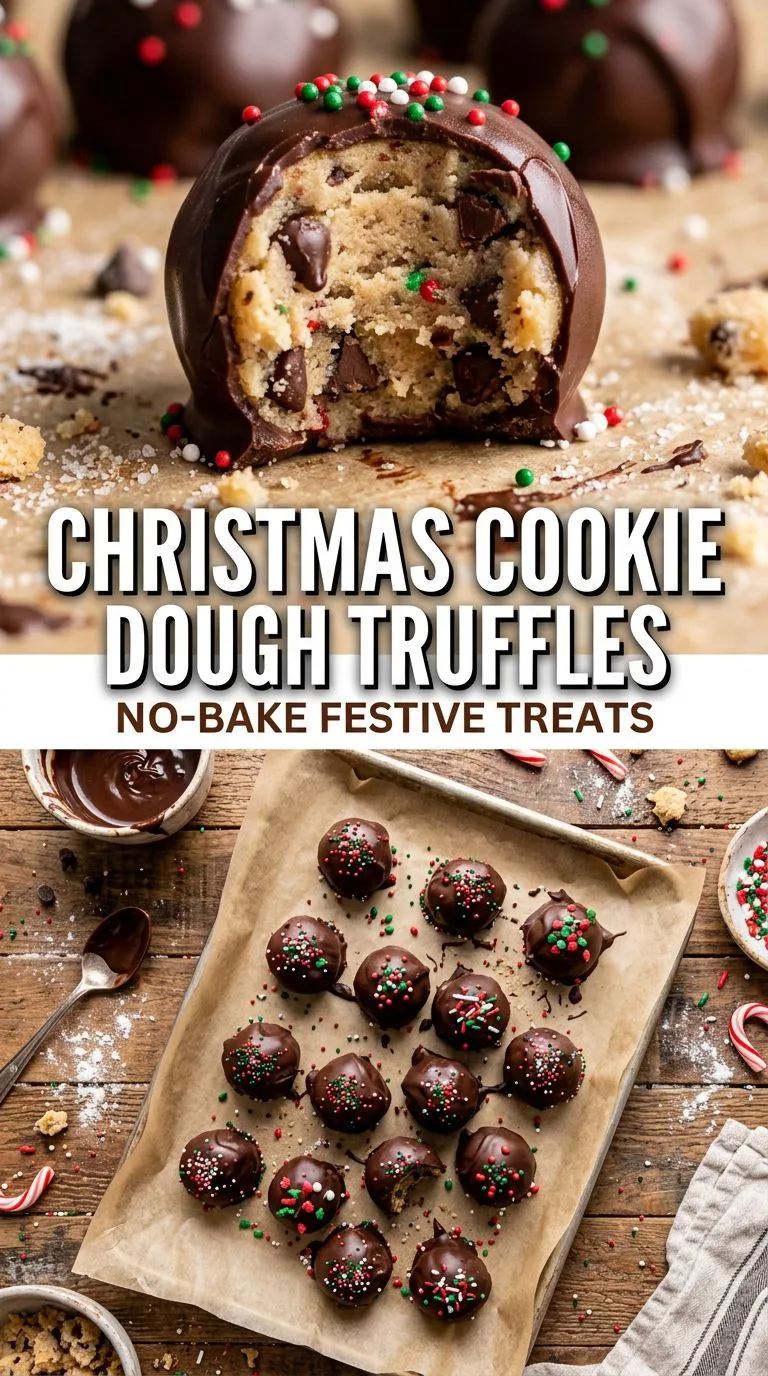
How to Make Christmas Cookie Dough Truffles
Creating these delightful truffles is a straightforward process that yields impressive results. I’ll guide you through each step to ensure success.
Begin by heat-treating your flour, which is the most important food safety step. Spread one cup of all-purpose flour evenly on a baking sheet and bake at 350°F until it reaches an internal temperature of 165°F throughout. This typically takes 5-10 minutes, but use a food thermometer to verify. Stir the flour once or twice during heating to ensure even temperature distribution. Once it reaches 165°F, remove it from the oven and let it cool completely before using. This step can be done ahead of time.
In a large mixing bowl, beat the softened butter, brown sugar, and granulated sugar together using an electric mixer on medium speed. Continue beating for 2-3 minutes until the mixture becomes light and fluffy. This creaming process incorporates air and creates a smoother texture in the final truffles. I recommend scraping down the sides of the bowl halfway through to ensure even mixing.
Add the milk, vanilla extract, and salt to the butter mixture. Beat on low speed until everything is well combined and smooth. The mixture should look creamy and uniform with no streaks of butter remaining.
Gradually add the cooled, heat-treated flour to the wet ingredients. Mix on low speed until a soft dough forms. The dough should be thick enough to hold its shape when rolled but still slightly soft. If it seems too dry, add an additional teaspoon of milk at a time until you reach the right consistency. If it’s too wet, add a tablespoon more heat-treated flour.
Fold in the mini chocolate chips using a spatula or wooden spoon, distributing them evenly throughout the dough. I find that gentle folding works better than mixing with the electric mixer, as it prevents the chips from breaking.
Using a small cookie scoop or your hands, roll the dough into 1-inch balls. Aim for uniform size so they look professional and dip evenly in chocolate. Place each ball on a parchment-lined baking sheet, leaving a little space between them. You should get approximately 24-30 truffles depending on size.
Refrigerate the cookie dough balls for 20-30 minutes until they’re firm. This chilling step is crucial—it makes the truffles much easier to dip in chocolate without falling apart. I sometimes chill them for up to an hour if I’m not in a rush, as firmer balls are easier to work with.
While the truffles chill, melt the chocolate wafers. Place them in a microwave-safe bowl and heat in 30-second intervals, stirring between each interval, until completely smooth. Be careful not to overheat, as chocolate can seize. The chocolate should be fluid enough to coat easily but not so hot that it melts the cookie dough.
Remove the chilled cookie dough balls from the refrigerator. Working with one at a time, drop a ball into the melted chocolate. Use a fork to roll it around until completely coated, then lift it out, allowing excess chocolate to drip back into the bowl. Gently tap the fork on the edge of the bowl to remove more excess chocolate.
Carefully slide the coated truffle back onto the parchment-lined baking sheet. Immediately sprinkle with Christmas sprinkles while the chocolate is still wet. The sprinkles need to be added right away, as the chocolate sets quickly. Repeat with remaining truffles, reheating the chocolate briefly if it starts to thicken.
Once all truffles are dipped and decorated, refrigerate them for 15-20 minutes until the chocolate coating is completely set and firm to the touch.
Expert Tips for Best Results
I’ve learned several tricks over the years that make these truffles turn out perfectly every time. Here are my most valuable tips.
Always verify that your heat-treated flour has cooled completely before adding it to the butter mixture. Warm flour can melt the butter and create a greasy, difficult-to-work-with dough. I usually heat-treat my flour the day before or at least a few hours in advance.
Room temperature butter is crucial for proper creaming. If you forget to soften your butter, cut it into small cubes and let it sit at room temperature for 20-30 minutes. Don’t microwave it, as this can create unevenly softened butter with melted spots.
When rolling the cookie dough balls, slightly wet your hands with water or lightly coat them with cooking spray. This prevents the dough from sticking to your palms and creates smoother, rounder truffles. I keep a small bowl of water nearby for this purpose.
Use a deep, narrow bowl for melting the chocolate rather than a wide, shallow one. This creates better depth for dipping and requires less chocolate overall. A 2-cup glass measuring cup works perfectly.
If your chocolate coating becomes too thick while dipping, microwave it for 10-15 seconds to restore the proper consistency. Chocolate naturally thickens as it cools, so don’t hesitate to reheat it as needed.
Work quickly when adding sprinkles, as the chocolate coating begins to set within seconds. I like to have my sprinkles in a small bowl right next to my workspace so I can grab a pinch immediately after placing each truffle on the parchment.
For the cleanest presentation, use a toothpick to remove any chocolate “feet” or drips from the bottom of the truffles after the chocolate has set. This creates a more polished, professional appearance.
Serving Suggestions
These Christmas cookie dough truffles are incredibly versatile when it comes to serving. I love arranging them on a festive platter alongside other holiday treats for a beautiful dessert spread. They pair wonderfully with pumpkin pie cheesecake truffles for a varied truffle selection that offers different flavors and textures.
For holiday parties, I recommend serving these truffles in mini cupcake liners arranged on a tiered stand. This not only looks elegant but also makes them easy for guests to grab without touching multiple pieces. The individual liners also help keep the chocolate coating pristine.
These truffles make exceptional homemade gifts. Package them in clear cellophane bags tied with festive ribbon, or arrange them in small decorative boxes lined with tissue paper. I like to include 6-8 truffles per gift box, which feels generous without being overwhelming. They’re perfect for teachers, neighbors, coworkers, or anyone on your gift list who appreciates homemade treats.
Serve them alongside hot chocolate, coffee, or dessert wine for an indulgent after-dinner treat. The rich chocolate and sweet cookie dough pair beautifully with bold beverages that can stand up to their intensity.
For a stunning dessert table centerpiece, create a truffle tower by stacking them on a cone-shaped foam form. Secure each truffle with a toothpick and cover the entire form for a dramatic presentation that doubles as both decoration and dessert.
Variations and Substitutions
While the classic version is delicious, I enjoy experimenting with different variations to keep things interesting throughout the holiday season.
White chocolate coating: Substitute white chocolate melting wafers for the semisweet chocolate for a sweeter, creamier coating. This looks especially beautiful with red and green sprinkles for Christmas.
Peppermint twist: Add 1/4 teaspoon peppermint extract to the cookie dough and use crushed candy canes instead of sprinkles for a festive peppermint version. This creates a flavor reminiscent of chocolate-covered peppermint patties.
Peanut butter cookie dough: Replace 1/4 cup of the butter with creamy peanut butter for a peanut butter cookie dough flavor. You can also add chopped peanut butter cups instead of chocolate chips.
Double chocolate: Add 2 tablespoons of cocoa powder to the dough along with the flour for chocolate cookie dough truffles. These are incredibly rich and perfect for serious chocolate lovers.
Gluten-free version: Use a gluten-free all-purpose flour blend in place of regular flour. Make sure to heat-treat it the same way. Most blends work well in this no-bake application.
Vegan adaptation: Use vegan butter, non-dairy milk, and dairy-free chocolate chips and coating. The texture will be slightly different but still delicious.
Different mix-ins: Try chopped nuts, toffee bits, crushed cookies, or dried cranberries instead of or in addition to the chocolate chips. Just keep the total mix-in amount to about 3/4 cup.
You might also enjoy incorporating flavors from other holiday treats, similar to how pumpkin spice magic cookie bars combine seasonal spices with classic dessert elements.
Storage, Freezing, and Reheating
Proper storage ensures these truffles maintain their quality and food safety for as long as possible.
Refrigerator storage: Store Christmas cookie dough truffles in an airtight container in the refrigerator for up to 2 weeks. Place parchment paper between layers to prevent them from sticking together. I recommend bringing them to room temperature for about 10 minutes before serving for the best texture and flavor, though they’re also delicious eaten cold.
Room temperature storage: While these can sit at room temperature for a few hours during serving, I don’t recommend storing them at room temperature for extended periods. The butter in the cookie dough can become soft and the truffles may lose their shape in warm conditions.
Freezing instructions: These truffles freeze beautifully for up to 3 months. Arrange them in a single layer on a baking sheet and freeze until solid, then transfer to a freezer-safe container or bag with parchment paper between layers. This prevents them from freezing together in a clump. Thaw in the refrigerator overnight before serving.
Make-ahead tips: You can prepare the cookie dough balls up to 3 days in advance and keep them refrigerated until you’re ready to dip them in chocolate. You can also heat-treat flour in large batches and store it in an airtight container at room temperature for up to 3 months, making future batches even quicker to prepare.
The chocolate coating helps preserve the freshness of the cookie dough inside, creating a protective seal that extends shelf life compared to unwrapped cookie dough.
Frequently Asked Questions
Why do I need to heat-treat the flour?
Raw flour can contain harmful bacteria like E. coli. Heat-treating kills these bacteria, making the flour safe to consume without baking. This is an essential food safety step that should never be skipped when making edible cookie dough.
Can I use regular chocolate chips instead of melting wafers?
Yes, but you’ll need to add about 1 tablespoon of coconut oil or shortening to help the chocolate melt smoothly and create a thinner coating. Melting wafers are formulated specifically for candy-making and provide the easiest, smoothest results.
My cookie dough is too crumbly. What should I do?
Add milk one teaspoon at a time until the dough holds together when pressed. The dough should be soft enough to roll into balls but not sticky. Humidity and flour measurement variations can affect consistency, so adjustments are sometimes necessary.
Can I make these truffles without a mixer?
Absolutely. You can cream the butter and sugars by hand using a wooden spoon and some elbow grease. It will take a bit longer, but the results will be just as delicious. Make sure the butter is very soft to make mixing easier.
How do I prevent the chocolate coating from cracking?
Make sure the cookie dough balls aren’t too cold when you dip them. If they’re frozen or extremely cold, the temperature difference can cause the chocolate to crack as it sets. Refrigerated but not frozen is ideal.
Can I use different types of sprinkles?
Yes, but avoid sprinkles that bleed color when they get wet. Jimmies and nonpareils work well, while some sugar pearls may cause color bleeding. Test a small amount first if you’re unsure.
Why are my truffles falling apart when I dip them?
They likely weren’t chilled long enough before dipping. Make sure they’re firm to the touch before attempting to coat them in chocolate. If they’re still falling apart, freeze them for 10-15 minutes to firm them up more.
How can I make the chocolate coating thinner?
Add a small amount of coconut oil or vegetable shortening to the melted chocolate, starting with 1 teaspoon and adding more as needed. This thins the chocolate and makes it easier to achieve a thin, even coating.
Christmas Cookie Dough Truffles
Bite-sized edible cookie dough truffles made with chocolate chips and coated in smooth chocolate, decorated with festive Christmas sprinkles. These no-bake treats are perfect for holiday parties, cookie exchanges, or homemade gifts.
Chilling Time: 40 minutes
Total Time: 1 hour 10 minutes
Servings: 24-30 truffles
Difficulty: Easy
Cuisine: American
Course: Dessert
Ingredients
- 1 cup all-purpose flour (heat-treated)
- 1/2 cup unsalted butter (softened)
- 1/2 cup packed brown sugar
- 1/4 cup granulated sugar
- 2 tablespoons milk
- 1 teaspoon vanilla extract
- 1/4 teaspoon salt
- 3/4 cup mini chocolate chips
- 12 ounces semisweet chocolate melting wafers
- 1/4 cup Christmas sprinkles
Instructions
- Heat-treat the all-purpose flour by spreading it on a baking sheet and baking at 350°F (175°C) until it reaches an internal temperature of 165°F (74°C) throughout, stirring once or twice. Remove from oven and cool completely.
- In a large mixing bowl, beat the softened butter, brown sugar, and granulated sugar together using an electric mixer on medium speed for 2-3 minutes until light and creamy.
- Add the milk, vanilla extract, and salt to the butter mixture. Beat on low speed until smooth and well combined.
- Gradually mix in the cooled heat-treated flour on low speed until a soft dough forms. If the dough is too dry, add milk 1 teaspoon at a time until it reaches the right consistency.
- Fold in the mini chocolate chips using a spatula until evenly distributed throughout the dough.
- Roll the dough into 1-inch balls using a small cookie scoop or your hands. Place on a parchment-lined baking sheet.
- Refrigerate the cookie dough balls for 20-30 minutes until firm.
- Melt the semisweet chocolate melting wafers in a microwave-safe bowl in 30-second intervals, stirring between each interval, until completely smooth.
- Remove the chilled cookie dough balls from the refrigerator. Working with one at a time, drop a ball into the melted chocolate, roll to coat completely using a fork, then lift out and allow excess chocolate to drip off.
- Place the coated truffle back on the parchment-lined baking sheet and immediately decorate with Christmas sprinkles while the chocolate is still wet.
- Repeat with all remaining truffles, reheating chocolate as needed if it begins to thicken.
- Refrigerate the dipped truffles for 15-20 minutes until the chocolate coating is completely set.
Recipe Notes
- Heat-treating flour is essential for food safety. Use a food thermometer to verify the flour reaches 165°F throughout.
- Make sure butter is fully softened to room temperature for proper creaming.
- Slightly wet hands when rolling dough balls to prevent sticking.
- Work quickly when adding sprinkles, as chocolate sets rapidly.
- If chocolate becomes too thick while dipping, reheat for 10-15 seconds in the microwave.
- For easier dipping, use a deep, narrow bowl for the melted chocolate.
- Store in an airtight container in the refrigerator for up to 2 weeks or freeze for up to 3 months.
Nutrition Information (Per Truffle, Estimated)
Calories: 145
Carbohydrates: 18g
Protein: 1g
Fat: 8g
Saturated Fat: 5g
Fiber: 1g
Sugar: 13g
Sodium: 35mg
Nutrition information is estimated based on standard ingredient values and serving sizes. Actual nutritional content may vary based on specific brands used and portion sizes.
