
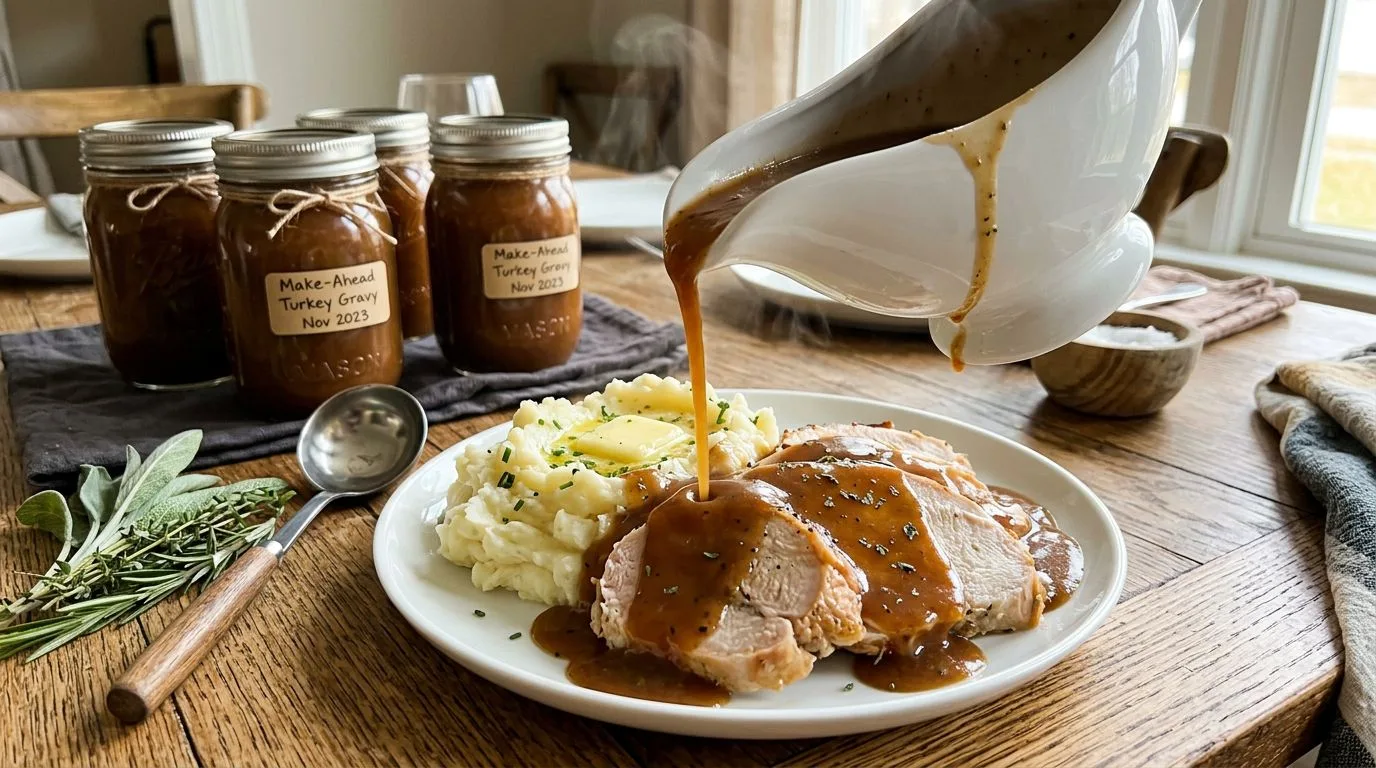
When Thanksgiving rolls around, I’m always looking for ways to make the big day less stressful and more enjoyable. One of my favorite strategies is preparing components ahead of time, and this make ahead turkey gravy is an absolute game-changer. Instead of scrambling to make gravy while carving the turkey and keeping side dishes warm, you can have this rich, flavorful gravy ready days in advance. It’s smooth, savory, and tastes just as delicious as gravy made from pan drippings—sometimes even better because you have complete control over the seasoning.
This recipe uses turkey stock as the base, enriched with aromatic vegetables and fresh herbs to create deep, complex flavor. The beauty of making gravy ahead is that you’re not dependent on having enough pan drippings or dealing with the uncertainty of timing. I love that this approach gives you one less thing to worry about on the actual holiday, and your guests will never know it wasn’t made at the last minute. Whether you’re hosting Thanksgiving for the first time or you’re a seasoned pro looking to streamline your workflow, this make ahead turkey gravy will become part of your holiday tradition.
Why You’ll Love This Make Ahead Turkey Gravy
This recipe solves one of the biggest challenges of Thanksgiving dinner: timing. I find that having gravy ready to go means I can focus on the turkey itself and coordinate all the side dishes without the added pressure of whisking gravy at the last minute. The flavor is outstanding because we’re infusing the stock with onion, garlic, thyme, and sage—all the classic turkey companions that create a deeply savory base.
Another reason I recommend this approach is consistency. When you make gravy from pan drippings, the results can vary depending on how much fat rendered from your turkey and how concentrated those drippings are. With this method, you control every element, ensuring smooth, lump-free gravy every single time. It’s also incredibly forgiving—if you need to thin it out when reheating, a splash of stock does the trick perfectly.
The make-ahead aspect means you can prepare this gravy up to four days before Thanksgiving, or even freeze it weeks in advance. I love the peace of mind that comes from checking one major component off my to-do list early. Plus, if you’re roasting a whole turkey, you can still use the pan drippings to enrich this gravy even further when you reheat it.
Ingredients and Substitutions
The ingredient list for this gravy is straightforward, focusing on quality basics that build exceptional flavor. Here’s what you’ll need and some helpful substitutions:
- Unsalted butter: This forms the base of our roux. I prefer unsalted so I can control the salt level in the finished gravy. You can substitute with an equal amount of turkey fat if you have it available.
- All-purpose flour: Creates the thickening roux. For a gluten-free version, you can use a gluten-free flour blend or cornstarch, though the technique will differ slightly.
- Low-sodium turkey stock: The star of the show. I recommend low-sodium so you can adjust seasoning to taste. If you only have regular stock, reduce or omit the added salt.
- Low-sodium chicken broth: Adds additional depth and body. You can use all turkey stock if you prefer, or substitute with vegetable broth.
- Yellow onion: Provides aromatic sweetness. A white or sweet onion works equally well.
- Garlic cloves: Adds savory depth. I like smashing them to release maximum flavor during the simmering process.
- Fresh thyme and sage: These herbs are classic turkey seasonings. If you only have dried herbs, use about one-third the amount.
- Black pepper and salt: Essential for seasoning. Adjust to your preference.
- Worcestershire sauce: Adds umami depth and complexity. You can substitute with soy sauce in a pinch.

How to Make This Recipe
Making this gravy is a two-part process: first infusing the stock with aromatics, then creating a roux and building the gravy. I find this method produces superior flavor compared to simply whisking flour into plain stock.
Infusing the Stock
Start by combining your turkey stock and chicken broth in a medium saucepan. Add the quartered onion, smashed garlic cloves, fresh thyme leaves, and chopped sage. Bring this mixture to a gentle simmer over medium heat—you don’t want a rolling boil, just a steady, gentle bubble. Let it simmer for 15 to 20 minutes, which gives the aromatics time to infuse their flavors into the liquid.
Once the stock is beautifully fragrant, strain it through a fine-mesh sieve into a bowl or large measuring cup. Discard the solids—they’ve done their job. Keep this flavored stock warm while you prepare the roux; warm stock incorporates more smoothly and reduces the risk of lumps.
Building the Gravy
In a separate saucepan (or you can rinse and reuse the first one), melt the butter over medium heat. Once it’s fully melted and just starting to foam, sprinkle in the flour. Whisk continuously for 2 to 3 minutes—this cooking time is important because it removes the raw flour taste and creates a lightly golden roux that will give your gravy a beautiful color and nutty undertone.
Now comes the crucial step: gradually add the warm, infused stock while whisking constantly. I like to add it in several additions, whisking thoroughly between each pour. This gradual incorporation is the secret to lump-free gravy. Once all the stock is added, bring the mixture to a gentle simmer and cook for 5 to 8 minutes, stirring frequently. The gravy will thicken and should coat the back of a spoon when it’s ready.
Stir in the Worcestershire sauce, black pepper, and salt to taste. Remember, you can always add more salt, but you can’t take it away, so taste as you go. If you’re planning to add pan drippings later when you reheat, keep the seasoning slightly lighter now.
Expert Tips for Best Results
After making this gravy many times, I’ve learned a few tricks that ensure perfect results every time:
- Use warm stock: Adding cold stock to your roux can cause it to seize up and create lumps. Keep that infused stock warm for the smoothest incorporation.
- Whisk constantly: Especially when adding the stock to the roux, continuous whisking is your best defense against lumps.
- Don’t rush the roux: Those 2 to 3 minutes of cooking the flour and butter mixture are essential for flavor and color. A pale roux will result in gravy that tastes floury.
- Adjust consistency when reheating: Gravy thickens as it cools and sits in the refrigerator. When reheating, have some extra stock or water on hand to thin it to your preferred consistency.
- Taste and adjust: The beauty of making gravy ahead is that you can taste it when it’s cooled and adjust the seasoning before the big day.
- Strain if needed: If you do end up with a few lumps despite your best efforts, simply strain the gravy through a fine-mesh sieve before storing.
Serving Suggestions
This versatile gravy is perfect for so much more than just turkey. I love serving it over mashed potatoes, stuffing, and roasted vegetables. It’s also wonderful with turkey breast, whether you’re serving a smaller gathering or prefer white meat.
For Thanksgiving dinner, I recommend transferring the reheated gravy to a warmed gravy boat or serving pitcher. This keeps it at the right temperature throughout the meal and makes it easy for guests to help themselves. If you’re serving buffet-style, consider keeping the gravy warm in a small slow cooker set to the lowest setting.
Beyond Thanksgiving, this gravy is excellent with roasted chicken, pork chops, or even over biscuits for a comforting breakfast. I’ve also used it as a base for pot pie filling and as a sauce for turkey sandwiches the day after Thanksgiving.
Variations and Substitutions
While this recipe is delicious as written, there are several ways to customize it to your preferences:
Herb variations: Try adding rosemary or parsley to the infusion. A bay leaf also adds wonderful depth. Just remember to remove it before straining.
Richer gravy: Replace half the stock with heavy cream for an ultra-rich, creamy gravy. Add the cream after the gravy has thickened to prevent curdling.
Mushroom turkey gravy: Sauté sliced mushrooms in the butter before adding the flour, or add sautéed mushrooms to the finished gravy for an earthy variation.
Wine-enhanced: Add 1/4 cup of dry white wine to the stock infusion for additional complexity. Let it simmer to cook off the alcohol.
Giblet gravy: If you have turkey giblets, simmer them with the stock infusion, then chop them finely and stir them into the finished gravy.
Gluten-free option: Use a gluten-free flour blend in place of all-purpose flour, or make a slurry with 3 tablespoons of cornstarch mixed with 1/4 cup cold water and whisk it into the simmering stock instead of making a roux.
Storage, Freezing, and Reheating
One of the best features of this recipe is how well it stores, making it truly perfect for advance preparation.
Refrigerator Storage
Allow the gravy to cool to room temperature, then transfer it to an airtight container. I recommend refrigerating it for up to 3 to 4 days before serving. The gravy will thicken considerably as it chills, which is completely normal. When you’re ready to use it, you’ll simply thin it back to the right consistency during reheating.
Freezing Instructions
This gravy freezes beautifully for up to 3 months. Let it cool completely, then transfer to freezer-safe containers or heavy-duty freezer bags. I like to freeze it in portion sizes that make sense for my needs—sometimes a large batch, sometimes in smaller containers for future meals. Leave a little headspace in the container as the gravy will expand slightly when frozen. Label with the date and contents.
To thaw, transfer the frozen gravy to the refrigerator 24 hours before you plan to serve it. For faster thawing, you can place the sealed container in a bowl of cold water, changing the water every 30 minutes.
Reheating Tips
Reheat the gravy gently in a saucepan over medium-low heat, stirring frequently to prevent scorching. The gravy will be quite thick when cold, so whisk in stock, water, or even pan drippings from your turkey a few tablespoons at a time until you reach your desired consistency. I find that the gravy usually needs about 1/4 to 1/2 cup of additional liquid after refrigeration.
Taste and adjust the seasoning after reheating—you may want to add a bit more salt, pepper, or Worcestershire sauce. If you have turkey pan drippings, this is the perfect time to whisk in a few tablespoons for even more flavor.
Frequently Asked Questions
Can I make this gravy without turkey stock?
Yes, you can use all chicken broth if turkey stock isn’t available. The flavor will be slightly different but still delicious. For a more turkey-forward flavor, look for turkey-flavored bouillon or concentrate to add to chicken broth.
How do I prevent lumps in my gravy?
The key is whisking constantly when adding the stock to the roux and making sure your stock is warm. Add the stock gradually rather than all at once, and whisk vigorously. If you do get lumps, strain the gravy through a fine-mesh sieve.
Can I double this recipe?
Absolutely! This recipe doubles or triples easily. Just make sure you use a large enough saucepan to accommodate the increased volume, and you may need to simmer the gravy a bit longer to reach the right consistency.
Why is my gravy too thin?
If your gravy is thinner than you’d like, continue simmering it to reduce and thicken, or make a small slurry with 1 tablespoon flour mixed with 2 tablespoons cold water and whisk it in. Let it simmer for a few more minutes to thicken and cook out the raw flour taste.
Why is my gravy too thick?
Gravy thickens as it cools and especially after refrigeration. Simply whisk in additional warm stock or water a little at a time when reheating until you reach your preferred consistency.
Can I use fresh herbs from my garden?
Definitely! Fresh herbs provide the best flavor. If you’re using dried herbs instead, remember they’re more concentrated—use about one-third the amount called for in the recipe.
How can I make this gravy darker in color?
For darker gravy, cook the roux a bit longer until it reaches a deeper golden brown color. You can also add a small amount of Kitchen Bouquet or gravy browning sauce, or incorporate some of the dark pan drippings from your roasted turkey when reheating.
Make Ahead Turkey Gravy
A rich and savory make-ahead turkey gravy prepared with flavorful turkey stock, butter, flour, and aromatic seasonings. This smooth homemade gravy is perfect for Thanksgiving dinner and helps simplify holiday meal preparation.
- Prep Time: 10 minutes
- Cook Time: 30 minutes
- Total Time: 40 minutes
- Servings: 8 servings (about 4 cups)
- Difficulty: Easy
- Cuisine: American
- Course: Side Dish
Ingredients
- 4 tablespoons unsalted butter
- 1/4 cup all-purpose flour
- 3 cups low-sodium turkey stock
- 1 cup low-sodium chicken broth
- 1 small yellow onion, quartered
- 2 garlic cloves, smashed
- 1 teaspoon fresh thyme leaves
- 1 teaspoon chopped fresh sage
- 1/2 teaspoon black pepper
- 1/2 teaspoon salt, or to taste
- 1 teaspoon Worcestershire sauce
Instructions
- Pour the turkey stock and chicken broth into a medium saucepan. Add the quartered onion, smashed garlic cloves, fresh thyme, and chopped sage.
- Bring to a gentle simmer over medium heat and cook for 15–20 minutes to infuse the stock with the aromatic ingredients.
- Strain the stock through a fine-mesh sieve, discarding the onion, garlic, and herb solids. Keep the flavored stock warm.
- In a separate saucepan, melt the butter over medium heat.
- Sprinkle in the flour and whisk continuously for 2–3 minutes to create a smooth, lightly golden roux.
- Gradually add the warm stock, whisking constantly to prevent lumps.
- Bring the gravy to a gentle simmer and cook for 5–8 minutes until smooth and thick enough to coat the back of a spoon.
- Stir in the Worcestershire sauce, black pepper, and salt to taste.
- For make-ahead preparation, allow the gravy to cool promptly and refrigerate in an airtight container for up to 3–4 days, or freeze for longer storage.
- Reheat gently on the stovetop, stirring frequently and adding a small splash of water or stock if needed to restore a pourable consistency.
Recipe Notes
- The gravy will thicken considerably as it cools. This is normal and expected for make-ahead gravy.
- When reheating, you’ll likely need to add 1/4 to 1/2 cup of additional liquid to return the gravy to the proper consistency.
- If you have turkey pan drippings on Thanksgiving day, whisk a few tablespoons into the reheated gravy for extra flavor.
- For a gluten-free version, substitute the flour with a gluten-free flour blend or use a cornstarch slurry instead of making a roux.
- Taste and adjust seasoning after reheating, as flavors can mellow during storage.
- This recipe can easily be doubled or tripled for larger gatherings.
Nutrition Information (Per Serving, Estimated)
- Calories: 78
- Carbohydrates: 5g
- Protein: 2g
- Fat: 6g
- Saturated Fat: 4g
- Fiber: 0g
- Sugar: 1g
- Sodium: 245mg
Nutrition information is estimated based on ingredient data and should be considered approximate. Actual nutritional values may vary based on specific brands and measurements used.
