
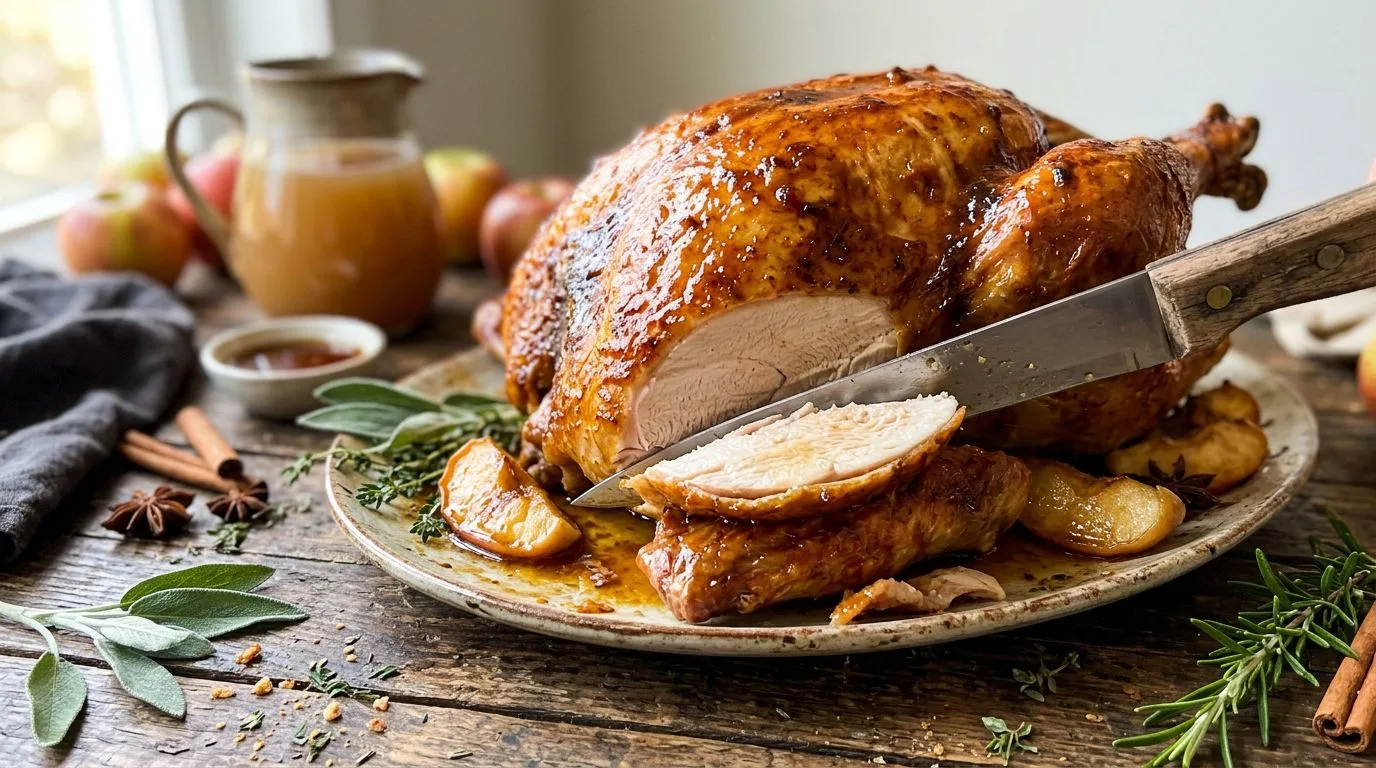
There’s something magical about a perfectly roasted turkey that brings everyone together around the holiday table. I’ve found that the secret to achieving incredibly juicy, flavorful meat lies in a simple but transformative technique: brining. This Apple Cider Brined Turkey with Maple Butter Glaze combines the best of fall flavors—crisp apple cider, warm cinnamon, fragrant herbs, and sweet maple syrup—to create a centerpiece that’s as beautiful as it is delicious.
The apple cider brine infuses the turkey with moisture and subtle sweetness, while the maple butter glaze adds a gorgeous golden finish and an irresistible caramelized coating. I love how the combination of savory and sweet flavors creates layers of complexity in every bite. Whether you’re preparing Thanksgiving dinner or hosting a special autumn celebration, this recipe delivers restaurant-quality results that will have your guests asking for seconds.
What I appreciate most about this recipe is that while it requires some advance planning for the brining process, the actual hands-on work is straightforward. The brine does most of the heavy lifting, ensuring your turkey stays moist throughout roasting, and the maple glaze comes together in minutes. The result is a show-stopping turkey that tastes like you spent days in the kitchen.
Why You’ll Love This Apple Cider Brined Turkey
This recipe transforms an ordinary turkey into an extraordinary feast centerpiece. The apple cider brine is a game-changer—it penetrates deep into the meat, seasoning it from the inside out while keeping every bite incredibly moist and tender. I find that brined turkey is noticeably more forgiving than unbrined turkey, which means even if you slightly overcook it, the meat remains juicy.
The maple butter glaze adds a beautiful caramelized finish that not only looks stunning but also provides a delicate sweetness that complements the savory turkey perfectly. The glaze creates a gorgeous mahogany color and a slightly sticky, flavorful coating that everyone loves. I recommend this recipe for both experienced cooks and those preparing their first holiday turkey—the brine provides insurance against dryness, and the straightforward roasting method is easy to follow.
Another reason I love this recipe is its versatility. While it’s perfect for Thanksgiving, it works beautifully for Christmas dinner, Easter celebrations, or any special occasion when you want to serve something memorable. The fall-inspired flavors feel festive without being overpowering, and the apple-maple combination appeals to both traditional and adventurous palates.
Ingredients and Substitutions
The ingredient list for this Apple Cider Brined Turkey is straightforward, focusing on quality components that work together to create maximum flavor. Let me walk you through the key ingredients and offer some helpful substitutions if needed.
For the turkey, a 12-14 pound bird is ideal for this recipe. This size feeds approximately 8-12 people and fits comfortably in most standard roasting pans. If you need to cook a larger turkey, you can scale up the brine proportionally—just ensure your container is large enough to fully submerge the bird.
The apple cider is the star of the brine. I recommend using fresh, unfiltered apple cider from the refrigerated section of your grocery store rather than shelf-stable apple juice. The fresh cider has a more robust apple flavor and natural sweetness that makes a noticeable difference. If fresh cider isn’t available, you can use high-quality apple juice, though the flavor will be slightly less complex.
Kosher salt is essential for the brine. The measurement provided (3/4 cup) is based on Diamond Crystal kosher salt. If you’re using Morton’s kosher salt, which has larger crystals, reduce the amount to about 1/2 cup. Table salt is even more concentrated, so you’d need only about 6 tablespoons. Getting the salt measurement right is crucial for proper brining.
The brown sugar balances the salt and adds a subtle sweetness to the brine. You can substitute white granulated sugar if needed, though brown sugar contributes a deeper, more caramel-like flavor that I prefer. Honey or maple syrup can also work, using about 1/3 cup in place of the brown sugar.
Fresh apples and oranges add fruity aromatics to the brine. Any variety of apple works well—I like using crisp varieties like Granny Smith, Honeycrisp, or Fuji. The oranges add brightness and citrus notes. If you don’t have fresh oranges, you can substitute with a few strips of orange zest or even use lemon slices.
The herbs and spices—cinnamon sticks, garlic, rosemary, and thyme—create the aromatic foundation of the brine. Fresh herbs are preferable, but if you only have dried herbs, use about one-third the amount. The cinnamon sticks add warm spice notes that complement the apple cider beautifully.
For the glaze, pure maple syrup is important. I recommend using real maple syrup rather than pancake syrup, which contains corn syrup and artificial flavoring. The genuine maple flavor makes a significant difference in the final taste. Grade A amber or dark maple syrup both work wonderfully.
The unsalted butter creates a rich, glossy glaze when combined with the maple syrup. Using unsalted butter allows you to control the saltiness, which is important since the turkey has already been brined. If you only have salted butter, it will still work, but the glaze may taste slightly saltier.
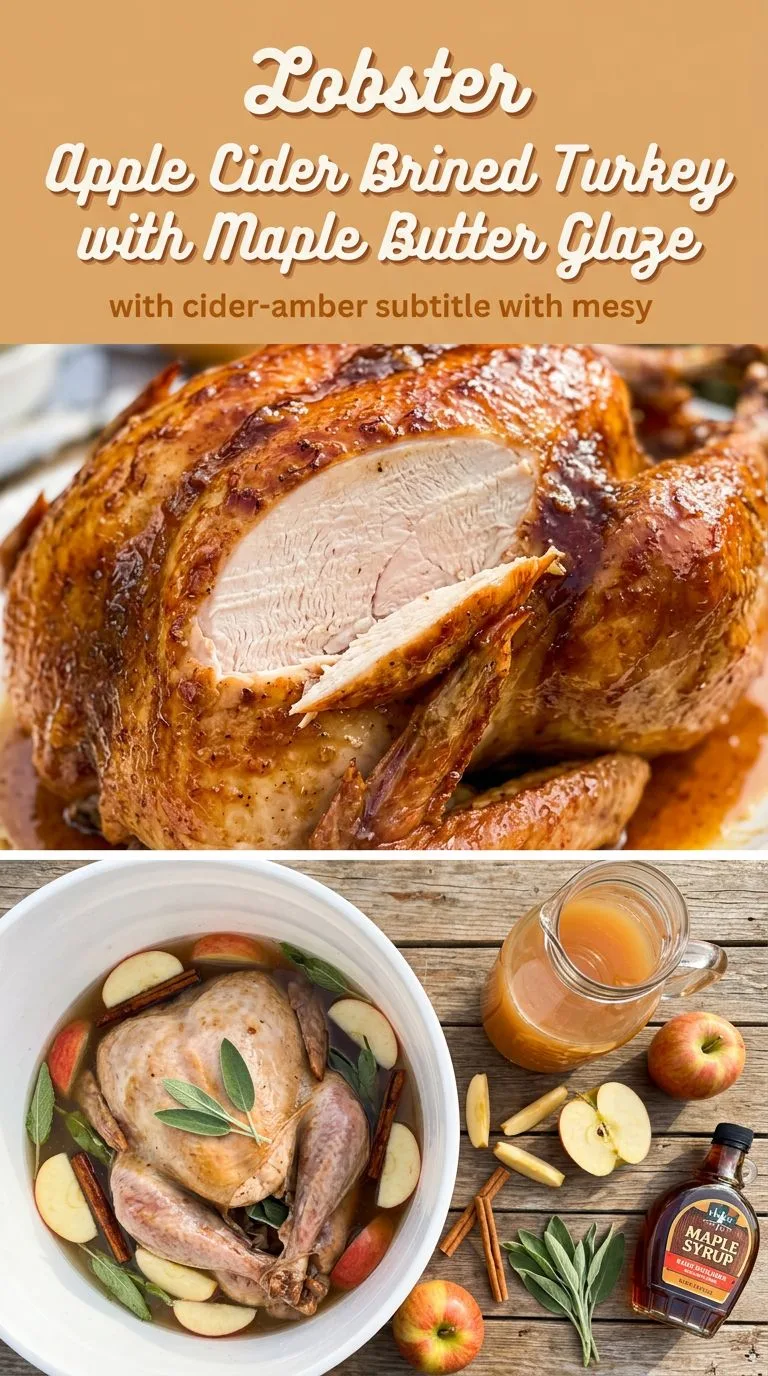
How to Make Apple Cider Brined Turkey
Making this Apple Cider Brined Turkey involves two main phases: the brining process and the roasting process. While the timeline spans about 24 hours from start to finish, the actual hands-on work is minimal. Let me guide you through each step to ensure perfect results.
Preparing the Brine
Start by selecting a food-safe container large enough to hold your turkey and the brine. I like using a large stockpot, a brining bag placed inside a cooler, or even a clean 5-gallon bucket. The container must fit in your refrigerator or be kept in a very cold environment (below 40°F).
Combine the apple cider, cold water, kosher salt, and brown sugar in your container. Stir vigorously until the salt and sugar completely dissolve—this is important because undissolved salt can create overly salty spots on the turkey. Add the sliced apples, oranges, cinnamon sticks, smashed garlic cloves, and fresh herb sprigs. These aromatics infuse the brine with incredible flavor.
Before adding the turkey, ensure the brine is completely chilled. If your cider was at room temperature, refrigerate the brine for at least an hour before proceeding. A warm brine can encourage bacterial growth, so temperature control is essential for food safety.
Brining the Turkey
Remove the giblets and neck from the turkey cavity (save these for making gravy if desired). Rinse the turkey briefly under cold water and place it into the chilled brine. The turkey should be completely submerged—if it floats, weigh it down with a plate. If parts of the turkey remain above the brine line, rotate the bird halfway through the brining time.
Refrigerate the turkey in the brine for 12-18 hours. I find that 14-16 hours is the sweet spot for optimal flavor and moisture without over-brining. Don’t exceed 24 hours, as the turkey can become too salty and the texture may become mushy.
Preparing the Turkey for Roasting
After brining, remove the turkey from the brine and discard all the used brine and aromatics—do not reuse them. Rinse the turkey briefly under cold water to remove any clinging herbs or fruit pieces, then pat it completely dry with paper towels. Getting the skin dry is crucial for achieving crispy, golden skin during roasting.
Let the turkey sit at room temperature for about 30-45 minutes before roasting. This allows for more even cooking. Meanwhile, preheat your oven to 350°F.
Roasting and Glazing
Place the turkey breast-side up on a roasting rack set inside a large roasting pan. The rack elevates the turkey, allowing hot air to circulate underneath for even cooking. Season the outside of the turkey lightly with black pepper and ground cinnamon—remember, the turkey is already well-seasoned from the brine, so you don’t need much additional seasoning.
Prepare the maple butter glaze by melting the butter with the maple syrup in a small saucepan over low heat, stirring until smooth and combined. Brush a generous coating of this glaze over the entire turkey before it goes into the oven.
Roast the turkey for approximately 2½ to 3½ hours, depending on the exact size and your oven. A 12-pound turkey typically takes about 2½ to 3 hours, while a 14-pound bird may need 3 to 3½ hours. During the final 45 minutes of roasting, brush the turkey with fresh maple butter glaze every 15-20 minutes to build up that beautiful caramelized coating.
If the glaze or skin begins to darken too quickly, tent the turkey loosely with aluminum foil to prevent burning while the interior continues cooking.
Checking for Doneness
The turkey is done when an instant-read thermometer inserted into the thickest part of the thigh (without touching bone) reads 165°F, and the breast also reaches 165°F. I recommend checking both locations to ensure even cooking throughout. The juices should run clear when you pierce the thigh.
Once the turkey reaches the proper temperature, remove it from the oven and let it rest for 25-30 minutes before carving. This resting period allows the juices to redistribute throughout the meat, ensuring every slice is moist and flavorful. Tent the turkey loosely with foil during resting to keep it warm.
Before serving, brush the turkey with any remaining maple butter glaze that you’ve heated to a simmer in a small saucepan. This final glaze adds extra shine and flavor.
Expert Tips for Best Results
After making this recipe many times, I’ve learned several tips that make a significant difference in the final result. Here are my top recommendations for success.
Plan your timeline carefully. The brining process requires 12-18 hours, so start at least a day before you plan to serve the turkey. I like to put the turkey in the brine the evening before I plan to roast it, then remove it the next morning to begin roasting by early afternoon.
Keep everything cold. Food safety is paramount when brining. Your turkey must stay at 40°F or below throughout the entire brining process. If your refrigerator doesn’t have space for a large container, you can use a cooler with ice packs, replacing the ice as needed to maintain the proper temperature.
Don’t skip drying the turkey. After removing the turkey from the brine, take the time to thoroughly pat it dry with paper towels, including inside the cavity. Dry skin crisps up beautifully in the oven, while wet skin steams and remains rubbery.
Use a reliable meat thermometer. Guessing doneness by time alone is risky. I recommend investing in a good instant-read thermometer or, even better, a probe thermometer that stays in the turkey during roasting and alerts you when it reaches the target temperature.
Reserve some glaze for serving. Set aside about 1/4 cup of the maple butter glaze before you start brushing it on the turkey. Heat this reserved portion to a simmer just before serving and use it to brush over the carved turkey or serve it alongside as a sauce. Never use glaze that has touched raw turkey without cooking it first.
Rotate the pan if needed. Ovens often have hot spots that can cause uneven browning. If you notice one side of the turkey browning faster than the other, rotate the roasting pan 180 degrees halfway through cooking.
Let the turkey rest. I know it’s tempting to carve into that beautiful bird immediately, but resting is essential. Cutting too soon causes all those flavorful juices to run out onto the cutting board instead of staying in the meat. Be patient—the wait is worth it.
Serving Suggestions
This Apple Cider Brined Turkey with Maple Butter Glaze is a stunning centerpiece that pairs beautifully with classic holiday sides. I love serving it alongside traditional Thanksgiving favorites that complement the apple and maple flavors.
For a complete autumn feast, I recommend pairing this turkey with honey roasted sweet potatoes, which echo the sweet notes in the maple glaze. The caramelized edges of roasted sweet potatoes provide a wonderful textural contrast to the tender turkey meat.
A fresh, crisp salad adds brightness to the rich turkey. An apple cranberry pecan salad is particularly perfect—the tart cranberries and crunchy pecans complement the sweet maple glaze beautifully, and the fresh apples tie into the apple cider brine theme.
Other excellent side dishes include creamy mashed potatoes, herb stuffing, green bean casserole, roasted Brussels sprouts with bacon, cranberry sauce, and dinner rolls. I like to offer both a traditional turkey gravy and the extra maple butter glaze so guests can choose their preferred sauce.
For beverages, consider serving apple cider (hot or cold), a crisp white wine like Riesling or Chardonnay, or a light-bodied red wine such as Pinot Noir. The fruity notes in these wines complement the apple and maple flavors nicely.
When it comes to presentation, transfer the carved turkey to a large serving platter and garnish with fresh herb sprigs, apple slices, and orange slices for a beautiful display. The glossy maple glaze catches the light beautifully and makes for stunning photos.
Variations and Substitutions
While this recipe is delicious as written, there are several ways you can adapt it to suit your preferences or dietary needs.
Herb variations: Feel free to customize the herbs in the brine. Sage is a classic poultry herb that works wonderfully, and bay leaves add an earthy note. You could also add fresh parsley or oregano. For the glaze, try adding a teaspoon of fresh chopped rosemary or thyme for an herbal twist.
Spice adjustments: If you love warm spices, add a few whole cloves, star anise, or allspice berries to the brine. For the glaze, a pinch of nutmeg or ginger adds complexity. If you prefer less sweet, reduce the maple syrup in the glaze to 1/4 cup and add a tablespoon of Dijon mustard for a savory-sweet balance.
Citrus variations: Instead of oranges in the brine, try using grapefruit, tangerines, or lemons. Each citrus fruit brings a different flavor profile—grapefruit adds bitterness, tangerines are sweeter, and lemons provide bright acidity.
Smaller or larger birds: This recipe works for turkeys ranging from 10 to 16 pounds. For smaller birds (10-12 pounds), reduce the roasting time to about 2 to 2½ hours. For larger birds (15-16 pounds), increase the time to 3½ to 4 hours. Always rely on internal temperature rather than time alone.
Turkey breast only: If you prefer white meat or are cooking for a smaller group, you can use this brine and glaze on a bone-in turkey breast (5-7 pounds). Reduce the brining time to 8-12 hours and the roasting time to about 1½ to 2 hours at 350°F.
Glaze alternatives: While maple butter is my favorite, you can create different glazes using honey, brown sugar, or even bourbon. For a honey glaze, substitute honey for the maple syrup and add a tablespoon of Dijon mustard. For a bourbon glaze, add 2 tablespoons of bourbon to the maple butter mixture.
Storage, Freezing, and Reheating
Proper storage of leftover turkey ensures you can enjoy this delicious recipe for days after your initial feast. Here’s how I handle storage and reheating to maintain the best quality.
Refrigerator Storage
Allow the turkey to cool to room temperature, but don’t leave it out for more than 2 hours. Carve any remaining meat from the bones and store it in airtight containers or wrap it tightly in aluminum foil or plastic wrap. Properly stored, cooked turkey will keep in the refrigerator for 3-4 days.
I like to store white meat and dark meat separately, as they have different moisture levels and reheat differently. Store any leftover maple butter glaze in a separate container in the refrigerator for up to a week.
Freezing Instructions
Turkey freezes remarkably well. For best results, slice or chop the turkey meat and place it in freezer-safe containers or heavy-duty freezer bags. Remove as much air as possible to prevent freezer burn. I recommend portioning the turkey into meal-sized amounts so you can thaw only what you need.
For extra moisture protection, you can cover the turkey pieces with gravy or broth before freezing. Properly frozen turkey will maintain good quality for 2-3 months, though it remains safe indefinitely at 0°F.
Label your containers with the date and contents. I also like to note whether it’s white or dark meat, as this helps with meal planning later.
Reheating Tips
The key to reheating turkey is adding moisture to prevent it from drying out. For refrigerated turkey, place the sliced meat in a baking dish, add a few tablespoons of chicken broth or leftover gravy, cover tightly with foil, and reheat in a 325°F oven for about 20-30 minutes until warmed through.
For frozen turkey, thaw it overnight in the refrigerator before reheating. You can also reheat individual portions in the microwave—place the turkey in a microwave-safe dish, add a splash of broth, cover with a damp paper towel, and heat in 1-minute intervals, stirring between each, until hot.
The leftover maple butter glaze can be reheated gently in a small saucepan over low heat. Drizzle it over reheated turkey for a flavor boost that makes leftovers taste freshly made.
Frequently Asked Questions
Do I need to rinse the turkey after brining?
Yes, I recommend giving the turkey a quick rinse under cold water after removing it from the brine. This removes any clinging herbs, fruit pieces, or excess salt from the surface. However, the rinse should be brief—you don’t want to wash away all the flavor the turkey absorbed during brining. After rinsing, pat the turkey completely dry with paper towels.
Can I brine a frozen turkey?
No, the turkey must be completely thawed before brining. Brining a frozen turkey won’t work because the brine cannot penetrate frozen meat. Thaw your turkey in the refrigerator, allowing about 24 hours for every 4-5 pounds. A 12-14 pound turkey will take approximately 3 days to thaw in the refrigerator.
Why is my turkey skin not crispy?
The most common reason for soggy skin is not drying the turkey thoroughly after brining. Take extra time to pat the turkey completely dry with paper towels, including under the wings and around the legs. Letting the turkey sit uncovered in the refrigerator for a few hours after brining also helps dry the skin. Additionally, make sure your oven is properly preheated and avoid basting too frequently during the first half of roasting.
Can I prepare the brine ahead of time?
Absolutely! You can prepare the brine up to 2 days in advance. Store it in the refrigerator in a covered container until you’re ready to add the turkey. Just make sure it’s thoroughly chilled before adding the turkey. This advance preparation can make holiday cooking less stressful.
What if I don’t have a container large enough for brining?
A large brining bag (available at most grocery stores during the holidays) placed inside a cooler or large stockpot works perfectly. You can also use a large food-grade plastic bucket or even a clean, heavy-duty trash bag doubled for extra protection. Just ensure whatever container you use is food-safe and can maintain a temperature of 40°F or below.
Can I stuff the turkey?
While you can stuff a brined turkey, I generally don’t recommend it. Brined turkeys are already quite moist, and stuffing can prevent the cavity from cooking evenly. Additionally, getting the stuffing to a safe temperature (165°F) often means overcooking the turkey meat. I prefer to bake stuffing separately in a casserole dish, which also allows you to make more of it and ensures even cooking.
How do I know when the turkey is done?
The only reliable way to determine doneness is with a meat thermometer. Insert an instant-read thermometer into the thickest part of the thigh without touching bone—it should read 165°F. Also check the thickest part of the breast, which should also reach 165°F. The juices should run clear, not pink, when you pierce the thigh. Don’t rely on pop-up timers, as they’re often inaccurate.
Can I make this recipe with a kosher or pre-brined turkey?
No, do not brine a kosher turkey or any turkey that has been pre-brined or enhanced with a salt solution. These turkeys have already been salted and brining them will result in overly salty, unpleasant meat. Check the turkey label carefully—if it mentions being “basted,” “self-basting,” “enhanced,” or “contains up to X% solution,” skip the brining step and proceed directly to roasting with the maple butter glaze.
Apple Cider Brined Turkey with Maple Butter Glaze
A deliciously juicy roasted turkey brined in apple cider and finished with a sweet maple butter glaze. The combination of apples, herbs, and maple creates an irresistible holiday centerpiece that’s perfect for Thanksgiving or any special celebration.
- Prep Time: 30 minutes (plus 12-18 hours brining)
- Cook Time: 2 hours 45 minutes
- Resting Time: 30 minutes
- Total Time: 15 hours 45 minutes (including brining)
- Servings: 10-12 servings
- Difficulty: Medium
- Cuisine: American
- Course: Main Course, Dinner
Ingredients
For the Brine:
- 1 whole turkey (12-14 lb)
- 1 gallon apple cider
- 1 gallon cold water
- 3/4 cup kosher salt (Diamond Crystal; adjust for other brands)
- 1/2 cup brown sugar
- 2 apples, sliced
- 2 oranges, sliced
- 4 cinnamon sticks
- 6 garlic cloves, smashed
- 4 sprigs fresh rosemary
- 6 sprigs fresh thyme
For the Maple Butter Glaze:
- 1/2 cup unsalted butter
- 1/3 cup pure maple syrup
- 1 teaspoon black pepper
- 1 teaspoon ground cinnamon
Instructions
- Prepare the brine: In a large food-safe container (such as a stockpot, brining bag in a cooler, or food-grade bucket), combine the apple cider, cold water, kosher salt, and brown sugar. Stir vigorously until the salt and sugar completely dissolve. Add the sliced apples, oranges, cinnamon sticks, smashed garlic cloves, rosemary sprigs, and thyme sprigs. Ensure the brine is fully chilled before proceeding.
- Brine the turkey: Remove the giblets and neck from the turkey cavity. Rinse the turkey briefly under cold water. Place the fully thawed turkey into the chilled brine, ensuring it is completely submerged. If the turkey floats, weigh it down with a plate. Refrigerate at 40°F (4°C) or below for 12-18 hours, rotating the turkey once halfway through if needed.
- Prepare the turkey for roasting: Remove the turkey from the brine and discard all the used brine and aromatics. Rinse the turkey briefly under cold water to remove any clinging herbs or fruit. Pat the turkey completely dry inside and out with paper towels—this is crucial for crispy skin. Let the turkey sit at room temperature for 30-45 minutes.
- Preheat and season: Preheat your oven to 350°F (175°C). Place the turkey breast-side up on a roasting rack set inside a large roasting pan. Season the outside of the turkey lightly with the black pepper and ground cinnamon.
- Make the maple butter glaze: In a small saucepan over low heat, melt the butter with the pure maple syrup, stirring until smooth and well combined. Reserve about 1/4 cup of the glaze in a separate container for serving later. Brush a generous coating of the remaining glaze over the entire turkey.
- Roast the turkey: Place the turkey in the preheated oven and roast for approximately 2½ to 3½ hours, depending on the size of your turkey. A 12-pound turkey typically takes about 2½ to 3 hours, while a 14-pound turkey may need 3 to 3½ hours.
- Apply the glaze: During the final 45 minutes of roasting, brush the turkey with fresh maple butter glaze every 15-20 minutes to build up a beautiful caramelized coating. If the glaze or skin begins to darken too quickly, tent the turkey loosely with aluminum foil to prevent burning.
- Check for doneness: The turkey is done when an instant-read thermometer inserted into the thickest part of the thigh (without touching bone) reads 165°F (74°C). Also check that the thickest part of the breast reaches 165°F. The juices should run clear when you pierce the thigh.
- Rest and serve: Remove the turkey from the oven and let it rest for 25-30 minutes before carving. Tent loosely with foil to keep warm. Just before serving, heat the reserved maple butter glaze to a simmer in a small saucepan and brush it over the turkey for extra shine and flavor. Carve and serve.
Recipe Notes
- Salt type matters: The 3/4 cup measurement is for Diamond Crystal kosher salt. If using Morton’s kosher salt, reduce to 1/2 cup. If using table salt, use only 6 tablespoons.
- Food safety: Keep the turkey at 40°F or below throughout the entire brining process. Use a refrigerator or a cooler with ice packs.
- Don’t over-brine: Brining for more than 24 hours can make the turkey too salty and affect the texture. The ideal range is 12-18 hours.
- Dry the skin thoroughly: This is essential for achieving crispy, golden skin. Take your time patting the turkey dry with paper towels.
- Use a meat thermometer: This is the only reliable way to determine doneness. Don’t rely on cooking time alone or pop-up timers.
- Glaze safety: Never use glaze that has touched raw turkey without cooking it first. Reserve some glaze before you start brushing, or heat used glaze to a simmer before serving.
- Make-ahead tip: You can prepare the brine up to 2 days in advance and store it in the refrigerator until ready to use.
Estimated Nutrition Per Serving (based on 12 servings)
Nutrition information is estimated and will vary based on exact ingredients and portion sizes.
- Calories: 385 kcal
- Carbohydrates: 8g
- Protein: 52g
- Fat: 15g
- Saturated Fat: 6g
- Fiber: 0g
- Sugar: 7g
- Sodium: 890mg
