
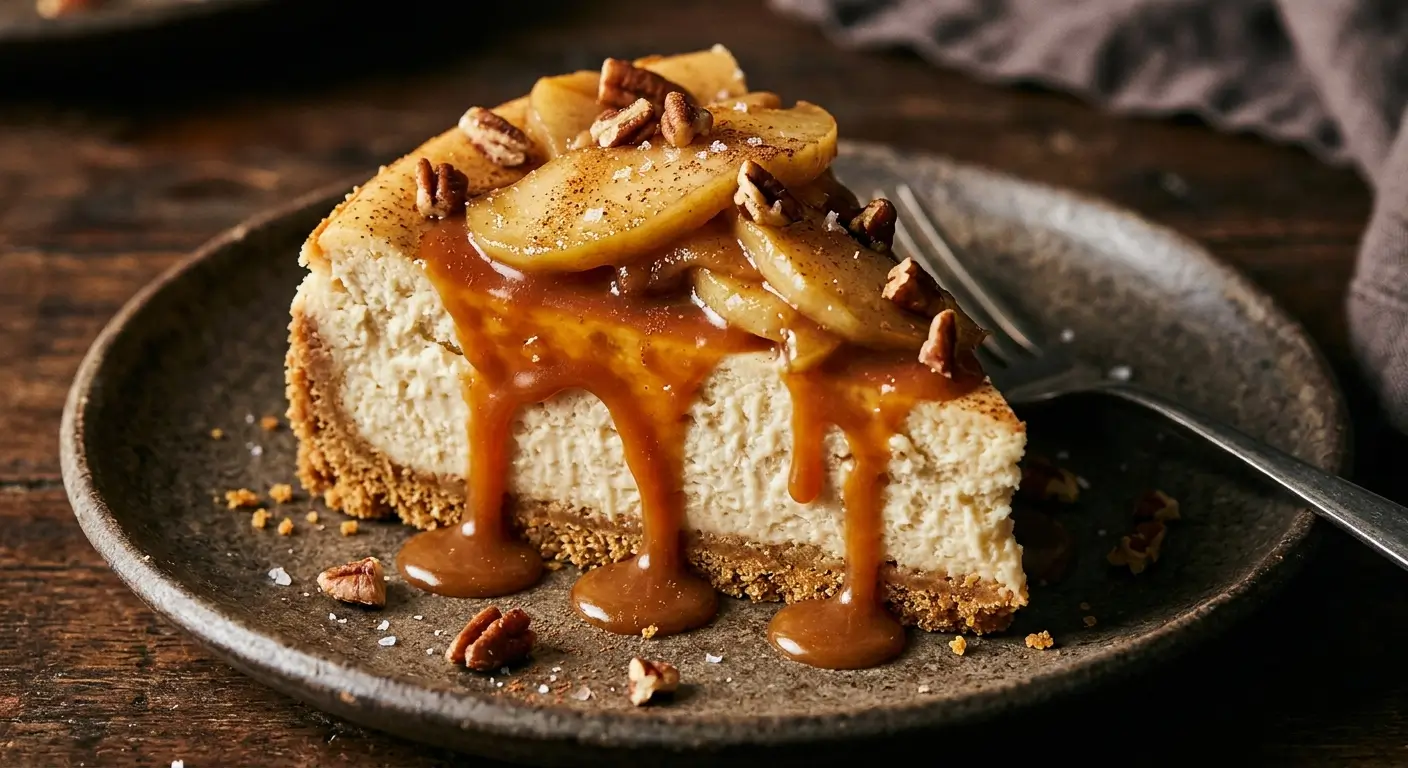
This cheesecake started as my attempt to combine two desserts I could never choose between at a fall potluck — a classic cheesecake and a warm apple crisp. I remember standing at the dessert table trying to decide which slice to take, and thinking there had to be a way to have both. A few tries later, this Caramel Apple Cheesecake was born, and it’s become the dessert I’m now known for bringing every autumn. It’s rich, a little indulgent, and always the first thing to disappear from the table.
This cheesecake layers a graham cracker crust, a smooth vanilla cheesecake filling, a spiced cinnamon apple topping, and a generous drizzle of caramel sauce. If you love pumpkin and apple desserts as much as I do, it sits nicely alongside my Pumpkin Cheesecake Bars in terms of fall baking — same creamy cheesecake base, just a completely different topping and personality.
Why This Recipe Works
Baking the cheesecake in a water bath is what keeps it from cracking and gives it that smooth, dense texture you want from a proper cheesecake, rather than a dry or overly airy one. Bringing the cream cheese fully to room temperature before mixing is equally important here — cold cream cheese never blends smoothly no matter how long you beat it.
Cooking the apple topping separately on the stovetop, rather than baking raw apples directly on top of the cheesecake, means the apples soften properly and develop that warm cinnamon-caramel flavor before they ever touch the finished cheesecake — it’s the same principle behind a good apple crisp topping, like the one in my Apple Crisp, where the apples get a head start on flavor before baking finishes the job.
Ingredients You’ll Need
For the graham cracker crust:
- 1 ¾ cups graham cracker crumbs (about 14 full sheets, crushed)
- 6 tablespoons unsalted butter, melted
- ¼ cup granulated sugar
For the cheesecake filling:
- 24 oz cream cheese, softened (three 8 oz blocks)
- ¾ cup granulated sugar
- 3 large eggs
- ⅓ cup sour cream
- 1 ½ teaspoons vanilla extract
For the cinnamon apple topping:
- 3 medium apples, peeled and diced (Granny Smith or Honeycrisp work well)
- 2 tablespoons unsalted butter
- 3 tablespoons brown sugar, packed
- ½ teaspoon ground cinnamon
- 1 tablespoon lemon juice
For serving:
- ½ cup caramel sauce, plus more for drizzling
Step-by-Step Instructions
1. Make the Crust
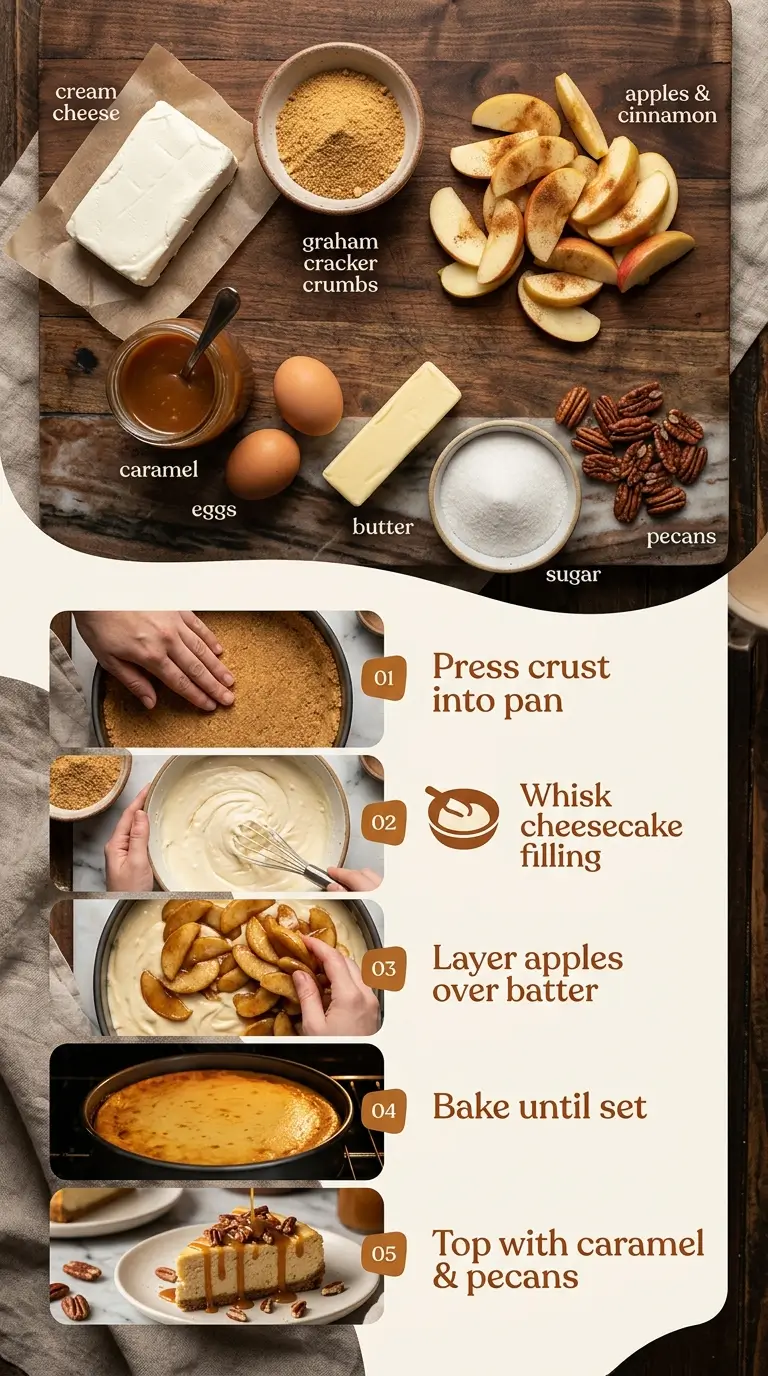
Preheat your oven to 325°F (165°C) and wrap the outside of a 9-inch springform pan tightly in foil to prepare for a water bath. In a bowl, mix the graham cracker crumbs, melted butter, and sugar until combined, then press firmly into the bottom of the pan. Bake for 8–10 minutes, then set aside to cool slightly.
2. Make the Cheesecake Filling
In a large bowl, beat the softened cream cheese and sugar together until smooth. Add the eggs one at a time, mixing on low speed after each addition just until combined. Stir in the sour cream and vanilla extract, mixing until smooth without overbeating.
3. Bake the Cheesecake
Pour the filling over the cooled crust. Place the springform pan into a larger roasting pan and fill the roasting pan with hot water until it reaches about halfway up the sides of the springform pan. Bake for 55–65 minutes, until the edges are set and the center has a slight jiggle. Turn off the oven and let the cheesecake sit inside with the door cracked for an hour, then refrigerate for at least 4 hours, or ideally overnight.
4. Make the Cinnamon Apple Topping
In a skillet over medium heat, melt the butter and add the diced apples, brown sugar, cinnamon, and lemon juice. Cook for 8–10 minutes, stirring occasionally, until the apples are tender and coated in a light caramel-like sauce. Let cool before using.
5. Assemble and Serve
Once the cheesecake is fully chilled, remove it from the springform pan. Spoon the cooled cinnamon apple topping evenly over the top, then drizzle generously with caramel sauce just before serving.
Tips From My Kitchen
- Make sure your cream cheese is fully softened to avoid lumps in the filling.
- Don’t skip the water bath — it’s what keeps the cheesecake from cracking and gives it that dense, creamy texture.
- Let the cheesecake chill for the full recommended time before slicing for the cleanest cuts.
- Add the apple topping and caramel right before serving, not before refrigerating, so the topping stays fresh and doesn’t make the crust soggy.
Nutrition Information
Estimated values per slice, based on 12 slices:
- Calories: approximately 380–420
- Protein: 6–7g
- Carbohydrates: 34–38g
- Fat: 25–27g
- Sugar: 26–29g
For a lighter version, use reduced-fat cream cheese and go lighter on the caramel drizzle — the cheesecake will still be rich and satisfying, just a bit less indulgent.
Storage and Reheating
Store the cheesecake covered in the fridge for up to 5 days — it’s meant to be served cold, so no reheating is needed. For longer storage, wrap individual slices tightly and freeze for up to 2 months (without the apple topping and caramel), then thaw in the fridge and add the topping fresh before serving.
Frequently Asked Questions
Why do I need a water bath?
A water bath insulates the cheesecake from direct oven heat, helping it bake evenly and slowly, which prevents cracking and gives you that smooth, creamy texture instead of a dry or sunken center.
Can I make this ahead of time?
Yes, the cheesecake actually needs to chill overnight, so making it a day ahead is ideal. Add the apple topping and caramel drizzle the day you plan to serve it for the freshest presentation.
Can I use a different fruit topping?
Yes, this same cheesecake base works well with a variety of toppings — a berry compote or a pumpkin swirl are both great alternatives if you want to switch things up.
Why did my cheesecake crack?
Cracks usually happen from overmixing after the eggs are added, baking without a water bath, or cooling too quickly. Mix gently once the eggs go in, use a water bath, and let the cheesecake cool gradually in the oven before refrigerating.
Final Thoughts
This Caramel Apple Cheesecake has become the dessert that solves my “which one do I bring” dilemma every fall, combining two favorites into one rich, impressive slice. It’s the kind of dessert that looks like it took all day but is really just a little patience and a few extra steps. I hope it earns a spot on your fall dessert table too.
